If you want a defined outdoor living space without a major renovation bill, these pergola ideas on a budget show you exactly what is possible with smart material choices and the right structural approach. Each idea below is matched to a specific yard size, climate, or use case so you can make a practical decision — not just get inspired.
1. Pressure-Treated Pine Pergola That Looks Like Cedar for Half the Price
Pressure-treated pine is the most accessible and affordable structural lumber in the United States, and when stained correctly, it is nearly indistinguishable from cedar at a fraction of the cost. A standard 10×10 freestanding build using treated pine posts, doubled beams, and evenly spaced 2×6 rafters can be completed for a budget that most homeowners can absorb without financing.
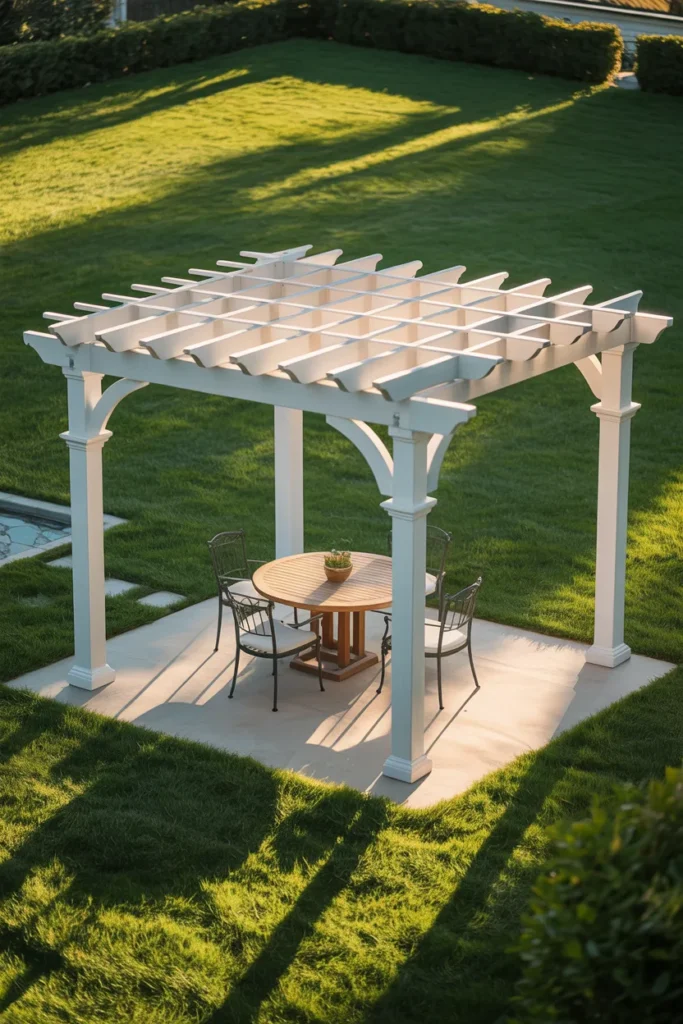
This setup works for almost any backyard. The traditional four-post, gabled-rafter silhouette suits craftsman, colonial, and ranch-style homes equally well. It is also the most beginner-friendly pergola structure to build, with widely available cut lists and tutorials specific to this material.

The critical mistake to avoid is skipping post-installation sealing. Pressure-treated lumber resists rot and insects but is not waterproof. Apply a quality exterior penetrating stain within the first season and reapply every two to three years. Also use hardware specifically rated for treated lumber — standard zinc fasteners will corrode from the chemical compounds in the wood within one to two seasons.
2. Attached Pergola Built Off the House Wall That Cuts Your Post Count in Half
An attached pergola anchors directly to your home’s exterior wall using a ledger board, which means you only need two posts instead of four. That single change reduces your lumber list, concrete footings, and installation time significantly. The result is a covered outdoor zone that connects directly to your back door — one of the most functional pergola layouts for everyday use.
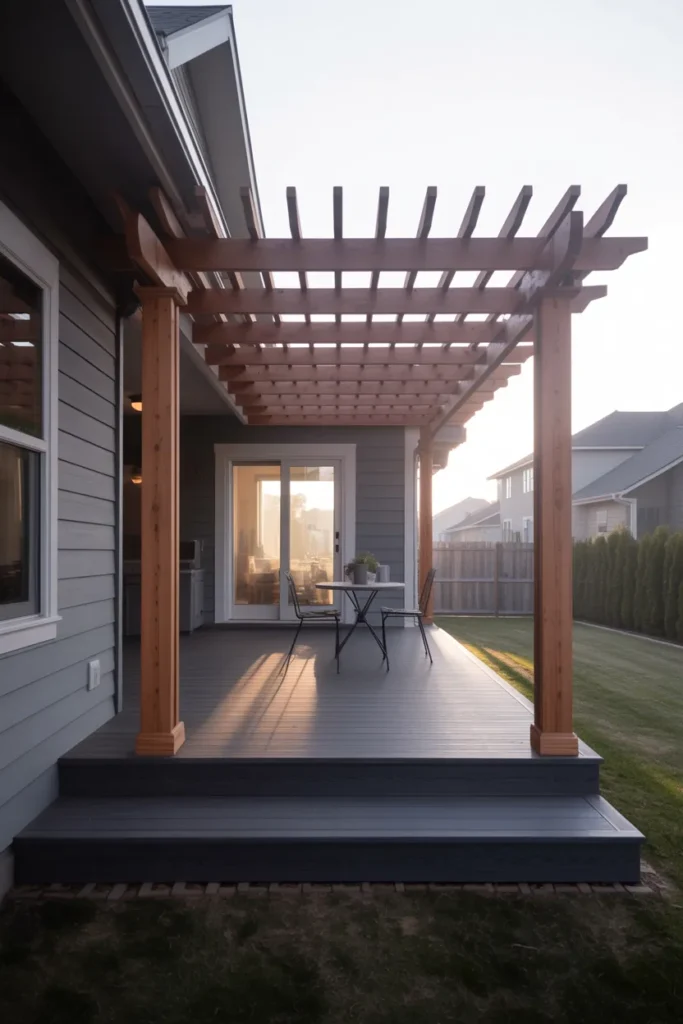
This is the right choice for smaller lots where a freestanding structure would consume too much open yard space. It also creates natural shade during the peak sun hours of the day, depending on which side of the house it faces. South and west-facing attached pergolas provide the most summer shade without any additional screening.
The most important detail here is the ledger connection. It must be lag-bolted into the home’s rim joist or structural wall framing — not just the exterior cladding. An improperly attached ledger is both a structural failure risk and a potential insurance issue. Use flashing tape over the top of the ledger board to prevent water from tracking behind the siding and into the wall assembly.
3. Bamboo Pergola With Rope Joints for a Low-Cost Tropical Outdoor Room
Bamboo poles are one of the most underused pergola materials in the United States, despite being strong, lightweight, and significantly cheaper than dimensional lumber when sourced locally or online. A bamboo-and-rope pergola uses traditional lashing techniques at the joints instead of metal hardware, which eliminates a substantial portion of the materials cost while creating a handcrafted visual quality that painted wood simply cannot replicate.
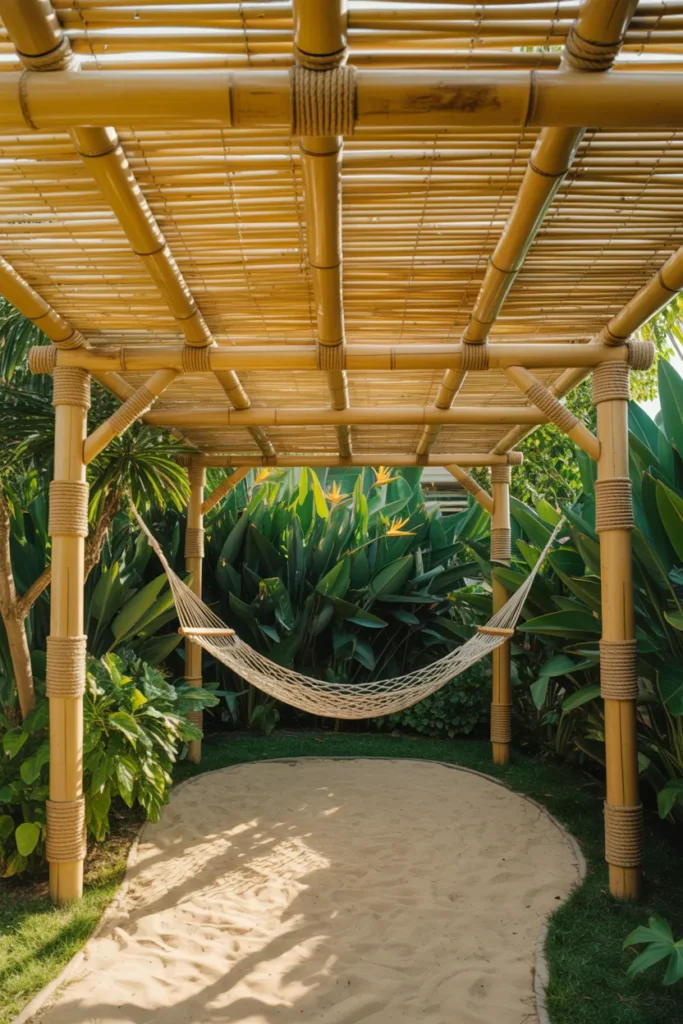
This design is best suited for warm climates where the structure will be used year-round and where freeze-thaw cycles are not a concern. It is also the most viable option for renters or homeowners who need a non-permanent outdoor structure. Bamboo pergolas can be built without concrete footings using weighted base plates or ground anchors, leaving no permanent yard modification.
Sealing is non-negotiable with bamboo. Untreated poles will crack, split, and develop surface mold within a single season in most American climates. Apply two coats of exterior tung oil or a dedicated bamboo sealant before installation, and touch up any cracked areas after the first summer. Use synthetic UV-stable rope for the lashing rather than natural fiber jute, which degrades quickly in outdoor conditions.
4. Steel Conduit Pergola for Rooftop Decks and Renter-Friendly Spaces
Electrical metallic tubing — the gray conduit used in standard electrical work — is one of the most overlooked materials for budget pergola construction. It is inexpensive, available at every hardware store, and can be connected without welding using standard conduit fittings and set-screw couplings. The result is a lightweight, industrial-looking structure that suits rooftop terraces, balconies, and urban backyard spaces particularly well.
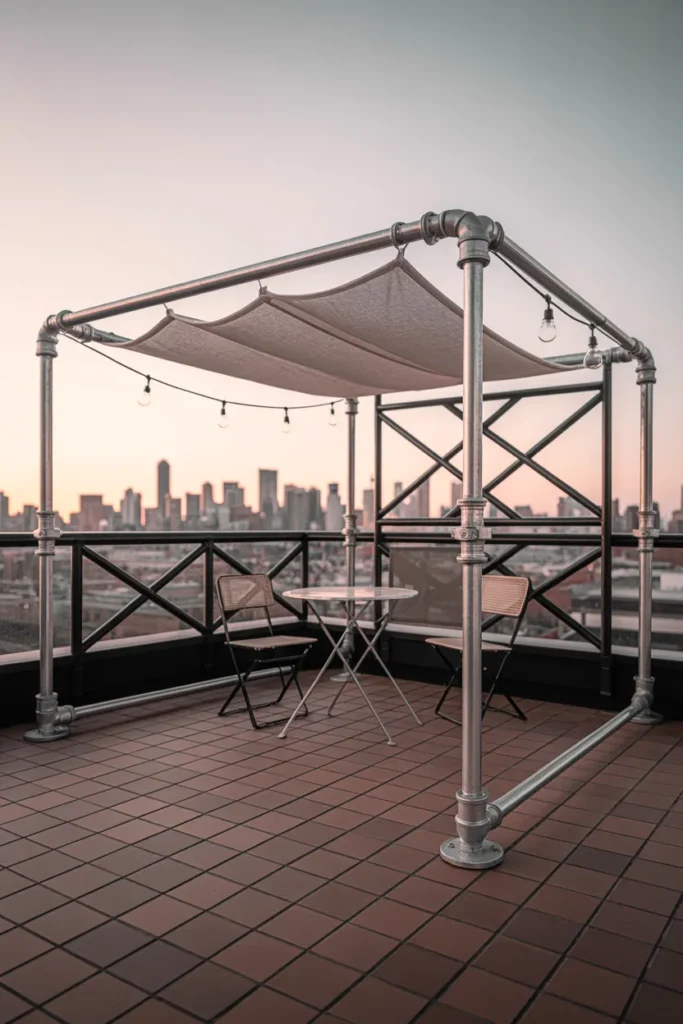
This approach is ideal for renters or condo owners who cannot anchor permanently into a building or dig footings in a shared yard. Weighted post bases — filled with sand or water — provide stability without any permanent installation. The entire frame can be disassembled, moved, or stored off-season without leaving any trace behind.
Wind bracing is the one detail most first-time builders overlook. An unbraced conduit frame will flex and rack in strong gusts, especially on exposed rooftop decks. Add a diagonal X-brace on the rear plane of the structure using the same conduit and fittings. It takes less than an hour, completely eliminates the movement problem, and makes the structure look more intentional and finished.
5. Corrugated Metal Roof Panel Pergola That Handles Rain Without a Full Roof Build
A standard open pergola provides shade but no weather protection. Adding corrugated metal or polycarbonate panels between the rafters solves that problem at a fraction of the cost of a full solid roof. Clear or tinted polycarbonate panels allow diffused natural light through while blocking rain and cutting direct UV exposure. Matte corrugated steel panels block light entirely but are virtually indestructible and require no maintenance once installed.
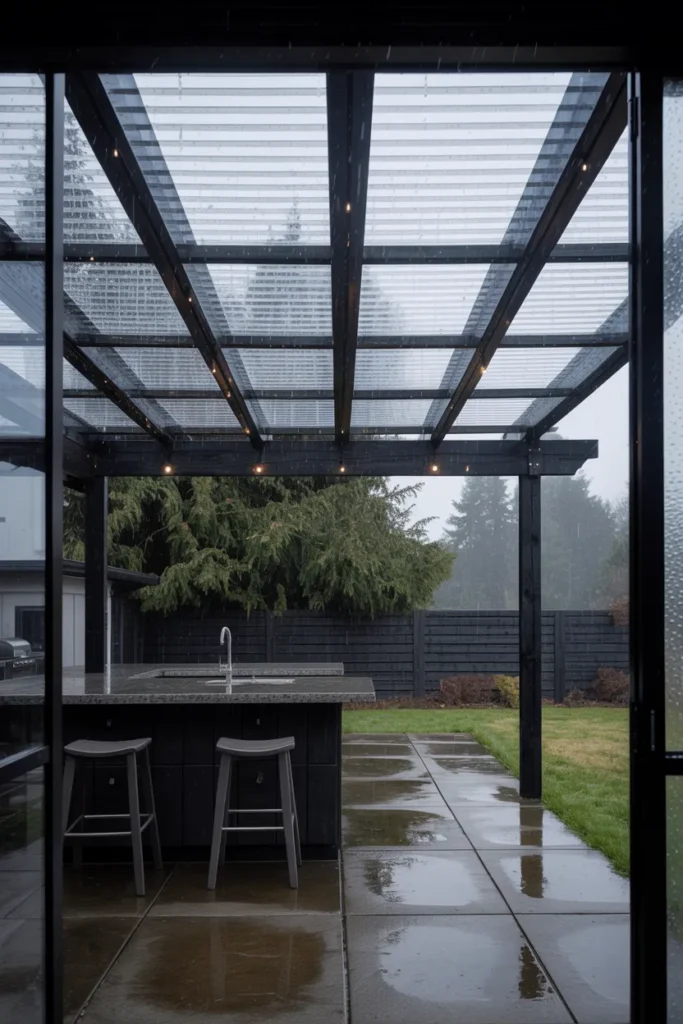
This modification makes the most sense in climates with regular afternoon rain — the Pacific Northwest, the Southeast, and the Midwest all benefit significantly. A covered pergola in these regions extends your usable outdoor season by months and eliminates the need to rush outdoor furniture inside every time a storm approaches.
To avoid leaks, space your rafters to align with standard panel widths — typically 26 or 36 inches — so panels sit flush without cutting. Overlap each panel by at least one full corrugation at the side seam and use neoprene-backed screws to seal the fastener holes against water infiltration. Unsealed screw holes are the single most common source of leaks in corrugated panel pergola roofs.
6. Corner Pergola That Uses Your Existing Fence as Two of Its Walls
A corner pergola occupies the L-shaped zone where two fence lines meet, using the existing fence panels in place of two full pergola sides. In practical terms, this means you may only need one or two freestanding posts instead of four, cutting your materials cost significantly. The fence panels also create instant enclosure and privacy without any additional screening work.
This layout is specifically designed for small urban and suburban backyards where placing a structure in the center of the yard would eliminate usable open space. By pushing the pergola into the corner, you preserve the yard’s open feel while still creating a defined outdoor room. It also gives climbing plants a ready-made trellis on two sides, which accelerates the natural canopy effect over time.
Before relying on your fence as structural support, assess its condition carefully. A fence that shows rot at the base, leans, or flexes easily should not carry any lateral load from a pergola frame. If the fence is solid and post-set within the last several years, lag-bolting a ledger board into the fence posts at each side is straightforward and reliable.
7. Shade Sail Pergola Frame That Costs Less and Installs in a Weekend
A shade sail pergola replaces a traditional rafter canopy with a tensioned fabric sail anchored between posts. This eliminates the cost of all rafter lumber and roofing materials, leaving you with just four posts and the sail itself — one of the leanest budget pergola ideas on a budget available for sunny climates. High-quality commercial-grade shade sails block 90 to 98 percent of UV radiation while still allowing airflow beneath the canopy.
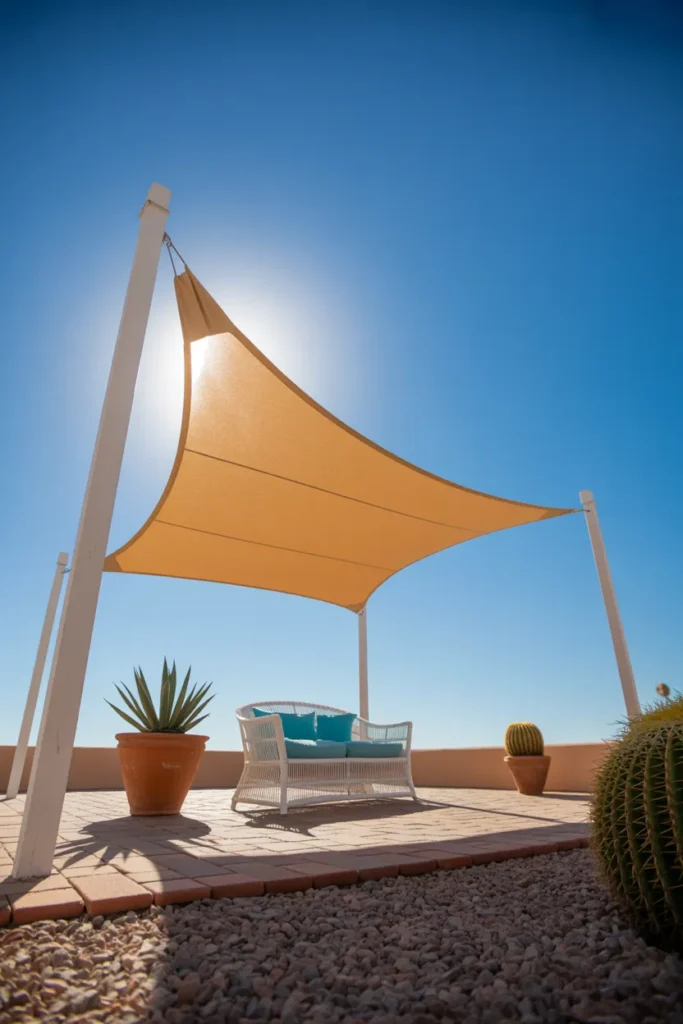
This approach works best in dry, sunny regions where rain is infrequent during peak outdoor-use months. The Southwest, Southern California, and much of Texas are ideal candidates. Shade sails shed light rain but are not an appropriate solution for regions with frequent afternoon storms — pooling water and fabric tension in heavy rain will stress both the sail material and the corner hardware over time.
Tension is the factor that determines whether a shade sail lasts one season or ten. Stainless steel turnbuckles at each corner allow you to maintain and adjust tension as the fabric stretches with heat and use. A sail installed without turnbuckles will sag within months, flap in wind, and cause premature failure at the corner attachment points.
8. Rustic Heavy-Timber Pergola With Rough-Cut Lumber From a Local Sawmill
Local sawmills sell rough-cut dimensional lumber — Douglas fir, pine, oak, and cedar — at prices well below retail home improvement stores, and the unfinished, textured surface of rough-cut timber is part of the design aesthetic rather than a quality compromise. Oversize posts and beams with visible saw marks and natural wood grain create a farmhouse or rustic craftsman look that feels considered and intentional rather than budget-driven.
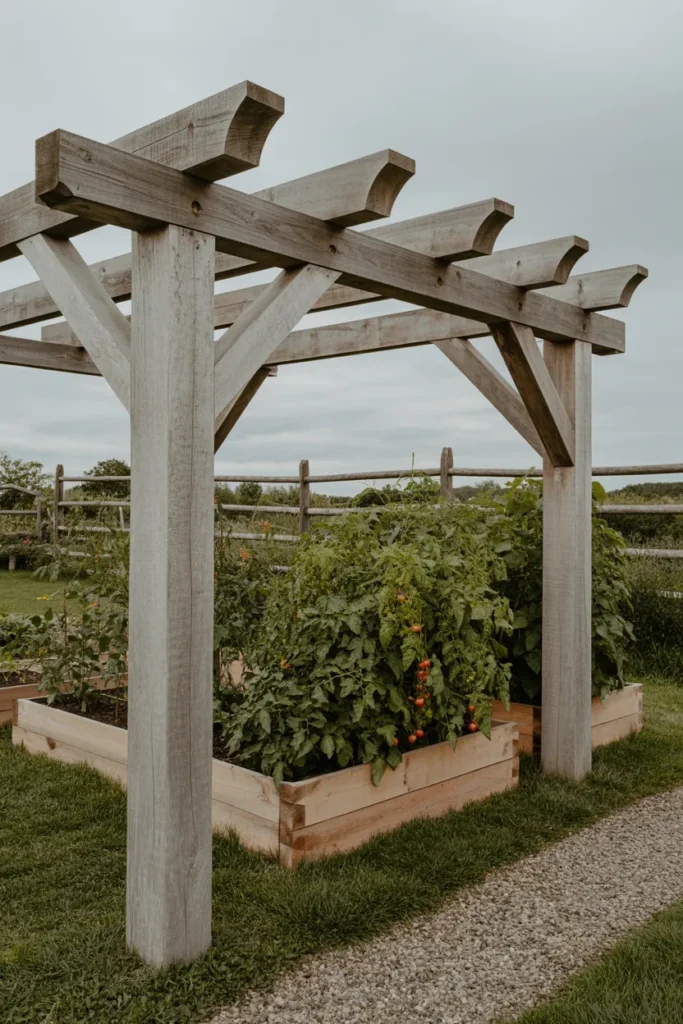
This style suits rural properties, larger suburban lots with kitchen gardens, and homes with farmhouse, cottage, or craftsman exteriors. The most effective structural detail in a heavy-timber pergola is notched beam connections — where the rafter sits in a cut notch in the beam rather than resting on a metal joist hanger. It requires more precise cutting but eliminates visible hardware and makes the joinery itself a design feature.
Finishing rough-cut timber is a choice between weathering and preservation. Allowing the wood to weather naturally will produce a silver-gray patina over two to three seasons. In humid climates, however, unfinished rough-cut lumber will also develop surface mold and deep end-grain cracking. A penetrating oil finish — not a film-forming paint — protects the wood while preserving the raw, textured surface quality.
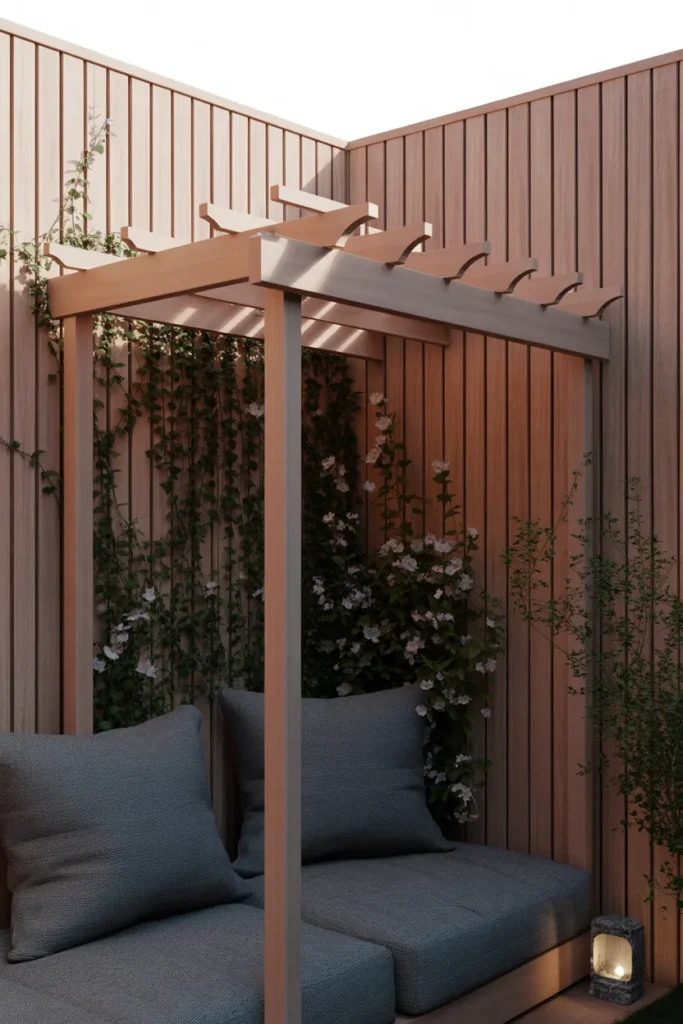
9. Minimalist Pergola With Horizontal Privacy Slats on One Side
A pergola that integrates horizontal wood or composite slats on one or two sides functions simultaneously as a shade structure, a privacy screen, and a windbreak. This replaces the need for a separate fence panel on the screened side and creates a much more enclosed, room-like feel than a standard open pergola. The spacing between slats controls the balance between visual privacy and airflow — tighter spacing blocks more sightlines, wider spacing admits more breeze.
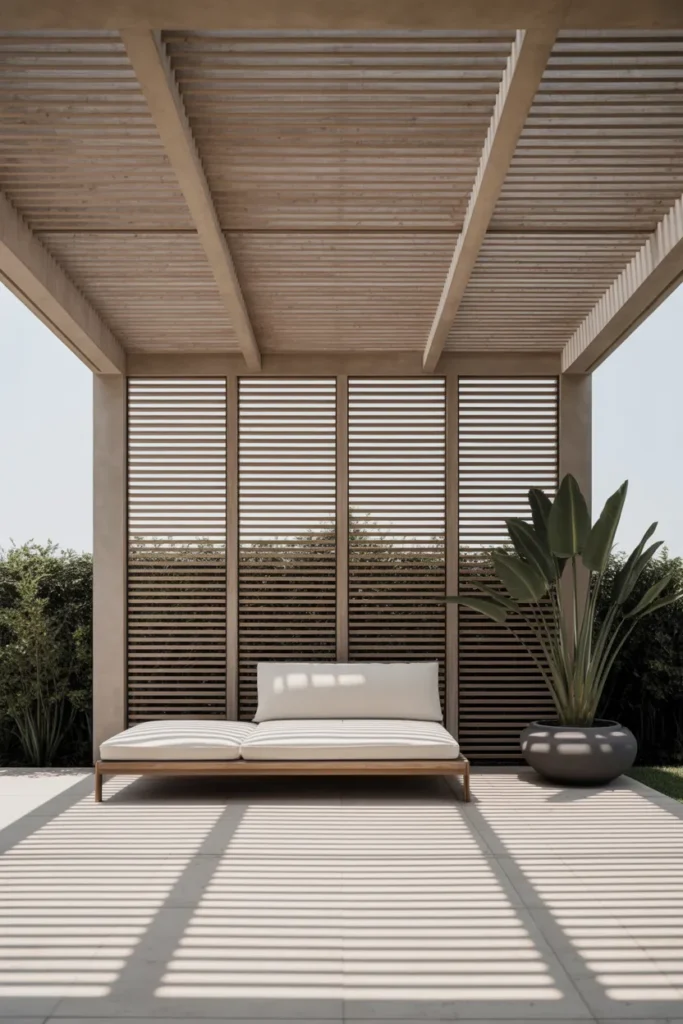
This layout is most effective for homes on corner lots, properties with close neighbors, or any outdoor area that faces a street, alley, or overlooking second-floor window. It is also one of the cleaner solutions for elevated decks where a standard privacy fence looks visually heavy and out of proportion with the deck framing below.
Composite decking boards make the best slat material for this application. They hold their color without annual staining, resist warping in humidity, and are available in profiles that look deliberate rather than improvised. Cedar is the best wood option if you prefer a natural material — it holds its dimension better than pine in varying moisture conditions and accepts stain evenly across the grain.
10. Pergola With Built-In Planter Boxes That Grow Into a Living Canopy Over Time
Integrating raised planter boxes at the base of each pergola post creates a structure that becomes more beautiful — and more functional — over time as climbing plants grow upward through the frame. In three to five growing seasons, wisteria, Virginia creeper, climbing hydrangea, or native clematis will cover the overhead rafters with enough density to create a natural shade canopy. That eliminates the future cost of shade sails, roofing panels, or fabric canopies entirely.
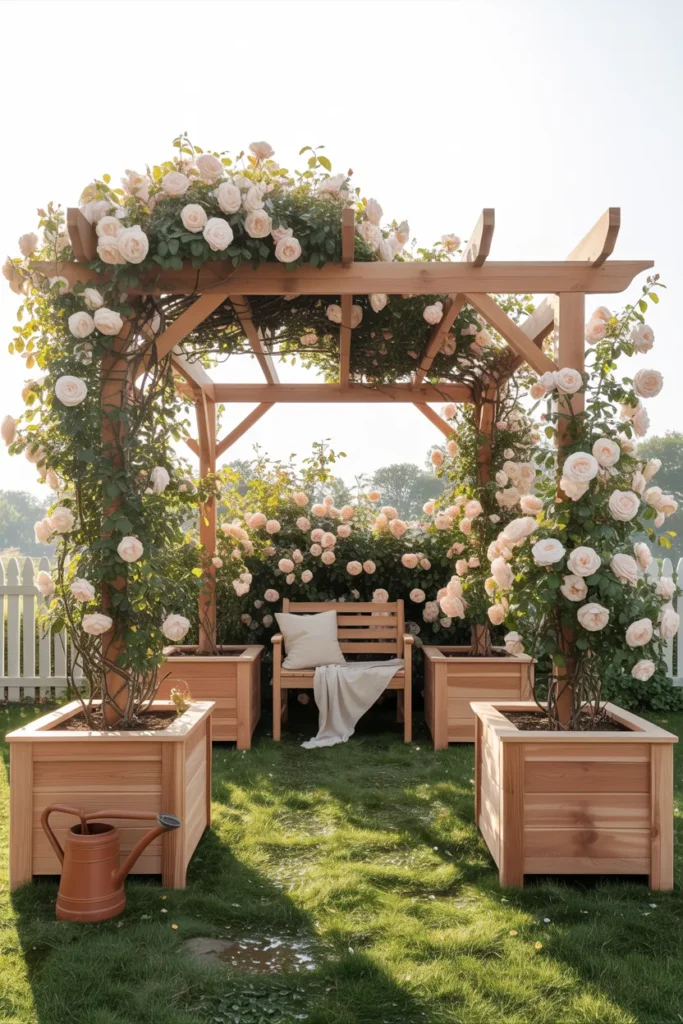
This is one of the most cost-effective long-term approaches among all practical pergola ideas on a budget because the plant material does the expensive canopy work for free over time. It is also one of the most visually rewarding — a pergola covered in flowering climbers becomes the focal point of an entire yard without any additional investment beyond the initial build.
Build the planter boxes as detachable units rather than fixing them permanently to the post bases. Removable planters let you replant, relocate, or replace individual boxes without affecting the pergola structure. Use cedar or composite for the planter bodies to prevent soil-contact rot, and size each box to hold at least 15 to 20 gallons of growing medium — climbing plants need root volume to reach structural height.
Final Thoughts
Choosing the right pergola comes down to three things: your yard size, your climate, and how you actually plan to use the space. The ten ideas above cover the full range — from lightweight conduit frames for renters to heavy-timber builds for permanent installation — so there is a realistic and actionable starting point here for almost every situation.
Save this post to your Pinterest boards before you start planning. Having these ideas in one place makes it easier to compare layouts, materials, and canopy options side by side when you are ready to move forward. Browse our related guides on budget deck ideas, small patio layouts, and low-maintenance backyard landscaping to continue building out your outdoor space plan.