Setting up a functional patio BBQ area in 2026 means more than buying a grill and pulling up a chair next to it. This guide gives you 10 layout-driven, decision-ready BBQ patio setups that solve real problems, from smoke management to prep space to guest flow, so your outdoor cooking area actually works the way you need it to.
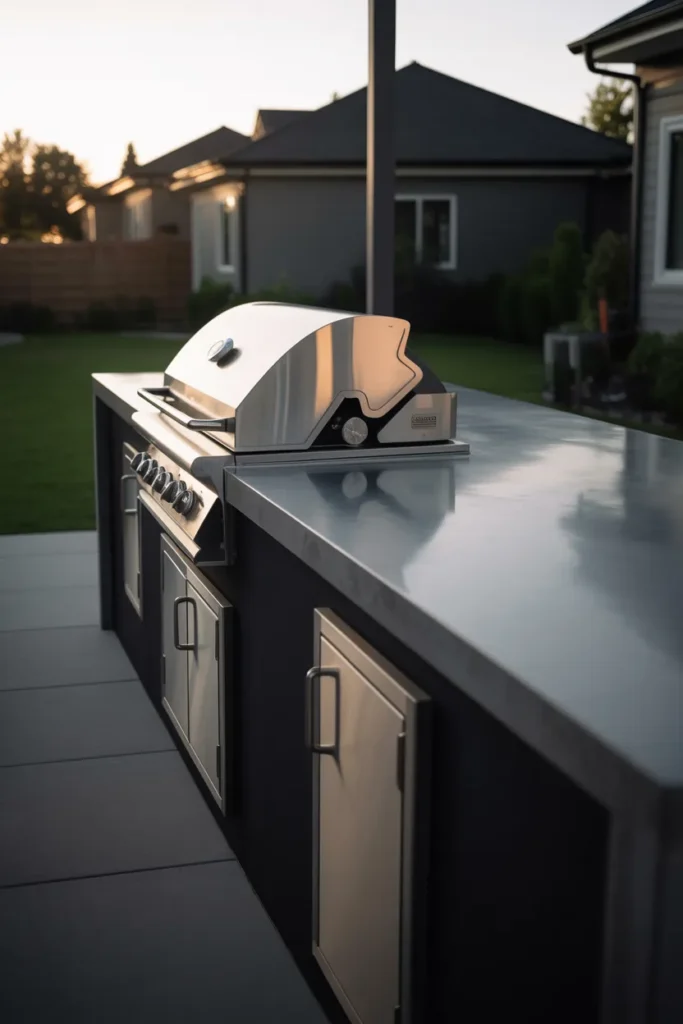
1. The Built-In Grill Station With Dedicated Prep Counter
A built-in grill flanked by a concrete or tile prep counter on at least one side is the single most functional patio BBQ setup you can build. The reason it works so well is simple: it eliminates the constant back-and-forth between the grill and an indoor kitchen that makes outdoor cooking feel like a chore.
The counter should extend a minimum of 18 inches on the side you work from most, which is typically your dominant hand side. This gives you enough room for a cutting board, a platter, and a set of tools without anything falling off the edge. If space allows, extend the counter on both sides and add an undercounter cabinet or drawer on one end for storage.

This layout is best for homeowners with a permanent outdoor setup who grill at least once a week during warm months. If you are renting or plan to move, a built-in is not the right investment. In that case, skip to a freestanding cart setup that achieves a similar workflow without permanent construction.
The most common mistake with built-in stations is placing them against a solid wall with no clearance on either side. Grease, smoke, and heat need somewhere to go. Always maintain at least 12 inches of clearance between the grill and any solid vertical surface.
2. The L-Shaped Outdoor Kitchen for Corner Patios
An L-shaped BBQ layout uses a corner that would otherwise sit empty and turns it into the most efficient grilling configuration possible. With the grill on one arm and a prep and serving counter on the other, you get a complete workflow without ever crossing your own path.
This layout works because the corner acts as your anchor. Everything stays within arm’s reach: the grill, the prep surface, the side burner if you have one, and the serving area at the open end of the L. For anyone who cooks elaborate meals outdoors, this is the layout that comes closest to replicating an indoor kitchen workflow.
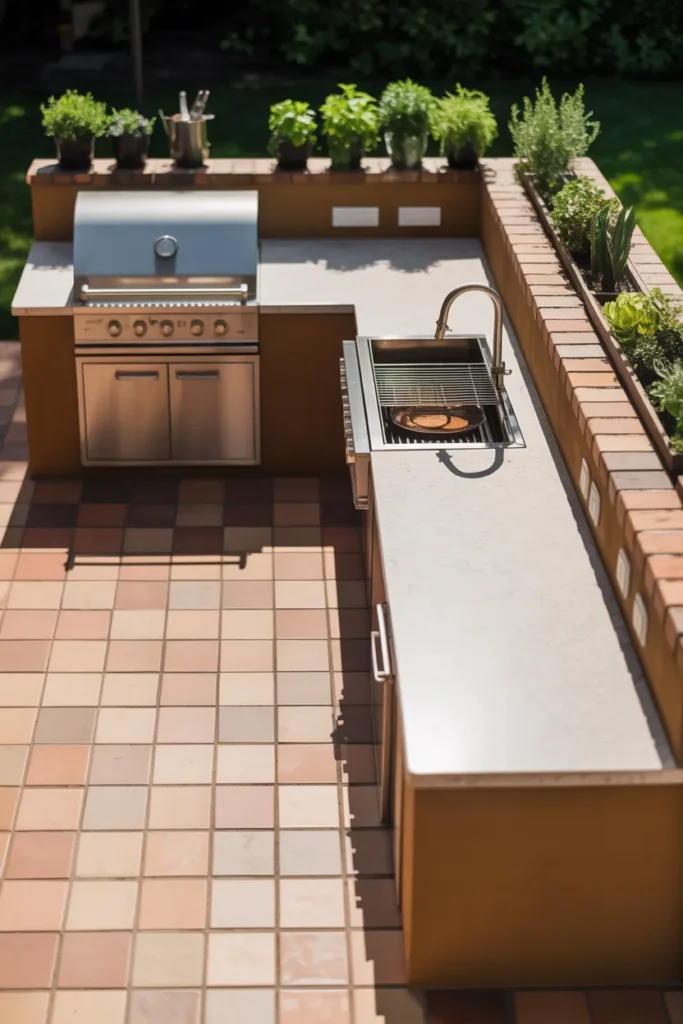
It works best on patios of 12×16 feet or larger where the corner is not already occupied by structural posts or doors. Before committing to an L-shape, map out the traffic flow from your back door to the yard. The L should not block the main path between the house and the outdoor seating area.
A design mistake to avoid here is building both arms of the L at the same length. The grill arm should typically be shorter (4 to 6 feet) and the prep and serving arm longer (6 to 8 feet). This keeps the hot grill away from the high-traffic end where guests tend to gather.
3. The Freestanding Grill Cart Setup With Mobile Prep Table
Not every patio BBQ area needs to be permanent. A high-quality freestanding grill cart paired with a heavy-duty outdoor prep table on locking casters gives you full flexibility without sacrificing function. You can reposition the setup for different events, store it under a cover in winter, or take it with you if you move.
The key to making this layout feel intentional rather than improvised is treating the cart and table as a matched set. Keep them at the same counter height, choose finishes that coordinate, and position them side by side so they function as a single unit during cooking. A 24-inch gap between them breaks the workflow and makes the setup feel disjointed.
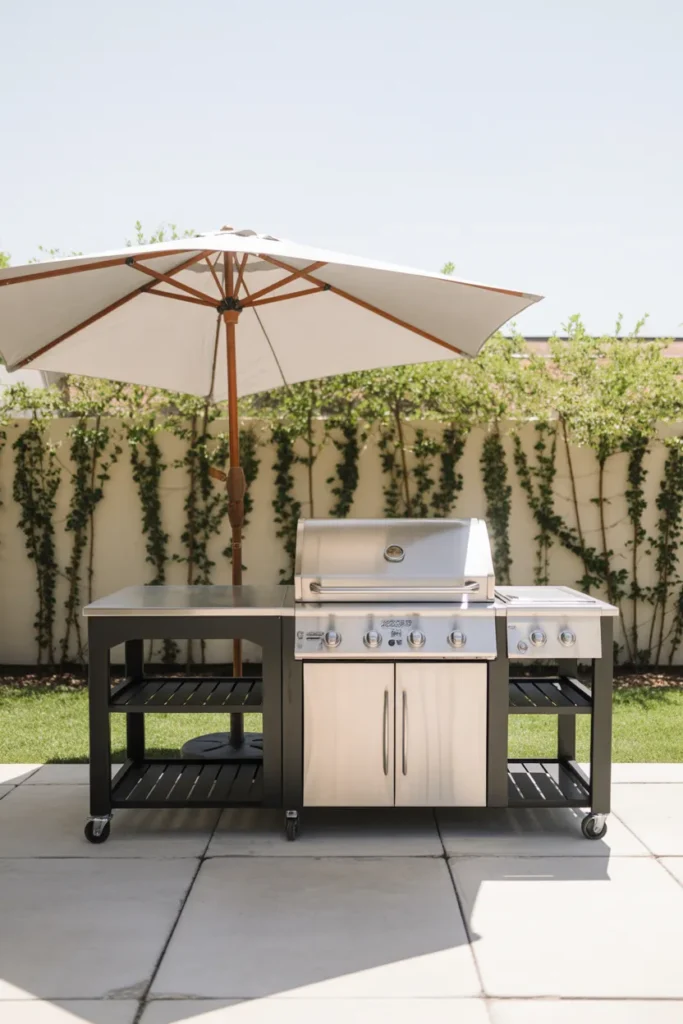
This is the right choice for renters, for homeowners who are still deciding on a permanent layout, and for anyone with a smaller patio where a built-in would dominate the available space. A freestanding setup on a 10×10 patio can be moved aside after grilling to open up the area for dining, which a built-in cannot do.
Resist the urge to add too many rolling pieces. One grill cart and one prep table is the functional limit for most patios. A third rolling unit starts to create clutter and reduces the open floor space that makes the setup comfortable to work in.
4. The Covered Pergola Grill Zone With Ventilation Planning
A pergola-covered BBQ area is one of the most popular patio BBQ area upgrades in 2026, but it is also one of the most commonly done wrong. The critical factor is ventilation. A solid or nearly solid roof over a charcoal or gas grill creates a smoke and heat trap that makes the space unusable.
The correct approach is a slatted pergola roof with gaps of at least 2 to 3 inches between boards, or an open lattice design that allows smoke to rise and disperse naturally. If you want a solid roof for rain protection, a ceiling-mounted outdoor exhaust fan positioned directly above the grill becomes non-negotiable.
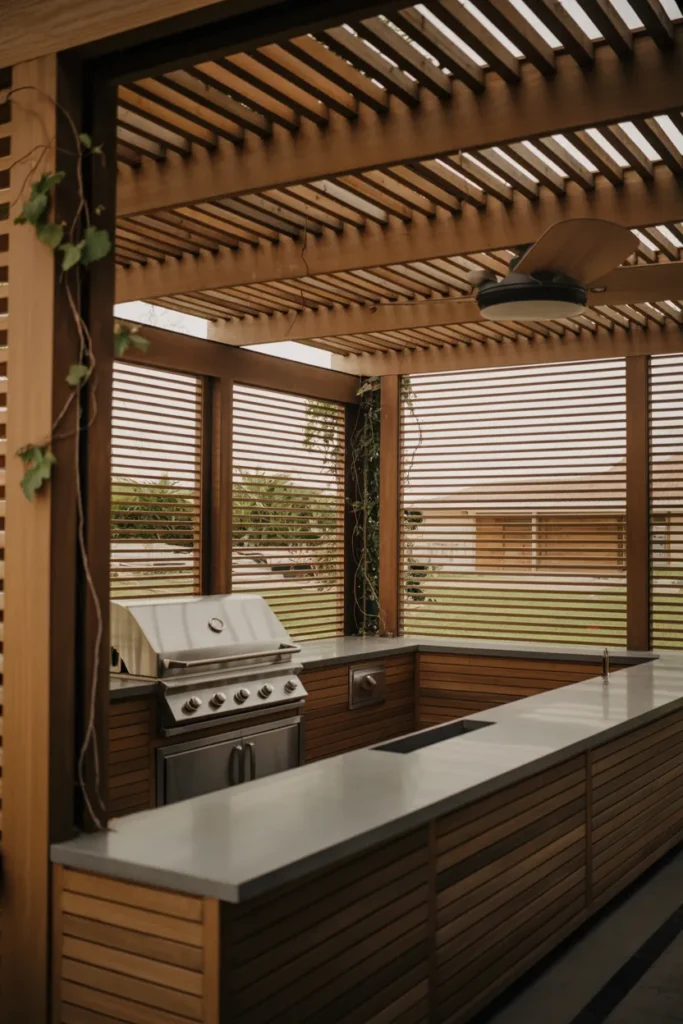
This layout is ideal for homeowners in climates with afternoon rain, strong UV exposure, or who want to extend their grilling season into cooler months. The covered structure makes the BBQ area usable in conditions that would otherwise send everyone inside.
Position the grill at one end of the pergola, not in the center. Centering the grill traps the cook inside the smoke zone with no escape. Placing it at one end allows the cook to step to the side or toward the open end of the structure to get fresh air while still monitoring the grill.
5. The Small Patio BBQ Setup That Stays Functional Under 100 Square Feet
Small patios are where most BBQ layouts fail, not because the space is too small but because the furniture and grill choices are too large. A compact two-burner grill or a ceramic kamado cooker on a weather-resistant stand paired with a fold-down wall-mounted prep shelf is the most space-efficient functional BBQ layout available.
The fold-down shelf is the most underused tool in small patio BBQ design. Mounted at counter height on a fence or exterior wall, it provides full prep surface when open and takes up zero floor space when closed. This alone can make a 60-square-foot patio completely workable for outdoor cooking.
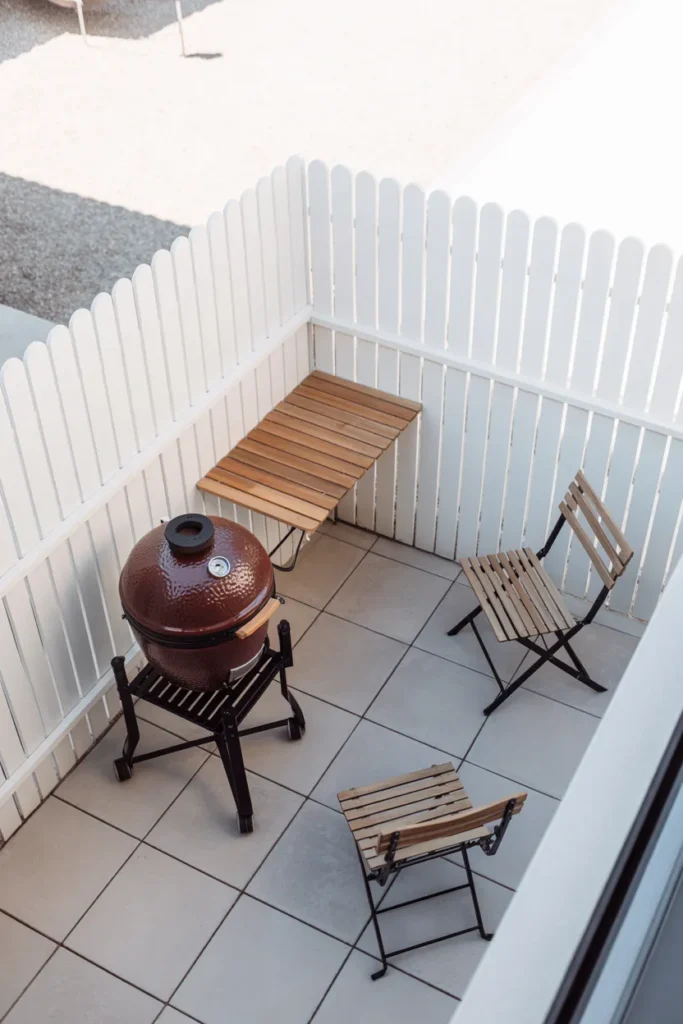
Keep the seating separate from the grill zone on small patios. The instinct is to push everything into one corner, but this puts guests too close to a heat source and limits your movement as the cook. Use the opposite corner or edge for seating and treat the grill zone as its own dedicated area, even if that means the two zones are only 5 feet apart.
Do not use a full-size six-burner grill on a patio under 150 square feet. The footprint, the heat radius, and the grease runoff area all compound in a small space and create both a comfort and a safety issue. Size the grill to the patio, not to your wish list.
6. The Outdoor BBQ Island With Bar-Height Seating
A BBQ island with a raised bar counter on the guest-facing side solves one of the most persistent problems in outdoor cooking: the social isolation of the cook. When guests can sit at bar height directly across from where you are working, the grill becomes the center of the gathering rather than a station the cook disappears behind.
The island format works best when the counter is at least 8 feet long, allowing a grill section on one end and an uninterrupted bar surface on the other. The bar-height counter on the guest side should be 14 to 16 inches deep, which is enough for drinks, plates, and elbows without being so deep it pushes guests too far from conversation range.
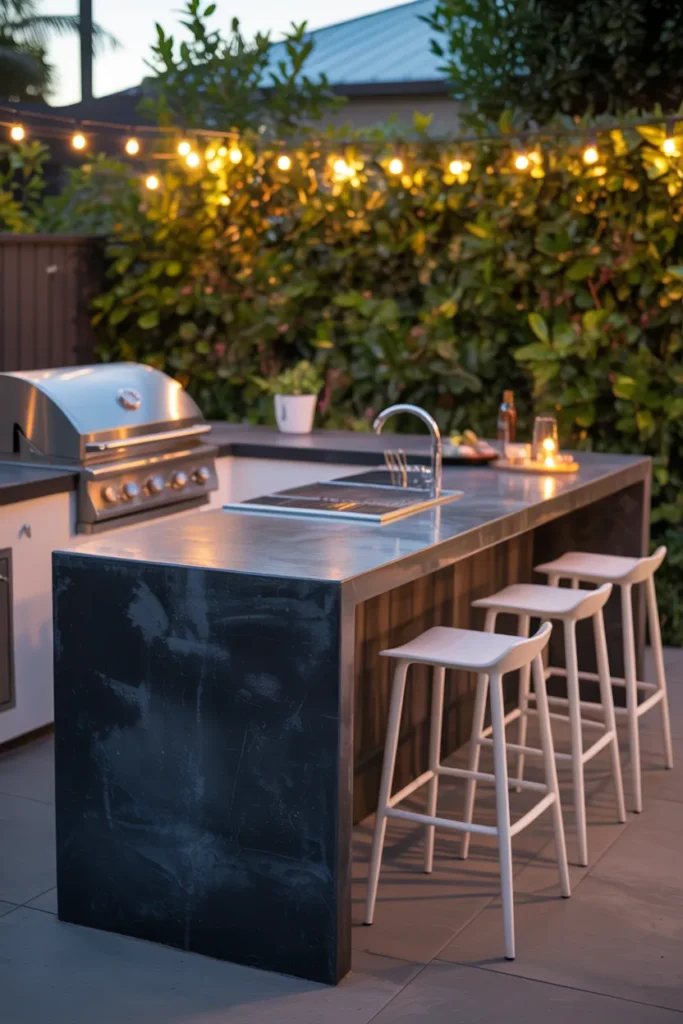
This is a layout for homeowners with larger patios, 16×20 feet or bigger, who entertain regularly. It requires a significant investment in materials and construction, but it also delivers the highest function-to-enjoyment ratio of any BBQ layout when it is sized and positioned correctly.
The mistake to avoid is installing bar stools on the same side as the grill. Heat, smoke, and the unpredictable flare-up radius make that side of the island uncomfortable and potentially unsafe for stationary seating. All bar seating belongs on the opposite side of the island from the cooking surface.
7. The Detached BBQ Pavilion Away From the Main House
Positioning your patio BBQ area away from the house and under a dedicated detached pavilion is the smartest smoke management decision you can make. Smoke rises and drifts and when the grill is close to the house, it enters through open windows, doors, and HVAC intakes. A detached setup 15 to 20 feet from the structure eliminates this entirely.
A simple four-post open pavilion with a metal roof and a concrete slab is all this layout requires structurally. Keep it open on all sides for maximum airflow. The pavilion provides rain and sun protection while letting wind carry smoke away naturally without trapping it.
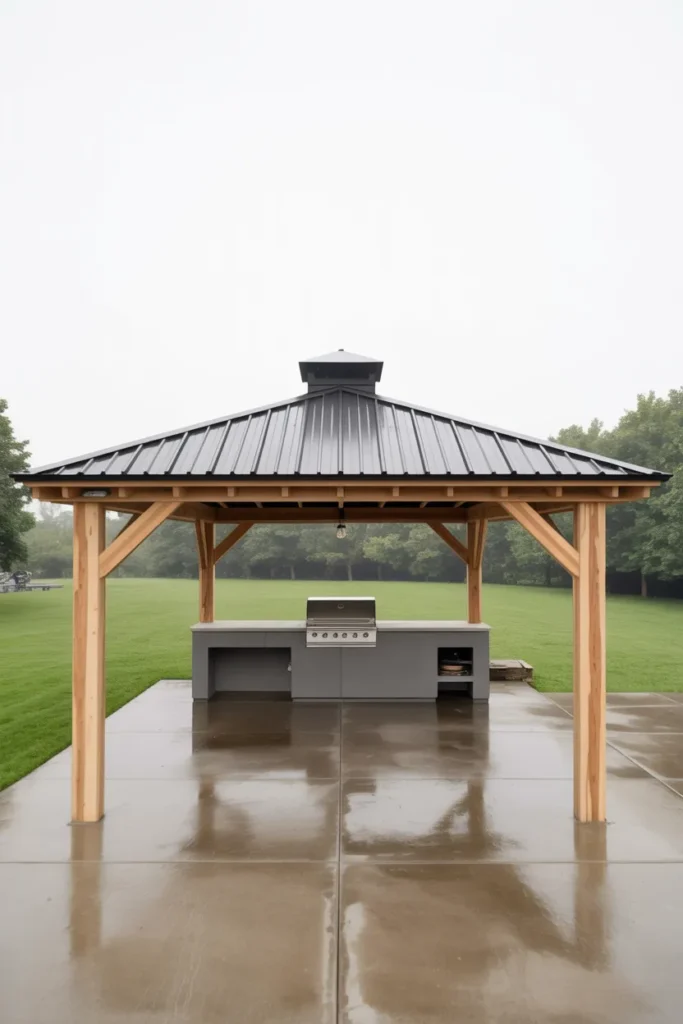
This works best for homeowners with a yard of a quarter acre or more where there is enough distance between the house and the BBQ zone without eating into the usable lawn. On smaller properties, focus on wind direction instead. Position the grill downwind of the main seating area and house, which solves much of the smoke problem without requiring a separate structure.
Run a dedicated outdoor electrical line to the pavilion during construction. Outdoor refrigerators, lighting, exhaust fans, and electric warming drawers all benefit from a hardwired circuit. Relying on extension cords in a permanent outdoor kitchen structure is both a safety and an aesthetic failure.
8. The Patio BBQ Zone With Integrated Smoke and Wind Management
The most overlooked functional problem in outdoor BBQ design is wind. Too much wind blows the heat away from the grill and extends cook time significantly. Too little wind concentrates smoke around the cook. A well-designed patio BBQ area in 2026 addresses both.
A partial privacy wall or a horizontal slat screen on the windward side of the grill (typically the north or west side in most US climates) reduces wind speed at grill level without eliminating it entirely. This keeps the cooking temperature stable while still allowing enough airflow to carry smoke away from the seating zone.
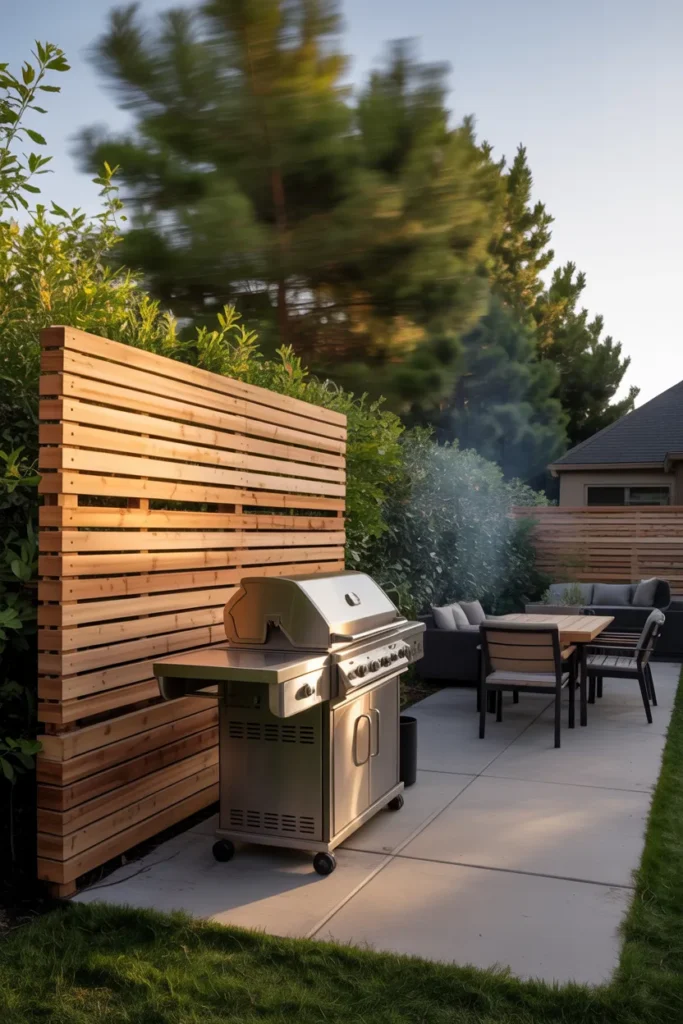
Pair the wind screen with the grill positioned at the edge of the patio rather than the center. This gives smoke an unobstructed direction to travel and keeps the center of the patio, where guests congregate, clearer of the cooking environment.
This layout strategy applies to any grill type and any patio size. Whether you are working with a freestanding setup or a full outdoor kitchen, addressing wind direction before you finalize the grill position will do more for the practical comfort of your outdoor BBQ area than almost any material or equipment upgrade.
9. The BBQ Patio With a Dedicated Serving and Staging Zone
One of the most practical upgrades in a modern patio BBQ area is separating the cooking zone from the serving zone. When the grill also acts as the serving station, the cook cannot finish the last items while guests are already plating, which creates a bottleneck that disrupts the meal and the experience.
A dedicated serving zone is simply a separate outdoor console, buffet table, or built-in counter positioned 4 to 6 feet from the grill, out of the direct heat path. Finished food moves from the grill to the serving station, and guests serve themselves from there without crowding the cook.
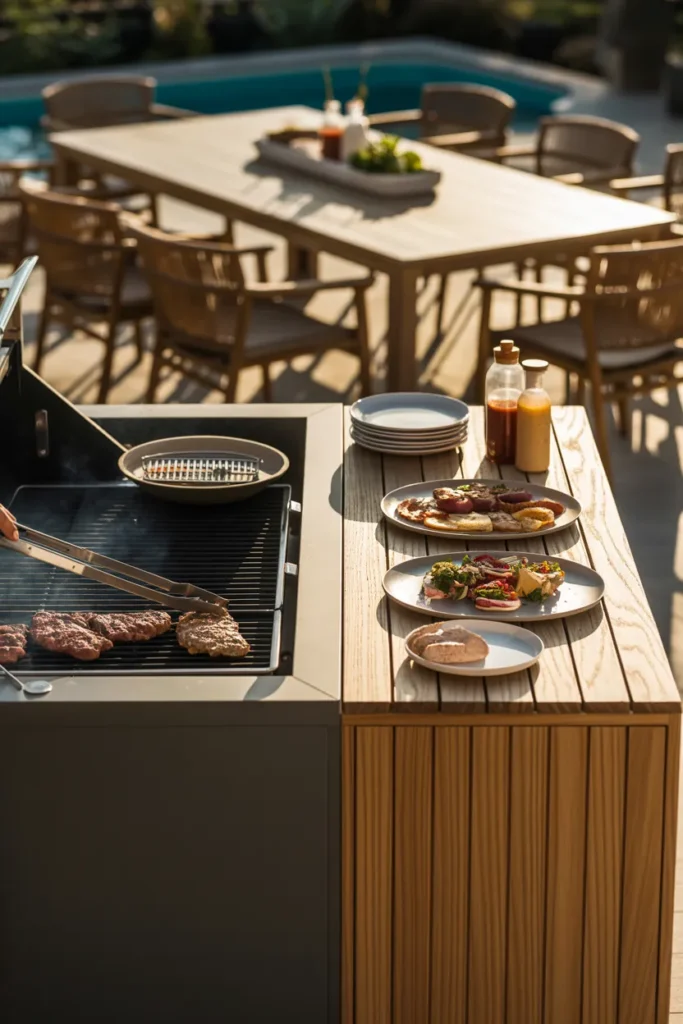
Position the serving station between the grill and the dining table so the flow from cooking to plating to eating is linear and uninterrupted. This is the same principle used in commercial kitchen design and it works just as well outdoors. A serving zone does not need to be large. A 24-inch-deep by 48-inch-long surface is enough to hold platters, sauces, utensils, and napkins for most gatherings.
Add a small outdoor cooler or side-by-side beverage station at the serving zone rather than at the grill. When drinks are adjacent to the food, guests naturally flow to that area and stay away from the active cooking zone, which keeps the grill area safer and gives the cook room to work.
10. The Modern Minimalist BBQ Patio With Clean-Line Design
In 2026, the outdoor BBQ area design trend moving fastest on Pinterest and in new construction is the minimalist BBQ patio: clean lines, concealed storage, monochromatic materials, and no visual clutter. It is a functional layout that also photographs exceptionally well and holds its design value over time.
The foundation of this look is a built-in grill counter with flush cabinet doors in powder-coated steel or concrete board cladding, a single material countertop, and absolutely no exposed propane tanks, tool hooks, or loose accessories. Everything stores inside. The surface stays clear except for what is actively being used.
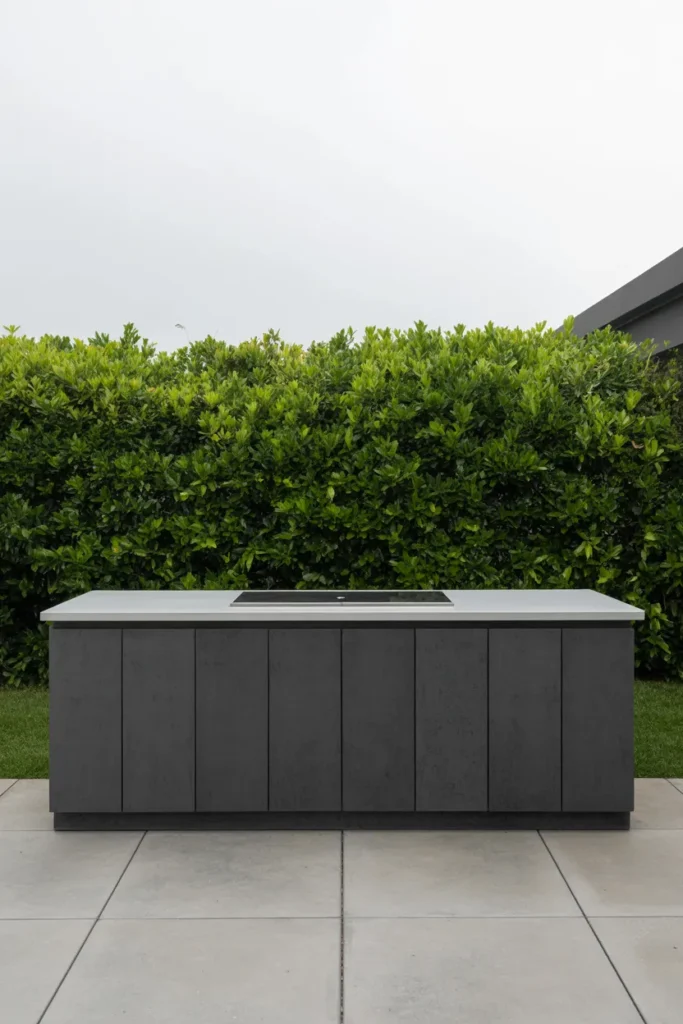
This layout works for homeowners who want their outdoor BBQ area to feel like an extension of a modern interior rather than a utilitarian grilling station. It requires more planning upfront because the storage has to be designed in, not added on, but the result is a space that looks as good as it functions.
The design principle to hold onto is subtraction. Every time you are tempted to add something to the surface or the front of the counter, ask whether it can be stored inside instead. The restraint is what makes the minimalist BBQ patio work. Clutter in a clean-line layout is more visible and more damaging to the overall effect than it would be in any other outdoor setup.
Final Thoughts
A well-planned patio BBQ area in 2026 is not about the most expensive grill or the largest layout. It is about making the right decisions for your specific space, your cooking habits, and how you actually use your outdoor area with other people. Every setup in this guide is built around those practical realities.
If one of these layouts fits your yard or your goals, save this post to your Pinterest boards so you can reference it when you are ready to plan or build. And if you are still comparing options, explore more outdoor kitchen and patio design ideas to find the configuration that fits your space, your climate, and how you live outdoors.