Most upcycling content shows you what something looks like without telling you whether it will actually hold up outdoors, drain properly, or suit your specific garden size. These diy upcycled garden ideas are built around practical decisions — what materials work, what fails over time, and how to match each project to your actual outdoor space.
1. Turn Old Wooden Pallets Into a Vertical Herb Garden Wall That Actually Drains
A vertical pallet planter is one of the most searched diy upcycled garden ideas online, but most versions fail within a season because the builder skips two critical steps: lining the pallet correctly and ensuring drainage at each planting pocket. Done right, a pallet herb wall is a genuinely functional growing structure.
Choose a heat-treated pallet marked HT — never a chemically treated MB-marked pallet, as the methyl bromide residue is unsafe for food growing. Sand the surface smooth and seal with an exterior wood oil or paint to extend its outdoor life. Staple landscape fabric to the back and sides of each horizontal gap to create individual planting pockets, leaving the front open for planting.
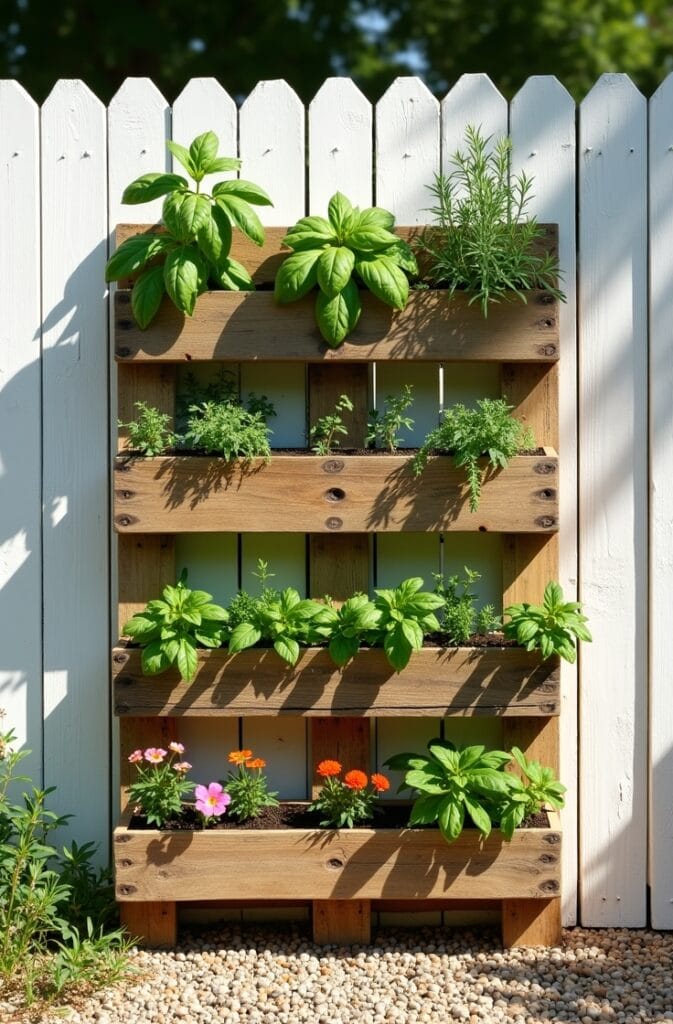

Fill each pocket with a 50/50 mix of potting compost and perlite for drainage and root aeration. Plant the lower pockets first while the pallet is lying flat, then allow two weeks for roots to establish before standing the pallet upright against a wall or fence. This waiting period is the step most people skip, and it is the reason vertical pallet gardens collapse within weeks.
This layout works best against a south or west-facing fence where herbs receive at least five hours of direct sunlight. For a shaded wall, swap herbs for ferns, trailing ivy, or small-leafed begonias that tolerate lower light conditions.
2. Convert a Cracked Ceramic Sink Into a Raised Planting Basin With Drainage Built In
An old ceramic butler sink or bathroom basin makes one of the most structurally sound upcycled garden planters available because it already has a drain hole, a deep basin for root development, and a weight that keeps it stable in exposed positions. It requires no drilling, no lining, and minimal preparation.
Clean the sink thoroughly with an outdoor cleaner and allow it to dry completely. Place the sink on two stacked concrete blocks or a simple timber trestle to raise it to a comfortable working height — this is particularly valuable for gardeners who find ground-level bending difficult. Cover the drain hole with a mesh disc or broken crock to prevent compost loss while maintaining drainage.
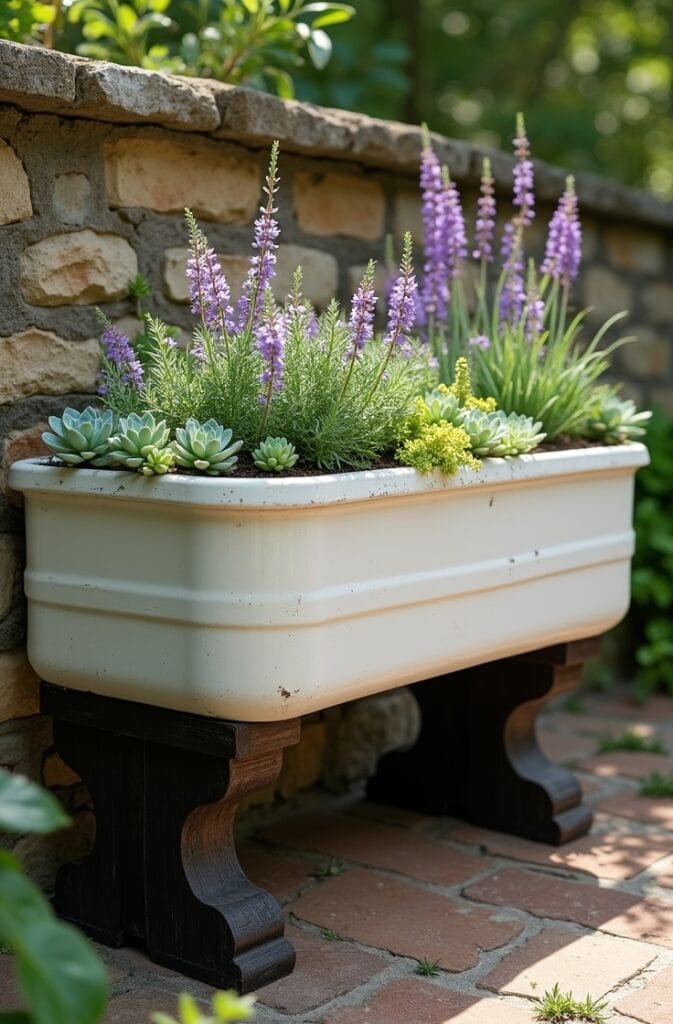
Plant with a single-theme scheme for the cleanest result: an alpine garden using grit-based compost with small succulents and sedums, a compact salad garden with cut-and-come-again lettuce varieties, or a dwarf bulb display for spring color. Each of these suits the depth and drainage profile of a ceramic basin.
Position the sink against a wall or in a corner so its back and sides read against a solid backdrop — a freestanding sink in the middle of a lawn looks out of place. This is one of the most durable upcycled outdoor planting ideas because ceramic does not rot, warp, or degrade with weather exposure.
3. Upcycle Galvanized Metal Stock Tanks Into Long-Lasting Raised Bed Planters
Galvanized metal stock tanks — originally designed for livestock water — are among the most durable and visually appealing containers for an upcycled raised garden bed. They resist rust for years, maintain a clean utilitarian aesthetic, and are deep enough for most vegetables and perennials.
Drill five to seven drainage holes across the base using a metal drill bit — 3/4 inch diameter holes spaced evenly prevent waterlogging. Fill the bottom third with a drainage layer of broken stone, gravel, or wood chip before adding compost. This reduces the total volume of expensive compost needed while improving drainage in the lower root zone.

Round tanks with a 100-gallon capacity work well as individual specimen planters for dwarf fruit trees or large ornamental grasses. Oval or rectangular tanks suit row crops like tomatoes, peppers, or salad greens. Position on a hard surface — patio, gravel, or compacted stone — rather than directly on lawn, as the tank base will kill grass below and create an uneven footing over time.
The galvanized finish weathers to a soft matte silver-gray over two to three seasons, which suits both modern and farmhouse garden aesthetics. This is one of the most long-lasting creative garden upcycling projects because the material itself has a service life measured in decades rather than seasons.
4. Stack Reclaimed Bricks Into a No-Mortar Raised Bed That Adjusts as Your Garden Grows
A dry-stacked reclaimed brick raised bed requires no cement, no professional skills, and no permanent commitment — bricks can be unstacked and relocated if your garden layout changes. Salvaged bricks from demolition sites, old chimneys, or architectural salvage yards bring texture and warmth that new materials rarely replicate.
Stack bricks in a running bond pattern — each brick overlapping the joint below — to a height of three to five courses. Three courses (approximately 9 inches) suits shallow-rooted crops and annuals. Five courses (approximately 15 inches) provides enough depth for tomatoes, root vegetables, and established perennials. No adhesive is needed for beds up to five courses high when the base is level.
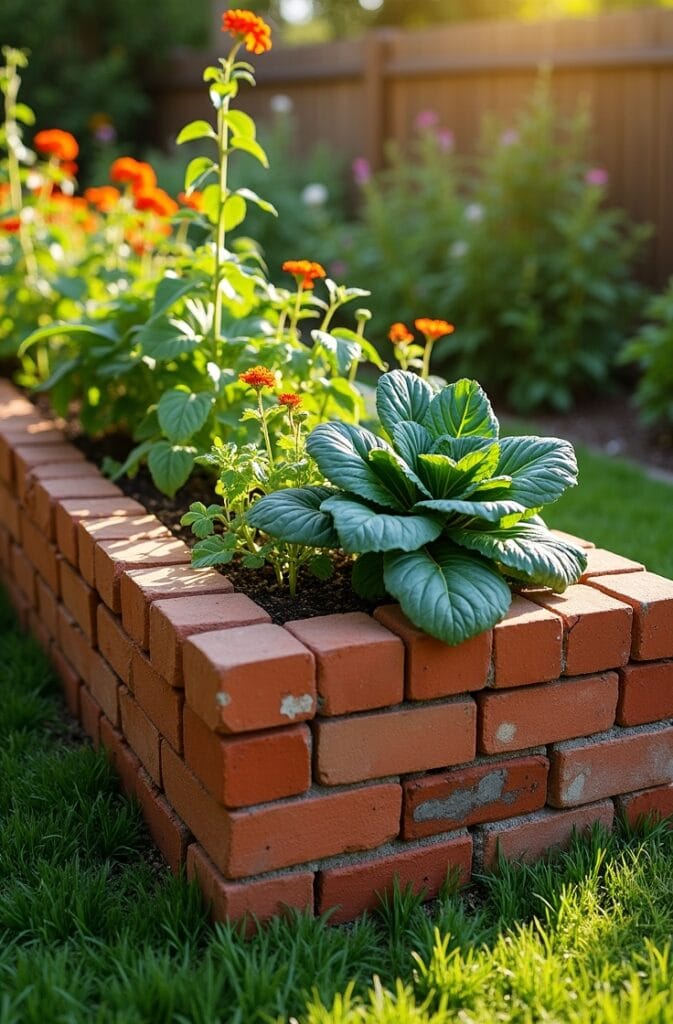
Line the interior with landscape fabric before filling to prevent compost from filtering through the brick gaps. Fill with a mix of topsoil and garden compost in a 60/40 ratio for general planting, or a compost-dominant mix for vegetables. The fabric also controls weed entry from below.
Reclaimed brick absorbs heat during the day and releases it at night, which creates a slightly warmer microclimate inside the bed — a real advantage for heat-loving crops like peppers, eggplant, and basil in cooler US climate zones. This thermal mass effect is a practical benefit that most people overlook when choosing raised bed materials.
5. Transform a Worn Wooden Ladder Into a Freestanding Tiered Plant Display
An old wooden A-frame ladder makes a structurally sound and visually interesting tiered plant stand that works equally well on a patio, deck, or against a garden wall. The rungs serve as natural shelving at staggered heights, creating a display with built-in vertical layering.
Sand the ladder surface to remove splinters and apply two coats of exterior wood paint or stain — charcoal, forest green, and white are the finishes that read best against a planted backdrop. Reinforce any loose rung joints with exterior wood glue and allow to cure for 24 hours before loading with plant weight.
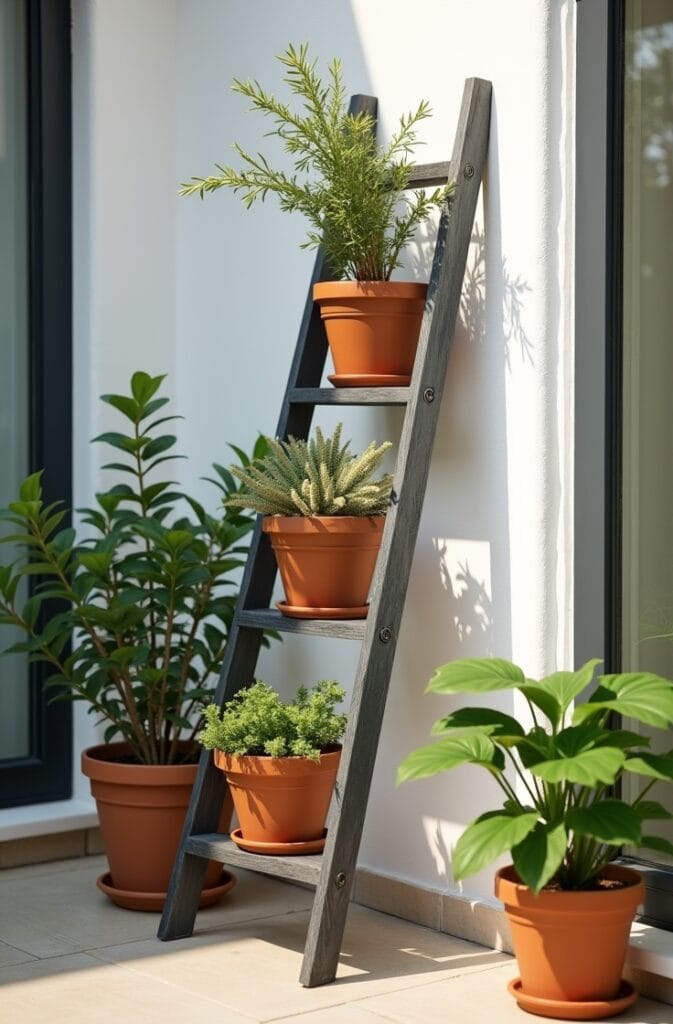
Place the heaviest planters on the lowest rungs and lightest on the highest to keep the center of gravity low and prevent tipping. Use a consistent pot size across all rungs for a curated look, or vary sizes intentionally — large on the base, progressively smaller toward the top — to create a tapered, tree-like form.
This project suits small patios and balconies where floor space is limited because the ladder footprint is minimal relative to the number of plants it displays. It is one of the most accessible diy upcycled garden ideas because the material is inexpensive, the preparation is simple, and the result looks considered rather than improvised.
6. Repurpose Old Colanders and Enamelware as Hanging Container Gardens
Metal colanders and enamelware pots already have drainage holes built into their design, which makes them structurally ideal as hanging planters — no drilling required. Their interior depth suits trailing and compact plants, and the vintage enamel aesthetic suits both cottage and modern farmhouse garden styles.
Thread S-hooks or jute twine through the colander handles or through drilled holes in enamelware rims to create hanging points. Hang from a pergola beam, a fence hook, or a wall-mounted rail at a height that keeps the planting visible without obstructing head clearance below.
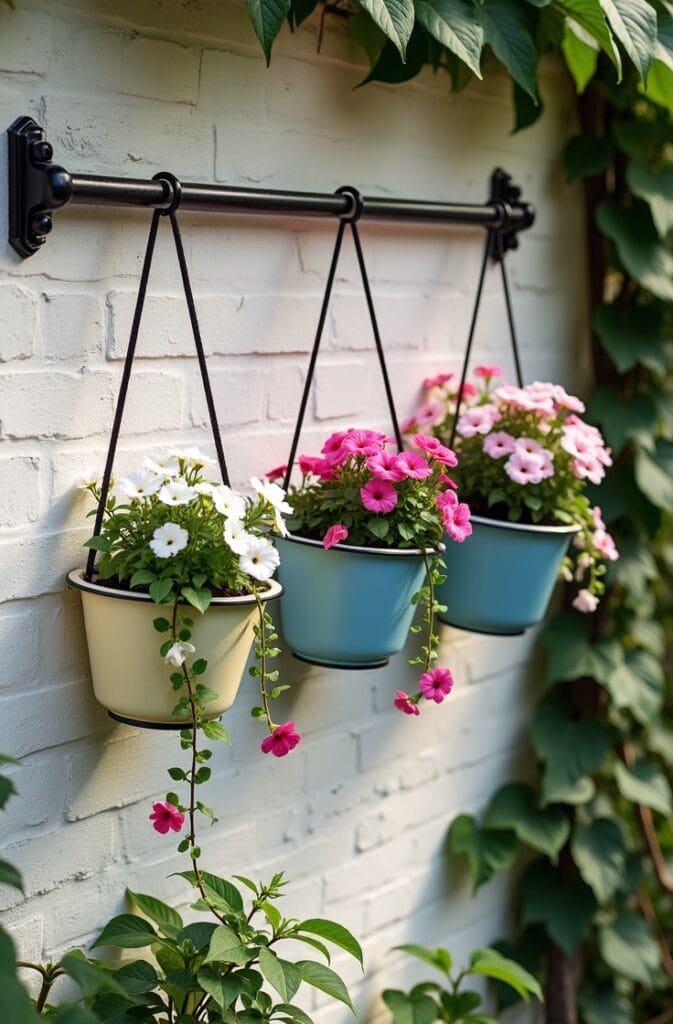
Plant trailing varieties that spill naturally over the container edge — trailing petunia, bacopa, string of pearls, or compact nasturtium all work well and suit the shallow depth typical of colander containers. Add a thin layer of perlite beneath the compost to prevent the drain holes from clogging with fine soil particles.
Group three or five containers together at different heights for a more impactful display than a single hanging piece. Odd numbers create a more natural, visually balanced grouping than even numbers. This is a strong upcycled container gardening project for renters because no permanent installation is required.
7. Use Cracked Terracotta Pots as a Mosaic Stepping Stone Base in a Garden Path
A cracked terracotta pot that is no longer usable as a container can be broken down further into shards and used as the surface mosaic material for a handmade garden stepping stone. Combined with concrete or hypertufa mix, the terracotta shards create a warm-toned, slip-resistant path surface.
Mix concrete or hypertufa (a blend of Portland cement, perlite, and peat) to a firm but workable consistency and press into a round or square mold — a shallow plastic container, an old cake tin, or a purpose-cut wooden frame. Press terracotta shards face-down into the surface in a random or deliberate pattern before the mix sets.
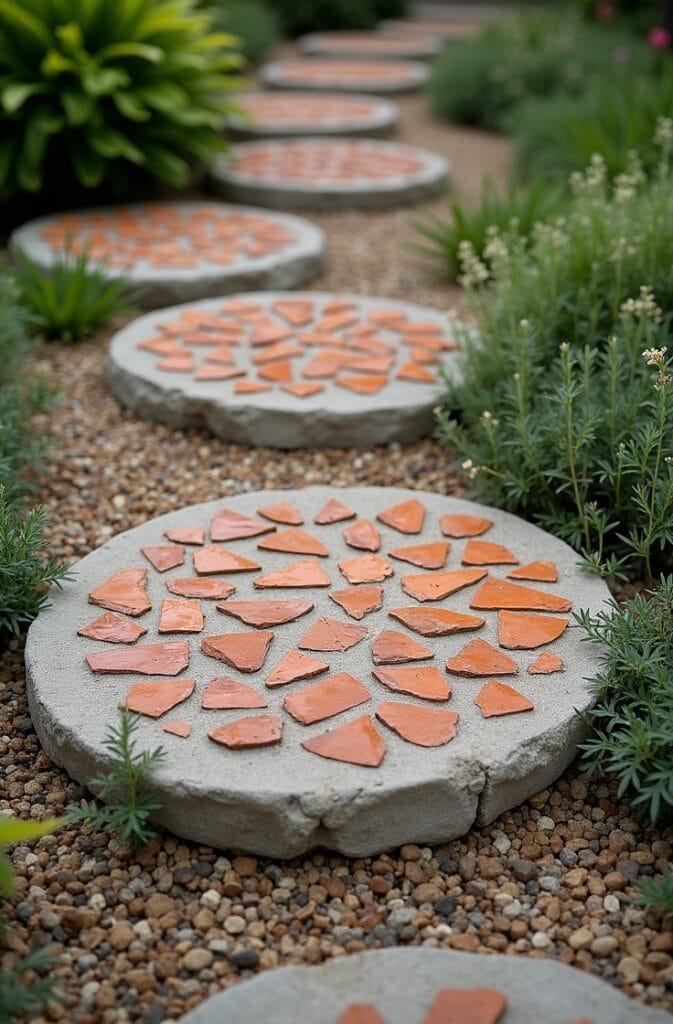
Allow to cure for a full 48 hours before removing from the mold and a further two weeks before placing in the garden path to allow the concrete to reach full strength. Position the stone flush with the surrounding soil surface so it does not create a trip hazard.
This project is ideal for gardens with multiple broken pots that accumulate over the season. Rather than discarding them, a set of six to eight matching stepping stones creates a cohesive path that looks purposeful and handcrafted. It is one of the most genuinely sustainable diy upcycled garden ideas because it converts broken waste material into a durable structural garden element.
8. Convert a Vintage Wooden Dresser Into a Multi-Drawer Outdoor Planting Station
A solid wood dresser with drawers at multiple heights creates a genuinely original planting display when the drawers are pulled out at varying depths and planted individually. The staggered drawer arrangement creates visual movement and prevents the piece from reading as a flat, static backdrop.
Choose a dresser made from solid hardwood rather than MDF or particleboard — MDF deteriorates rapidly when exposed to moisture and outdoor conditions. Sand, prime, and apply two coats of exterior paint in a finish that suits your garden palette. Line each drawer interior with heavy-duty plastic sheet or a pond liner offcut to protect the wood from compost moisture.
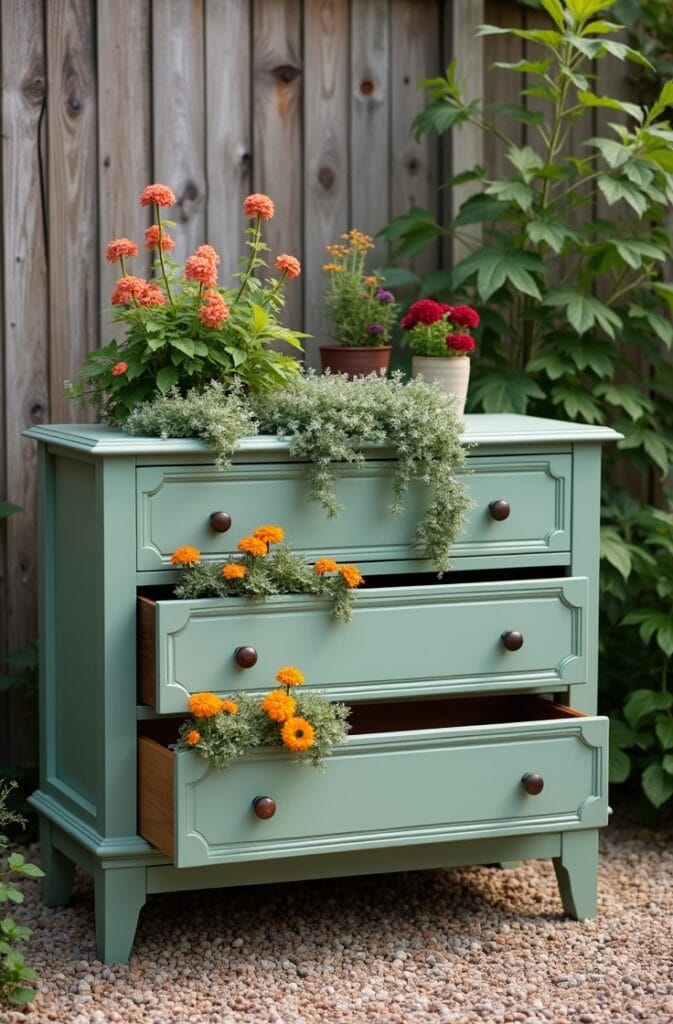
Pull each drawer to a different extension depth — some fully open, some half-open, some barely cracked — before planting. This staggered effect is what separates a genuinely interesting display from a standard multi-pot arrangement. Plant each drawer with a single species for the cleanest look, using trailing varieties in the uppermost drawers so the planting cascades downward naturally.
Position the dresser against a fence or wall rather than freestanding in the open — it needs a backdrop to read properly as a display piece. This is one of the most visually striking creative garden upcycling ideas because it combines a recognizable domestic object with outdoor planting in a way that reads as curated rather than accidental.
9. Build a Raised Seating Wall From Stacked Reclaimed Concrete Blocks and Planted Gaps
Reclaimed concrete blocks — salvaged from demolition, road projects, or building sites — can be stacked without mortar to form a low garden seating wall with planting gaps built into the structure. The planting that grows through the gaps softens the industrial material and transforms a hard surface into a living architectural feature.
Stack the blocks to a height of 18 to 20 inches — comfortable as a seating surface — in a straight or gently curved line. Leave intentional gaps of 2 to 3 inches between alternating blocks and fill those gaps with a gritty compost mix. Plant with creeping thyme, sedum, or alpine plants that thrive in shallow, well-drained conditions.
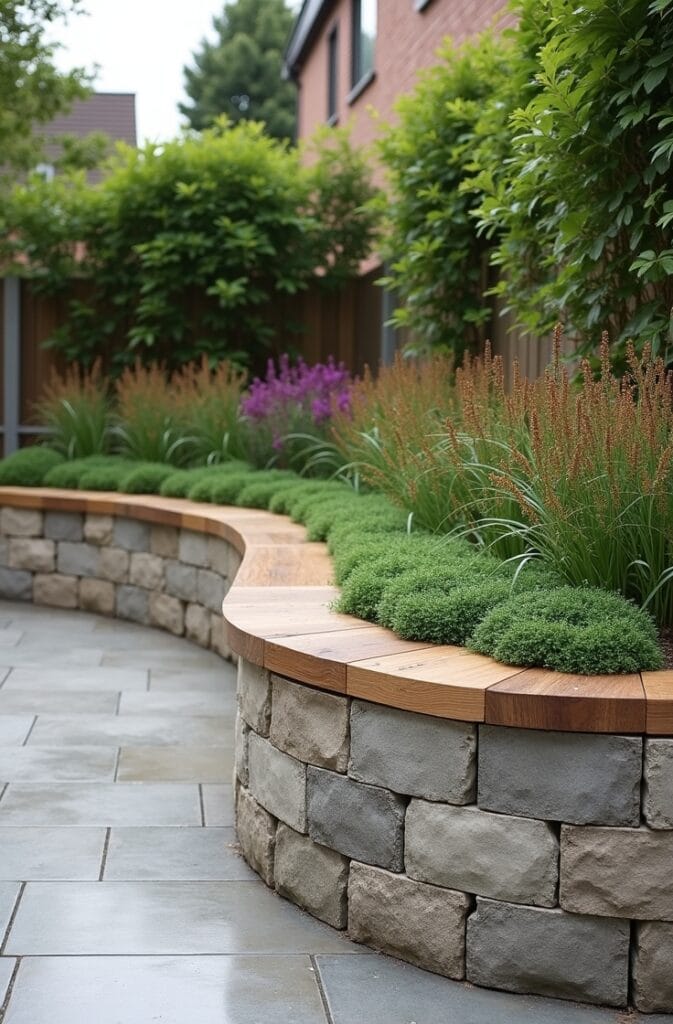
Cap the wall with a smoother material for comfortable seating — a single course of reclaimed timber, smooth stone slabs, or painted MDF sealed with exterior resin. The contrast between the rough block structure and the smooth cap reads as considered rather than improvised.
This project suits larger gardens with space for a defined seating zone and works particularly well in gardens with an industrial, urban, or contemporary aesthetic. It is a genuinely structural garden upcycling project, not just a decorative one, and adds permanent usable functionality to the outdoor space.
10. Repurpose a Wooden Wine Crate as a Self-Contained Herb Planter for a Patio Table
A standard wooden wine crate is the right size, depth, and weight for a tabletop or bench-top herb planter — typically 14 inches long, 10 inches wide, and 6 to 8 inches deep, which suits compact herbs comfortably. Its slatted base provides natural drainage without modification.
Sand the interior smooth and seal with food-safe beeswax or mineral oil to protect the wood from moisture without introducing chemicals near edible plants. Line with hessian fabric rather than plastic to allow air movement through the sides while retaining compost. The hessian breaks down slowly over one to two seasons and can be replaced.
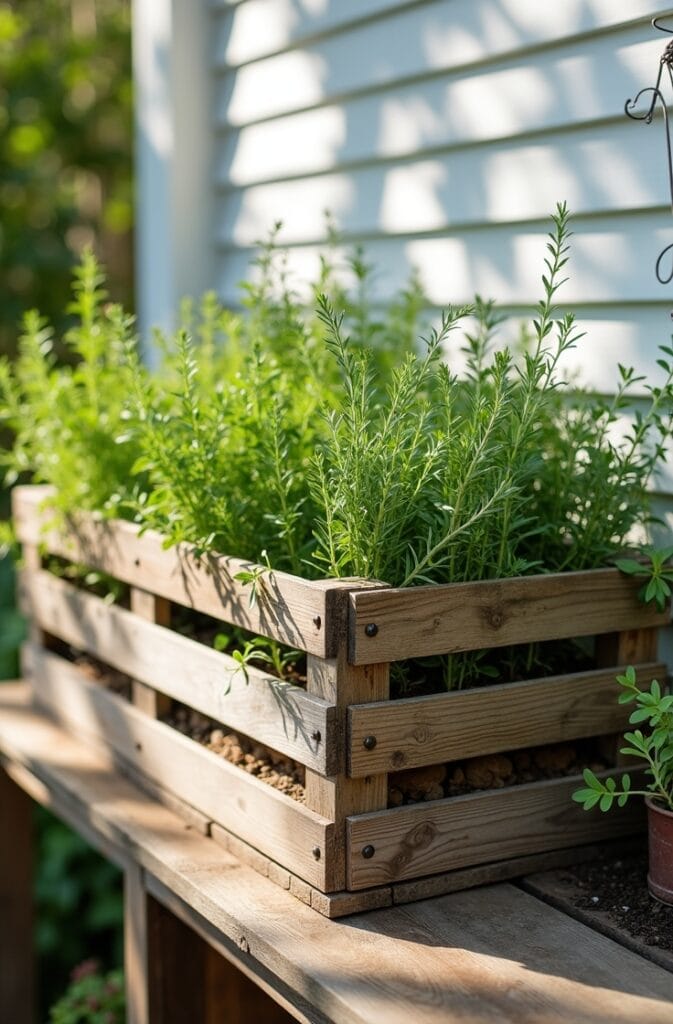
Plant with three to five herbs that share similar water and light requirements — rosemary, thyme, and oregano for a dry-loving Mediterranean group, or basil, parsley, and chives for a moisture-tolerant kitchen herb set. Do not combine Mediterranean and moisture-loving herbs in the same crate as their watering needs directly conflict.
Position the crate on a patio table, potting bench, or kitchen windowsill adjacent to a back door for daily harvesting convenience. This is one of the simplest diy upcycled garden ideas to execute in under an hour, and the result is practical every day rather than just visually appealing.
11. Stack Old Tires as a Painted Raised Bed Tower for Compact Potato or Strawberry Growing
Stacked painted tires are a well-established technique in compact vegetable garden upcycling for growing potatoes or strawberries in a very small footprint. A single stack of three tires produces a growing volume equivalent to a 30-inch raised bed while occupying less than 6 square feet of ground.
Paint the outer surface of each tire with exterior masonry or rubber paint in a bold color — deep red, cobalt blue, or white — to reduce the visual heaviness of the rubber material and to minimize heat absorption, which can otherwise overheat the root zone in summer. Use a non-toxic paint and allow to cure fully before adding soil.
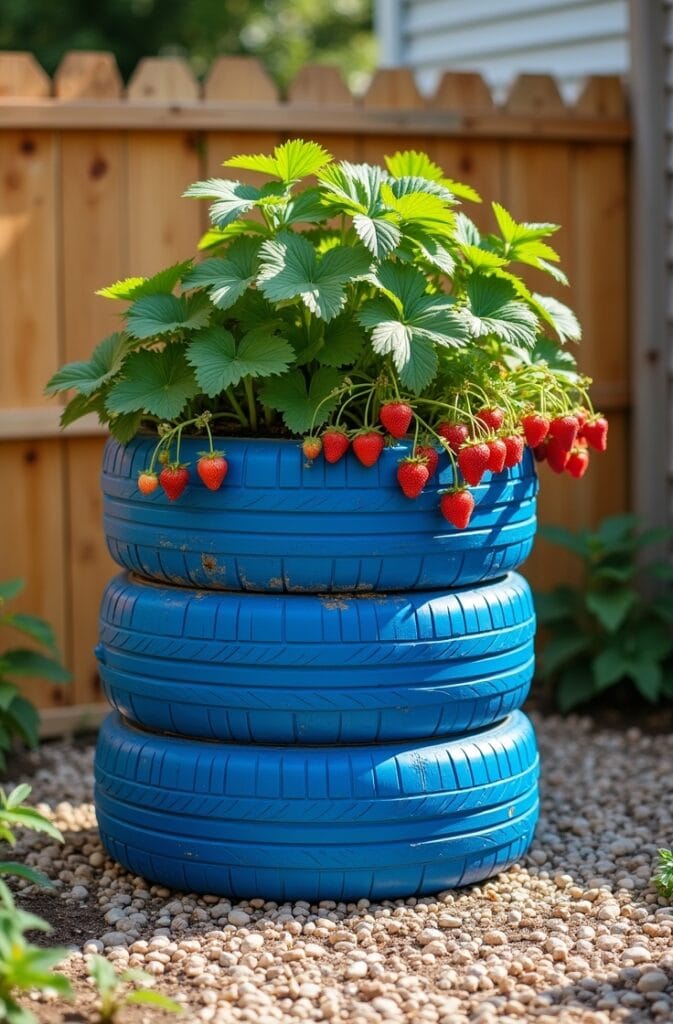
For potatoes, fill the first tire with compost and plant seed potatoes at the recommended spacing. As the foliage grows, add the second tire on top and fill with more compost, covering the lower stems. Add the third tire as the plant continues to develop. This earthing-up technique produces a significantly larger potato crop from a small space.
For strawberries, plant directly into the top tier and trail the runners over the tire edges — the raised height keeps fruit off the ground and away from slugs. This approach is a proven compact growing system used widely in community garden settings across the USA.
12. Hang an Old Wooden Window Frame as a Trellis for Climbing Plants on a Garden Wall
A salvaged wooden window frame — glass removed — makes a lightweight and visually interesting trellis structure when mounted flat against a garden wall or fence. The existing glazing bars create a natural grid for climbing plants to weave through without any additional wire or mesh.
Remove any remaining glass and sand the frame to remove loose paint or rot. Apply exterior wood primer and a coat of exterior paint in a color that contrasts with the wall behind — white on brick, charcoal on render, or forest green on timber. Mount the frame flat against the wall using exterior screws and wall plugs, leaving a 2-inch gap between the frame back and the wall surface for plant growth.
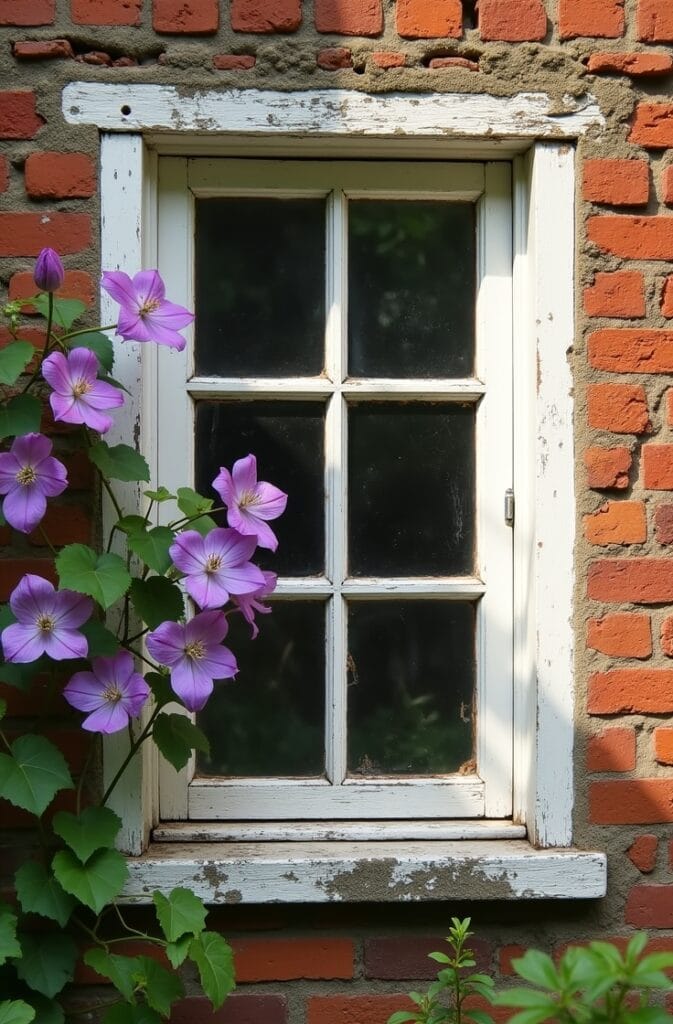
Plant a climbing rose, a small-leafed clematis, or a jasmine at the base of the frame and guide initial stems through the glazing bar grid using soft plant ties. The plant will self-cling or can be tied at intervals as it grows. Within one full growing season, the frame will be substantially covered.
This is one of the most architecturally interesting upcycled vertical garden ideas because it adds a framed, picture-like quality to a plain wall surface while serving a functional growing purpose. Choose a frame with interesting original detail — arched tops, decorative glazing bars, or original latch hardware — for the best visual result.
13. Create a Gravel Garden Edging System From Broken Roof Tiles Set on Their Edge
Broken clay roof tiles set vertically on their edge — pressed into the soil at a slight angle in an overlapping scallop pattern — create a durable, free, and visually distinctive garden border edging. This technique has a long history in cottage and kitchen garden design and holds up better than most plastic edging products.
Source broken tiles from roofing contractors, salvage yards, or from your own roof repairs. Clean off any mortar residue and sort by size for a more consistent result. Press each tile 3 to 4 inches into the soil at a consistent angle — typically 45 degrees — with the curved bottom edge facing outward and upward to create the scallop profile.
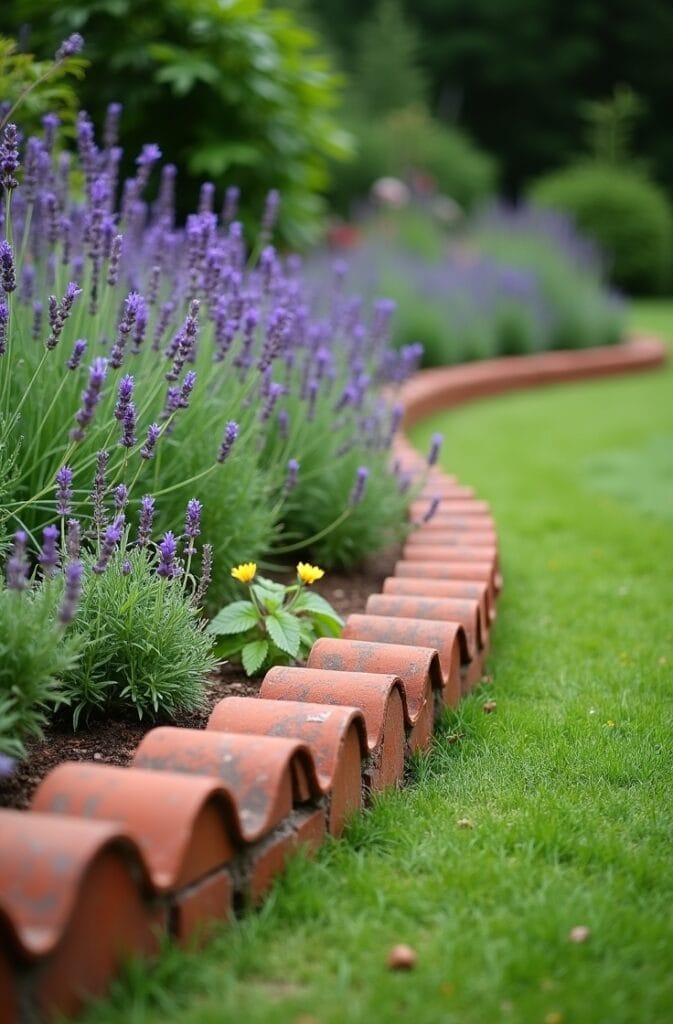
Overlap each tile slightly with the next to create a continuous interlocking edge that resists movement without any adhesive or fixing. The tiles self-stabilize through soil pressure once the border is complete. The natural clay color weathers to a warm, muted tone that complements planting rather than competing with it.
This edging system suits cottage gardens, kitchen gardens, and any border where a traditional material feels more appropriate than modern metal or plastic alternatives. It is genuinely free in most cases, more durable than plastic, and improves in appearance as it weathers — the opposite of most synthetic edging materials.
Conclusion
The best diy upcycled garden ideas are not the ones that look most impressive in a photograph — they are the ones that solve a real problem in your outdoor space, hold up through multiple seasons, and cost close to nothing to create. Every project in this guide is built on that principle.
Save this post to your Pinterest DIY or garden boards before you start — these are the kinds of ideas you will want to revisit as different materials become available or as your garden evolves through the seasons. Each project here works independently, but several can be combined for a cohesive upcycled garden scheme.
If you found these ideas useful, explore more small garden layout content, container gardening guides, and budget outdoor design ideas for patios, balconies, and compact outdoor spaces across every US climate zone.