A brilliant DIY pallet fence solves one of the most common yard problems — needing privacy, definition, or a garden border without the cost of a conventional fence build — but only when the pallets are selected correctly and the structure is built to last. This guide covers 18 distinct pallet fence ideas, each with material guidance, structural requirements, finish options, and the specific mistakes that cause most pallet fences to fail within a season.
1. Vertical Pallet Privacy Fence With Uniform Board Spacing
Standing pallets vertically and securing them between posts creates one of the fastest privacy fence solutions available without cutting or disassembling the pallet. The key to making this work visually is selecting pallets with consistent board spacing — irregular gaps between slats make a vertical pallet fence look unplanned rather than intentional.
Source heat-treated pallets stamped HT on the side block. Avoid pallets stamped MB (methyl bromide) — these were chemically treated for pest control and are not safe for outdoor living spaces where children and pets are present. HT pallets are safe, structurally sound, and widely available from garden centers, feed stores, and small retailers who receive regular pallet shipments.
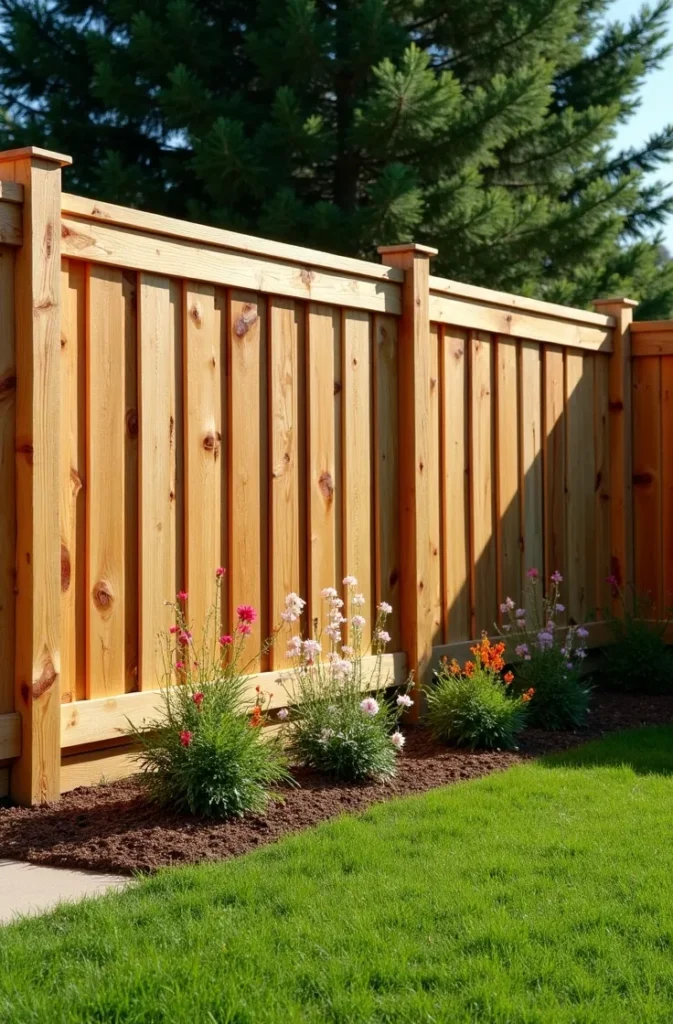

Set 4×4 posts in concrete at eight-foot intervals and attach the pallets to the post faces using exterior-grade lag screws. Do not simply lean pallets against posts or attach them with deck screws into the end grain of the pallet stringer — end-grain connections in outdoor wood fail under lateral load within one to two seasons. Drive lag screws through the pallet stringer face into the post side for a connection that holds.
This design works best when the pallets are all sourced from the same supplier at the same time. Mixing pallet sizes and slat thicknesses in a single fence run creates an inconsistent appearance that undermines the structured look a vertical privacy fence requires.
2. Whitewashed Pallet Fence for Cottage Garden Borders
A whitewashed pallet fence installed as a low garden border — at 36 to 48 inches height — creates a clean, cottage-style definition between lawn and planting beds without blocking light or views. The whitewash finish unifies mismatched pallet boards into a cohesive surface that reads as intentional rather than salvaged.
Whitewash for exterior wood is applied as a diluted latex paint: one part white exterior paint to two parts water, brushed on and partially wiped back while wet. This technique allows the wood grain to show through the white pigment, giving the finish a chalky, aged quality that suits a cottage garden aesthetic. A full white paint coat on rough pallet wood looks sloppy. The whitewash technique turns the texture into an asset.
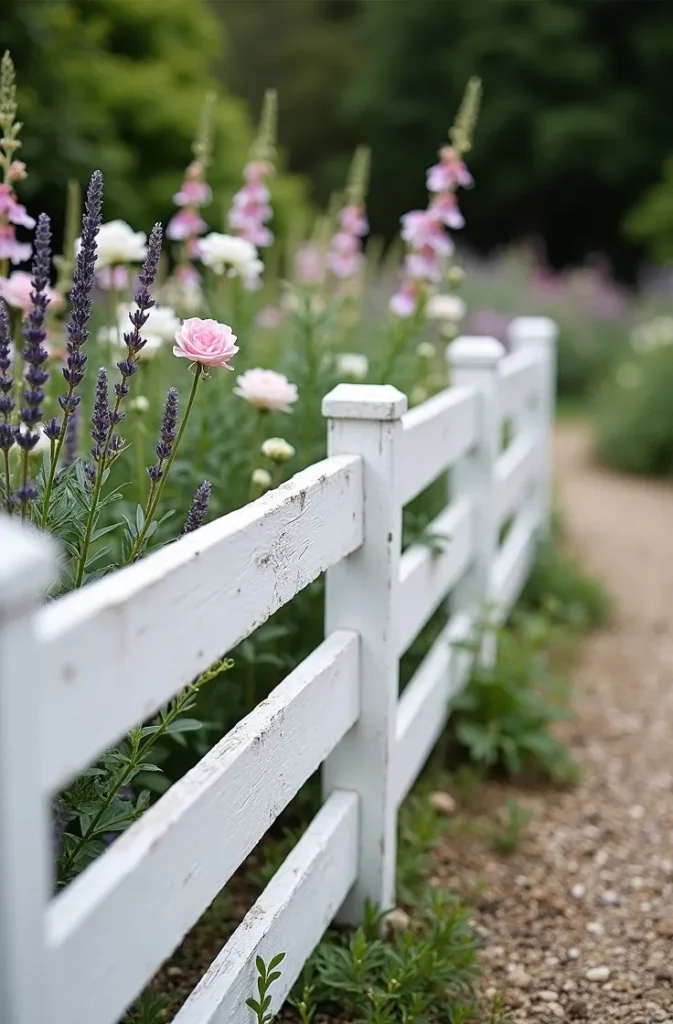
At 36 to 48 inches, this fence functions as a visual border and light animal deterrent, not a security perimeter. It is the correct height for garden bed separation, patio edge definition, and decorative yard division. Using it where true privacy is needed — at street or property line — is a common misapplication that leads to disappointment.
Disassemble the pallets before building a low border fence. Working with individual boards cut to consistent lengths and spaced on a simple 2×4 top-rail and bottom-rail frame gives you control over spacing, height, and alignment that full-pallet construction cannot provide at this scale.
3. Pallet Fence With Built-In Planter Boxes at Post Bases
Adding a built-in planter box at each post base along a pallet fence transforms a utilitarian structure into a planted feature that improves with every growing season. The planter boxes are built from the same pallet lumber as the fence panels, creating material consistency, and they serve as additional ballast for the post bases in soft soil conditions.
Build the planter boxes from disassembled pallet boards using 1×4 or 1×6 lumber cut to matching lengths. Line the interior with landscape fabric stapled to the frame before filling with soil — this prevents soil from pushing out through the board gaps while allowing drainage. Do not use plastic sheeting as a liner; it traps water and causes the wood to rot from the inside out within two seasons.
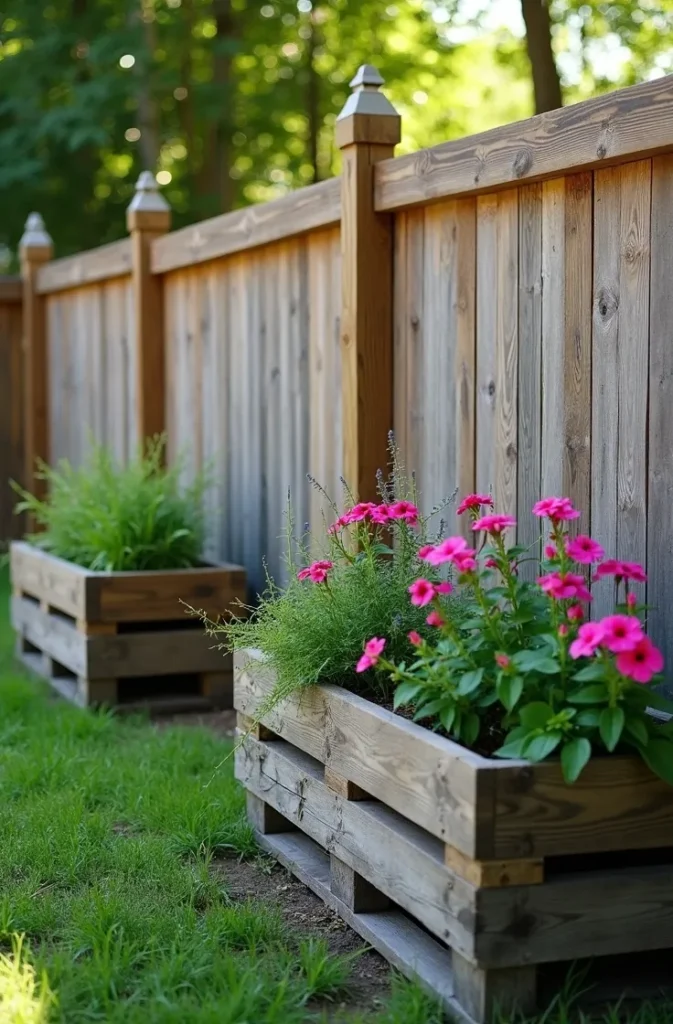
Size the planter boxes to match the post spacing. A 12-by-12-inch square planter at each 8-foot fence post creates a proportionate rhythm without overwhelming the fence. Larger planters at wider spacing look sparse. Smaller planters feel token. The 12-by-12-inch format accommodates annuals, herbs, compact perennials, and small ornamental grasses — all plants that provide meaningful visual contribution at fence base level.
This combination design is one of the most pinnable brilliant DIY pallet fence ideas because it photographs well at every season. Plant for spring-to-fall succession — bulbs for spring, annuals for summer, ornamental kale or grasses for fall — and the fence base remains visually active throughout the growing year.
4. Painted Black Pallet Fence as a Bold Garden Backdrop
A pallet fence painted in matte exterior black creates one of the most effective garden backdrop structures available without professional construction. The dark surface makes the greens, whites, and warm tones of plants in front of it appear more saturated and three-dimensional — the same effect used in high-end garden design and commercial plant nursery displays.
Sand the pallet boards before painting. Rough pallet wood holds exterior paint adequately, but sanding to 80-grit removes splinters, loose fibers, and surface contamination that cause paint to peel prematurely. Apply one coat of exterior primer followed by two coats of exterior matte black paint. Gloss or semi-gloss black on rough wood looks industrial rather than designed — matte is the finish that reads as intentional.
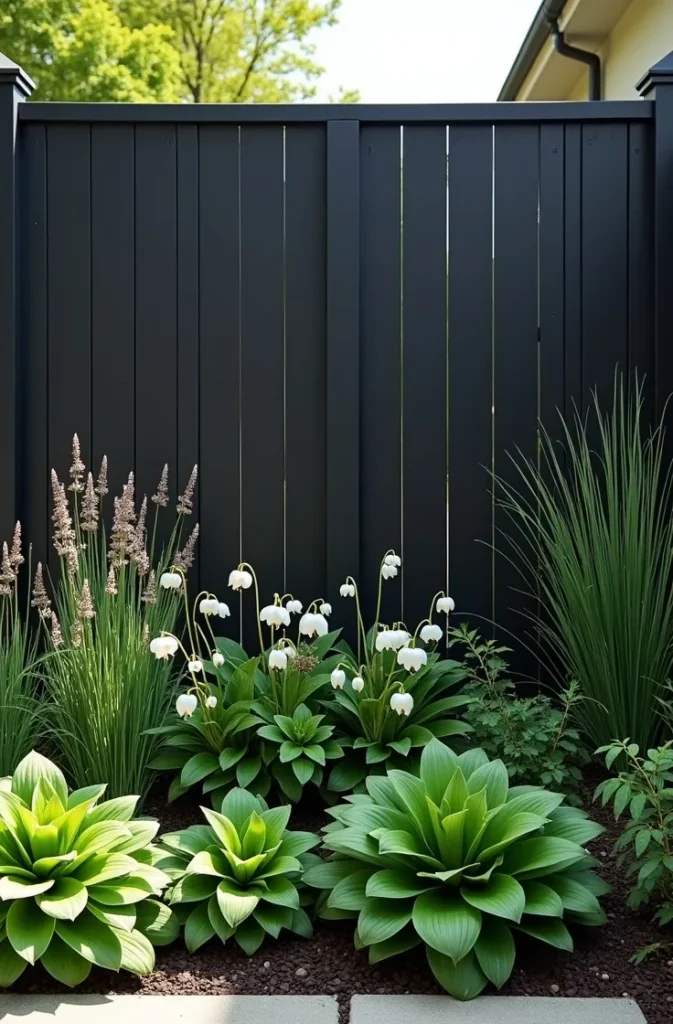
This design works best as a rear border fence at the back of a planting bed, not as a front yard or street-facing fence. The boldness of a full black fence is an asset in a garden context but can appear aggressive or heavy at the street edge of a residential property where softer, more neutral finishes are more appropriate.
Use this approach when your garden planting is already established and you want to elevate its visual impact without replanting. A row of white flowering shrubs, ornamental grasses, or a mixed perennial border in front of a matte black pallet fence photographs and presents as a dramatically more designed space than the same plants against a brown wood or gray fence.
5. Horizontal Pallet Board Fence in a Modern Ranch Style
Disassembling pallets and reassembling the boards horizontally on a standard post-and-rail frame creates a modern ranch-style fence that reads as contemporary rather than salvaged. The horizontal orientation changes the visual language of pallet wood entirely — the same boards that look rough and utilitarian when stacked vertically read as clean and architectural when run horizontally with consistent spacing.
The rail frame for horizontal fence boards requires posts at closer spacing than a standard fence — six feet maximum between posts rather than eight. Horizontal boards spanning more than six feet without mid-span support will bow over time, particularly in climates with high humidity or significant seasonal moisture variation. Build the frame correctly and the horizontal boards stay straight indefinitely.
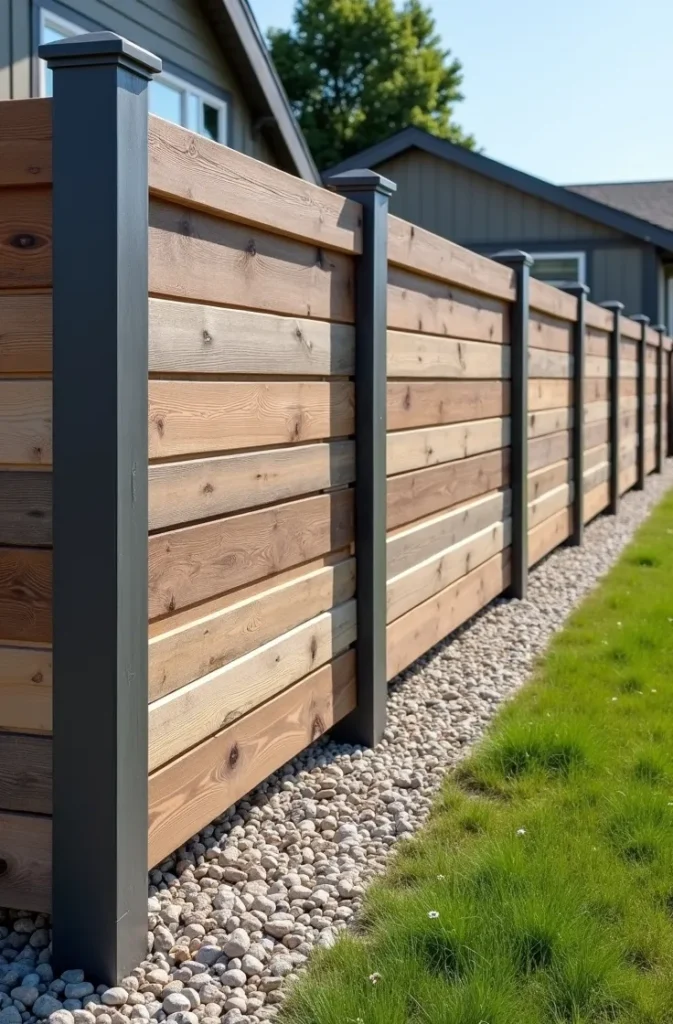
Spacing between horizontal boards is a design decision with both aesthetic and functional consequences. A 1.5-inch gap between boards is tight enough to block most direct sightlines while allowing airflow. A 3-inch gap creates a more open, decorative feel suitable for a garden border where privacy is less critical. Gaps under one inch trap debris, hold moisture, and create conditions for accelerated rot at the board edges.
Finish horizontal pallet board fencing in a solid semi-transparent stain rather than paint. Stain penetrates the wood rather than forming a surface film, which means it does not peel when the wood expands and contracts seasonally. For a modern ranch look, a warm gray or driftwood-tone semi-transparent stain is the most versatile and contemporary finish.
6. Pallet Fence With Lattice Top Section for Climbing Plants
A pallet fence with a 12 to 18-inch lattice panel added above the full pallet section creates a two-stage fence that reaches privacy height while providing a trellis surface for climbing plants at the top. The climbing plants soften the fence profile, add seasonal color, and make the pallet fence look like a planned garden feature rather than a budget solution.
Build the solid pallet base section first and set the posts at the final height needed — including the lattice topper. Retrofitting lattice above a completed fence that was cut to the wrong post height is significantly more difficult than planning the full height from the start. Add 18 inches to your fence post height calculation to accommodate the lattice panel and its frame.
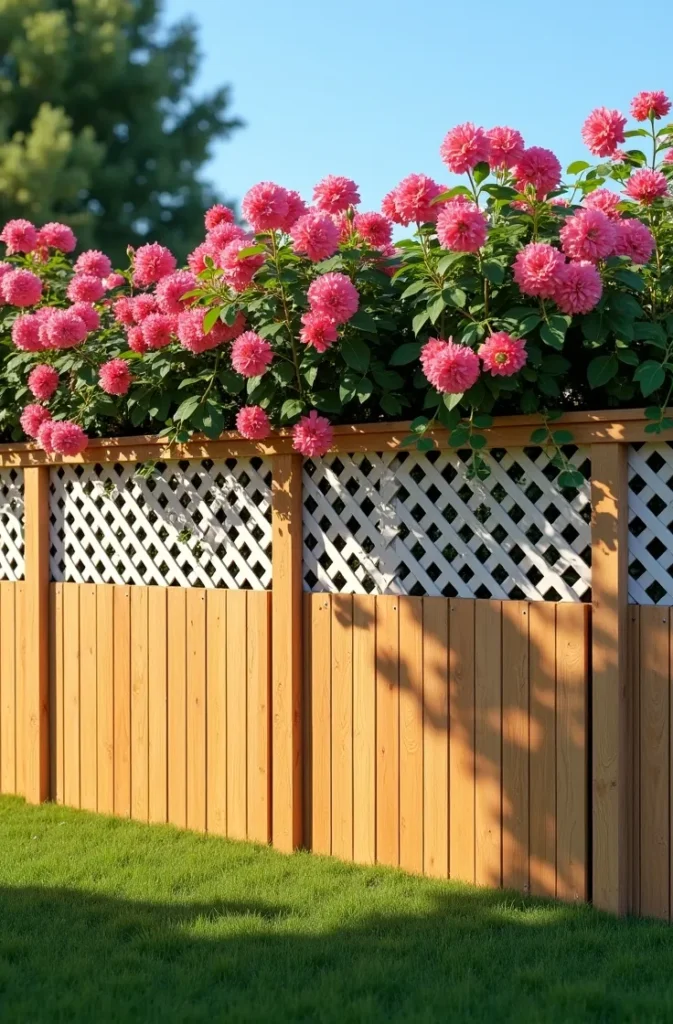
Choose annual or perennial climbers based on your privacy timeline and maintenance preference. Annual climbers — morning glory, sweet pea, black-eyed Susan vine — cover a lattice panel in a single season and require replanting each spring. Perennial climbers — climbing hydrangea, coral honeysuckle, or Virginia creeper — take two seasons to reach coverage but return each spring without replanting after establishment.
Avoid wisteria on a pallet fence lattice topper. Wisteria is a vigorous grower that reaches significant weight within two to three seasons, and a pallet fence structure is not engineered for the combined load of mature wisteria growth and wind. Use it on a properly engineered pergola structure instead.
7. Weathered Gray Pallet Fence for a Coastal or Beachside Yard
Allowing a pallet fence to weather naturally to gray is the correct finishing choice for coastal and beachside properties where a weathered, driftwood aesthetic suits the environment. Trying to maintain a fresh-stained finish in a salt-air, high-humidity coastal setting requires constant re-application — letting the wood gray naturally is lower maintenance and more visually appropriate.
The weathering process on raw cedar or pine pallet wood takes six to eighteen months depending on sun exposure and moisture levels. To accelerate the weathering to a consistent gray without waiting, apply a single diluted wash of iron acetate solution — a DIY solution made from steel wool dissolved in white vinegar — brushed onto the raw wood. It reacts with the wood’s natural tannins and produces an even gray tone within 24 hours.
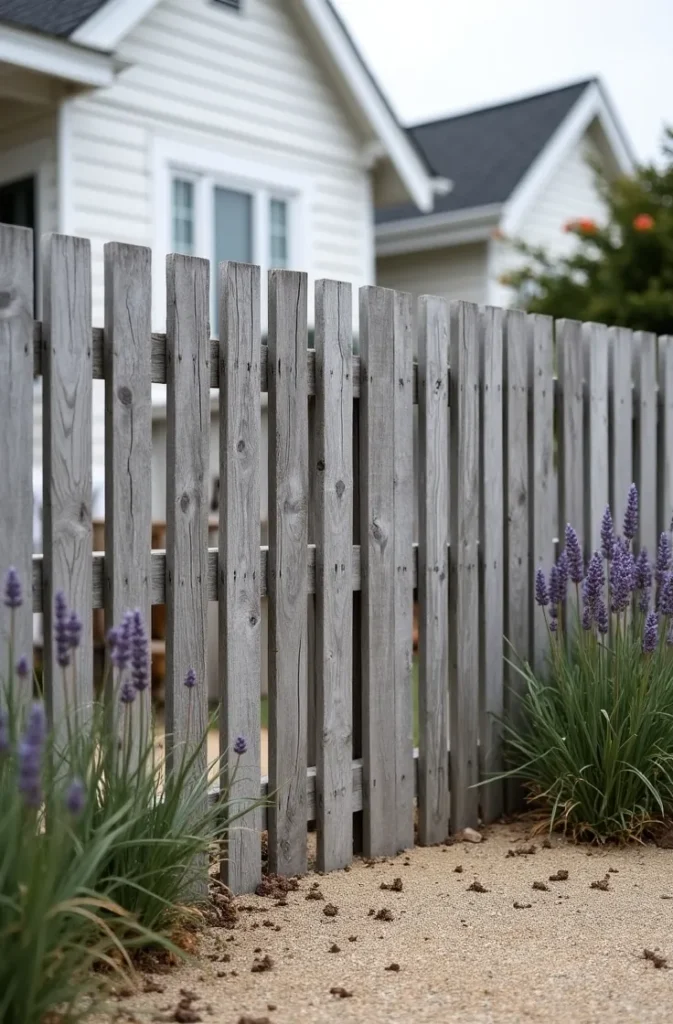
For coastal applications, the post footings are more critical than in inland settings. Saltwater environments accelerate metal corrosion and wood decay at ground contact points. Use hot-dipped galvanized post base hardware, pressure-treated posts rated for ground contact (UC4B classification), and set posts in concrete that extends above grade by at least two inches to prevent moisture wicking into the post base.
A weathered gray pallet fence pairs naturally with white-painted trim on a nearby structure, coastal plantings like ornamental grasses, sea lavender, or beach roses, and a natural gravel or shell aggregate ground surface. This combination produces a cohesive coastal yard that requires minimal ongoing maintenance.
8. Pallet Fence Panel as a Freestanding Outdoor Privacy Screen
A single pallet panel, framed and mounted on heavy weighted feet, functions as a portable outdoor privacy screen that can be repositioned seasonally without post installation or ground anchoring. This approach is ideal for renters, homeowners with HOA restrictions on permanent fencing, or anyone who wants to test a placement before committing.
Build the freestanding frame from pressure-treated 2×4 lumber forming a rectangle around the pallet panel. Attach the weighted feet — concrete-filled steel base plates or heavy planter box bases filled with ballast stone — at the bottom of the vertical frame members. The combined weight of frame, pallet panel, and ballast needs to exceed 60 pounds per linear foot of fence height to resist tipping in moderate wind.
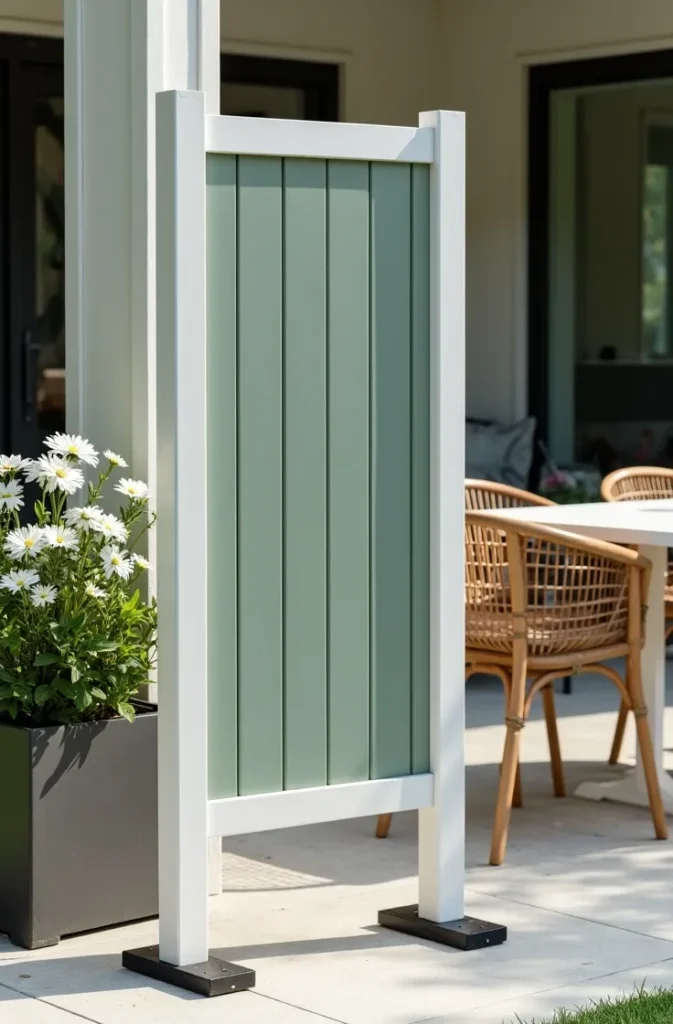
A single six-foot-tall by four-foot-wide freestanding pallet screen works well as a point privacy solution — blocking a specific sightline from a neighbor’s window, screening a utility area from a patio seating zone, or defining one edge of an outdoor dining area. It is not a perimeter privacy solution and should not be used as one.
For seasonal use, store freestanding screens in a covered area during winter or paint them with an exterior waterproof finish before leaving them outdoors year-round. Untreated pallet wood on a freestanding screen that sits on a hard surface without air circulation beneath it will rot at the contact points within two seasons.
9. DIY Pallet Fence With String Light Integration
Integrating outdoor string lights into a pallet fence build extends the functionality of the fence from a daytime structure into an evening ambient lighting feature. The pallet slats and rail members provide natural anchor points for string light hooks, and the irregular wood surface diffuses the light warmly rather than reflecting it harshly.
Run the string light wire along the top rail of the fence, using screw-in cup hooks at 12-inch intervals to keep the wire neat and tensioned. Plug-in string lights are the simplest integration — a single outdoor-rated extension cord from a GFCI-protected exterior outlet runs along the inside face of the fence where it is not visible from the yard. Hardwired integration connected to a low-voltage outdoor circuit is more permanent and cleaner, but requires an electrician for safe installation.
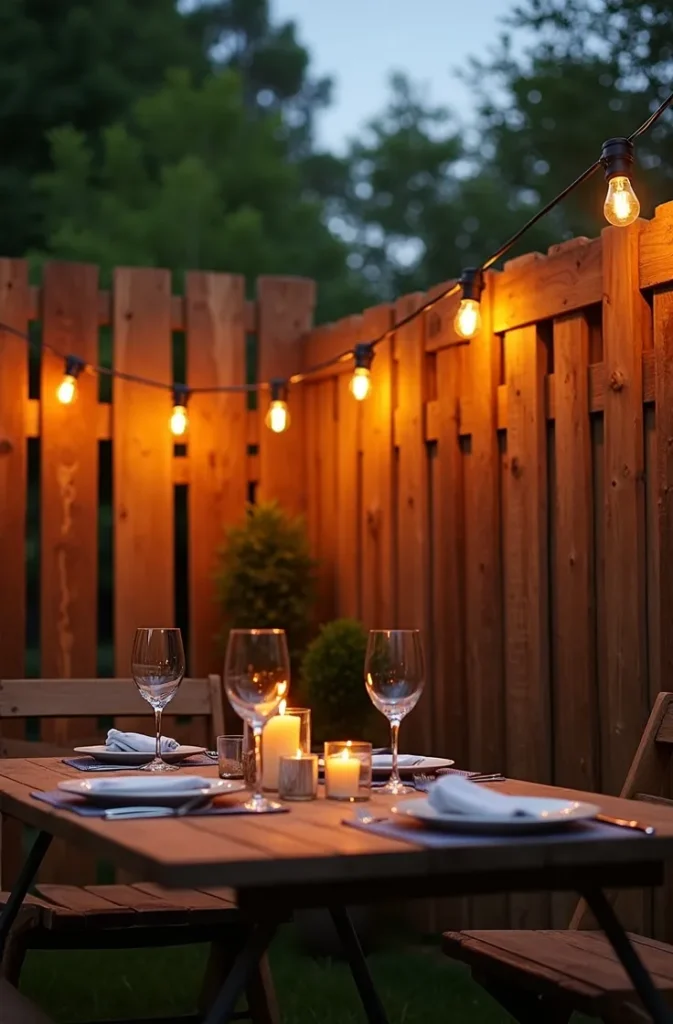
Warm white bulbs at 2700K color temperature suit the wood texture of a pallet fence most naturally. Cool white or daylight bulbs at 5000K read as clinical against warm wood tones. Edison-style filament bulbs spaced 12 inches apart on a black wire are the most compatible pairing aesthetically with the raw or stained pallet wood surface.
Position the fence so the string-lit face is oriented toward the primary seating area. A pallet fence that runs parallel to the main patio edge and faces inward toward the seating zone creates an intimate lit backdrop for evening entertaining. The same fence facing outward provides ambient light for the yard but serves the entertainment function less effectively.
10. Raised Pallet Garden Bed Integrated With Fence Section
A raised garden bed built from pallet lumber and attached to the inside base of a pallet fence section creates a dual-function structure where the fence both encloses the bed and provides a trellis surface for vertical growing above. This integration uses the same footprint for two purposes — fence and garden — which is particularly valuable in small urban or suburban yards.
Build the raised bed from disassembled pallet boards, not from full pallets. Whole pallets used as raised bed walls have too many gaps for soil retention and structural consistency. Disassemble the pallets and recut the boards to the bed dimensions you need — a 12-inch-deep bed wall from double-layered 1×6 pallet boards provides adequate soil depth for most vegetables and perennials.
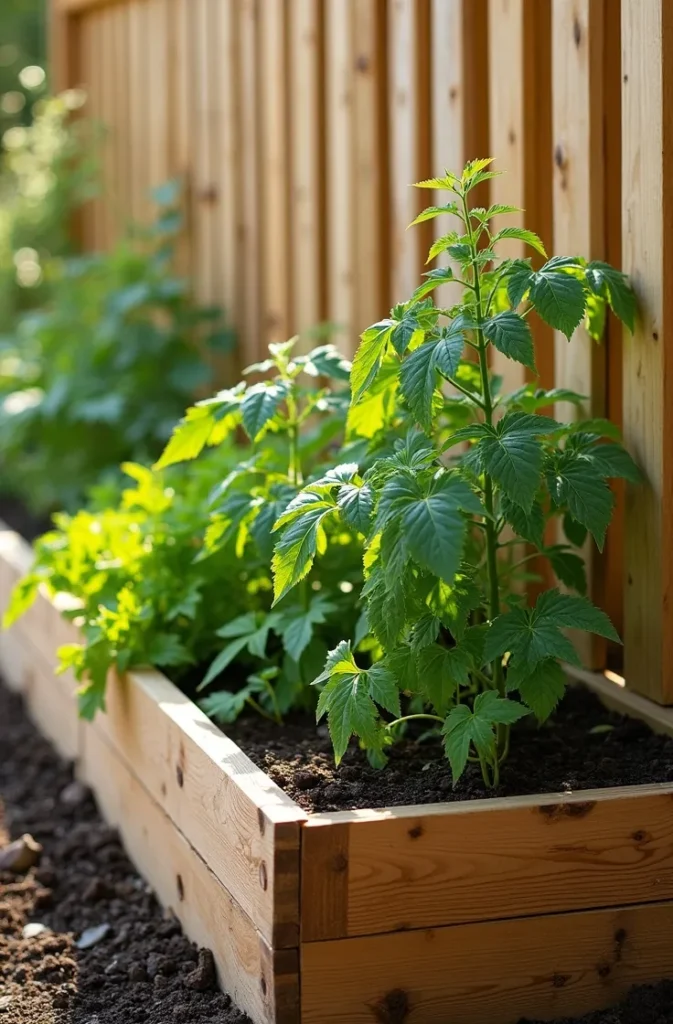
Line the interior of the raised bed with landscape fabric, not plastic sheeting. Landscape fabric allows drainage while retaining soil. Plastic sheeting creates anaerobic, waterlogged conditions that destroy plant roots within a single season regardless of how good the soil mix is.
Locate the raised bed on the south or east face of the fence so it receives maximum morning and early afternoon light. A raised bed on the north side of a pallet fence will be shaded by the fence structure for most of the day — a significant limitation for vegetable growing. This is the planting context where fence orientation determines growing success more than soil quality.
11. Pallet Fence Gate With Diagonal Brace: How to Build One That Stays Square
A gate is the most structurally demanding element of any fence, and pallet wood gates built without a diagonal internal brace will rack and sag within months. A proper diagonal brace — running from the bottom hinge corner to the top latch corner of the gate frame — transfers the weight of the gate into compression along the brace, keeping the gate square indefinitely.
Build the gate frame from 2×4 lumber rather than pallet boards. The gate frame carries the structural load; pallet boards are applied to the frame surface as cladding only. Using pallet stringers as the primary gate frame members introduces the warping and twist inherent in pallet lumber into the most movement-sensitive part of the fence structure.
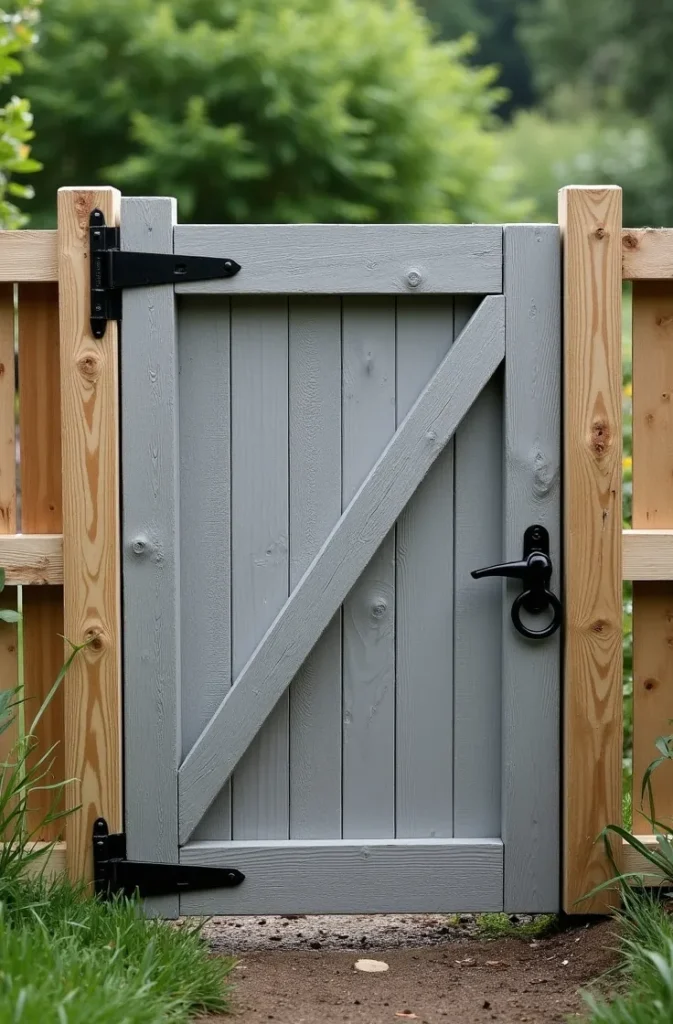
Use heavy-duty 3.5-inch exterior strap hinges with a minimum of three screws per mounting flap. Two-screw hinges on a pallet gate will pull loose within one season. Mount the hinges to a structural post, not to another pallet or a fence rail — the post is where the load transfers to the ground. A gate hung from a non-structural pallet panel will lean and bind within weeks.
Include a cane bolt at the bottom of a double gate, or a gravity latch on a single gate, from day one. A gate left without a fastening mechanism swings freely in wind, overstressing the hinges and racking the frame in ways that cannot be corrected once the wood takes a set.
12. Pallet Fence With Chalkboard Panel Sections for Family Yards
Inserting chalkboard-painted pallet panels at intervals in a family backyard fence creates an interactive, functional surface for children that integrates directly into the fence structure without requiring a separate freestanding board. The chalkboard panels replace one or two standard pallet sections in the fence run and are finished with exterior chalkboard paint over a smooth plywood backing mounted within the pallet frame.
Use 3/4-inch exterior-grade plywood as the chalkboard substrate, not the pallet boards themselves. Rough pallet wood creates an unusable chalkboard surface regardless of how many paint coats are applied. The plywood panel sits flush within the pallet frame opening, painted with two to three coats of exterior chalkboard paint in black or charcoal green.
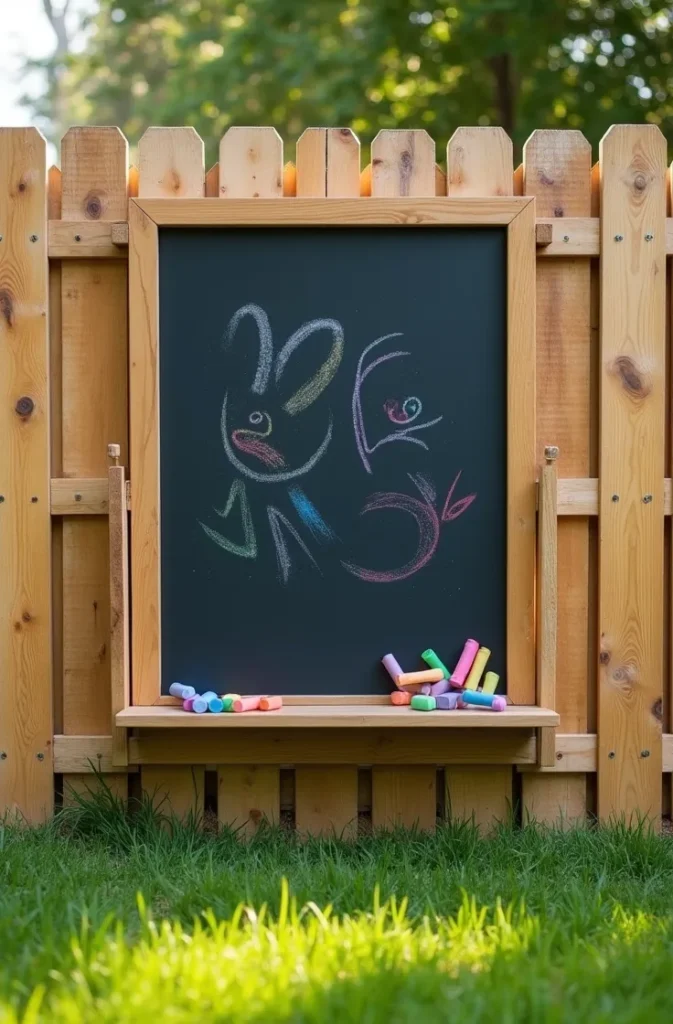
Mount the chalkboard panels at a height appropriate for the age of the children using them. A 36-inch starting height from the ground suits children aged three to eight. For older children and teens, a 48-inch starting height is more functional. Include a small ledge or hook below the panel for chalk and eraser storage — chalk left on the ground disappears quickly.
Seal the perimeter of the plywood panel with exterior caulk where it meets the pallet frame to prevent water infiltration. Unsealed plywood edges in an outdoor setting delaminate within one to two seasons, destroying the panel. This one sealing step, completed at installation, determines whether the chalkboard panel lasts one season or many years.
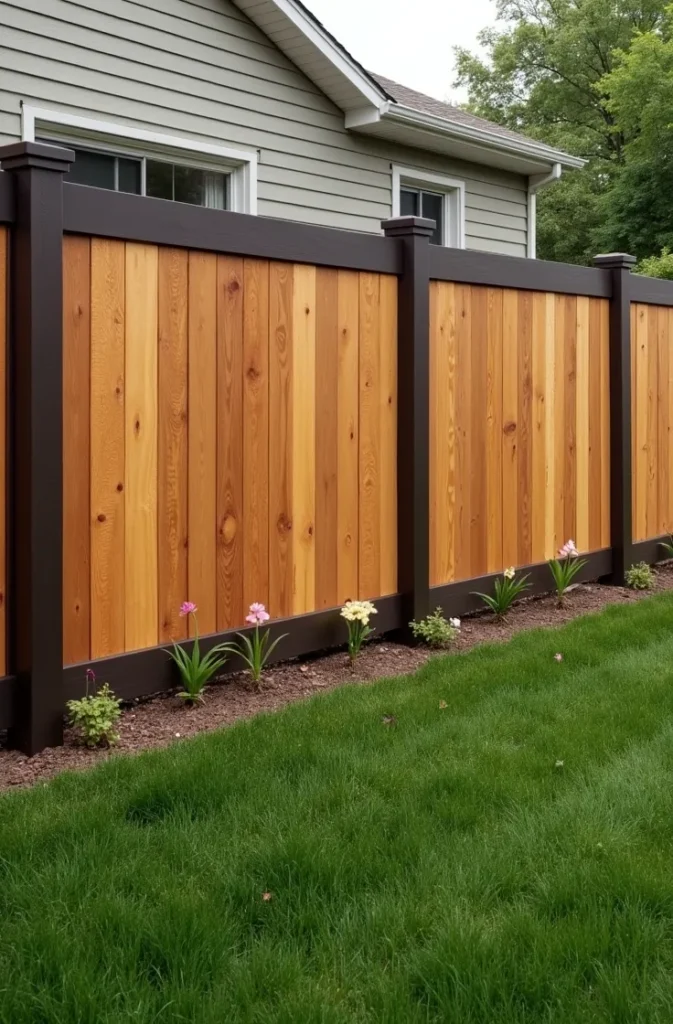
13. Two-Tone Stained Pallet Fence for a Designer Yard Look
Applying two complementary stain colors to a pallet fence — one color on the fence body, a contrasting color on the post faces and top rail — creates a designer, intentional appearance that elevates the finished fence significantly above the standard single-color DIY result. The two-tone technique is the same principle used in high-end painted furniture, where body and trim colors are treated as distinct elements.
Choose stain colors from the same tone family rather than contrasting opposites. A warm medium brown body with a dark espresso top rail and posts reads as rich and cohesive. A light driftwood gray body with a white-washed top rail reads as coastal and refined. Pairing a warm body color with a cool trim color creates a tension that reads as a color mistake rather than a design choice.
Apply the body color first across all fence panels. Allow full drying time — at least 48 hours in moderate temperatures — before applying the trim color to posts and rails. Masking the panel edges with painter’s tape before applying the trim color produces a clean line. Working without masking on rough pallet wood creates a messy transition that undermines the design intent.
This is one of the most effective brilliant DIY pallet fence finishing techniques for homeowners who want a result that looks planned and considered rather than improvised. The additional material cost is minimal — typically only a quart of the second color is needed for posts and rails — and the visual impact is disproportionately large.
14. Corrugated Metal and Pallet Wood Combo Fence
Combining corrugated metal panels with a pallet wood frame creates a mixed-material fence that references modern industrial and contemporary farmhouse aesthetics simultaneously. The metal panels sit within a pallet-lumber frame — typically one to two corrugated panels per fence bay — and the combination of raw metal and warm wood is one of the most visually effective DIY fencing approaches available without professional construction.
Use galvanized corrugated metal panels rated for exterior fence use. Standard corrugated roofing panels work adequately but are designed for roof application and may have pre-drilled holes that require covering. Flat corrugated fence panels designed for vertical installation are the cleaner choice and are available from most farm and ranch supply retailers.
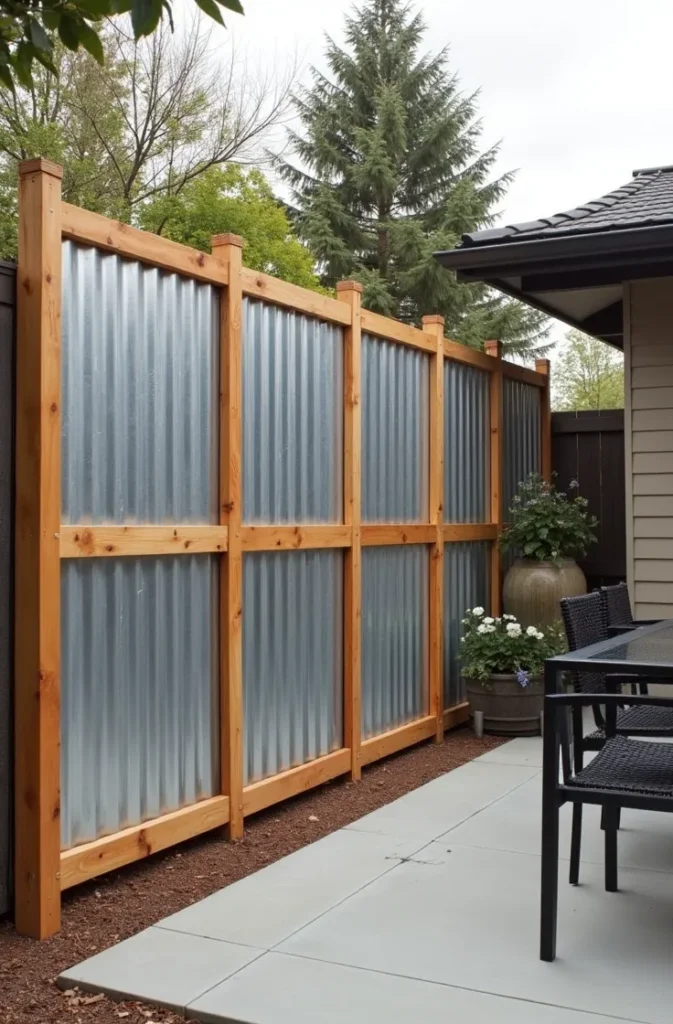
Attach the metal panels to the wood frame using appropriate metal roofing screws with neoprene washers — the washer creates a weatherproof seal at each fastener point. Using standard wood screws in corrugated metal leaves unsealed holes that rust and allow water infiltration behind the panel. The correct fastener is the difference between a fence that holds up for a decade and one that looks deteriorated within two seasons.
Seal the top edge of each corrugated panel with butyl tape to prevent water from channeling down into the wood frame below. Water running off the top of a metal panel directly onto a wood rail member creates a persistent wet zone that rots the rail from above. This single detail extends the wood frame lifespan significantly in any climate with regular rainfall.
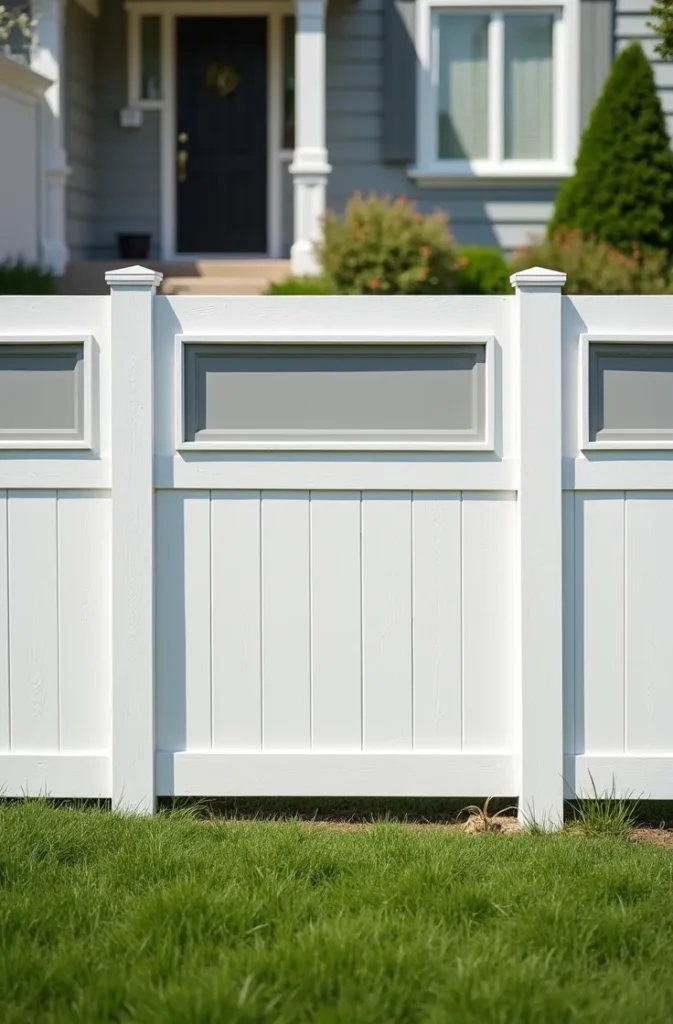
15. Pallet Fence With Decorative Cutout Panels for Front Yard Curb Appeal
Introducing a decorative element — a simple geometric cutout, a recessed square panel, or a shadow-box inset — into a pallet fence section creates visual interest that elevates the structure from functional boundary to designed landscape feature. This approach works best in front yard applications where the fence is viewed from the street and curb appeal is the primary objective.
A shadow-box inset — a recessed square frame applied to the face of a fence panel — is the simplest decorative addition and requires no cutting through the fence surface. Build a simple square from 1×4 pallet lumber and apply it face-mounted to the pallet panel using exterior construction adhesive and finish nails. Painted in a contrasting color to the fence body, the inset frame creates a furniture-like detail at minimal cost.
Geometric cutouts — circles, diamonds, or chevron patterns cut through the fence boards — require a jigsaw and accurate marking but add a level of craft that makes the fence look commissioned rather than DIY. Practice the cut on scrap pallet lumber before cutting the visible fence panel. Pallet wood is variable in density — a smooth cut on one board may tear on the next if feed speed is not adjusted.
Front yard pallet fences with decorative details should be finished in paint rather than stain for the most polished street-facing appearance. A solid painted finish in a color that complements the home exterior reads as a finished architectural element. A stained or natural finish in a front yard context requires more consistent maintenance to avoid looking weathered or neglected.
16. Angled-Top Pallet Fence for a European Garden Feel
Cutting the tops of pallet fence boards at a consistent 45-degree angle creates a picket-style pointed profile that evokes the look of European kitchen and cottage gardens without sourcing or cutting traditional picket fence lumber. The angled cuts are made with a circular saw or miter saw set to 45 degrees, applied to each board after the pallet has been assembled into a fence panel frame.
Mark a center line on each board top before cutting. The angled cut on each side meets at the center to form a point. Inconsistent center lines produce uneven points that read as sloppy even from a distance. Use a speed square to mark each board before cutting — the thirty seconds of marking time per board produces a level of consistency that makes the finished fence look machined rather than hand-built.

Paint this style of fence in a traditional white or cream for the most authentic European garden look. French blue, soft sage green, and matte black are secondary color options that suit the profile well. The pointed picket top in an unexpected color — particularly soft sage against a green garden — has high Pinterest visual impact and saves consistently well.
This design is particularly effective at defining a front garden from a public path or sidewalk at 36 to 48 inches height. The pointed tops add visual height without requiring additional materials, and the European garden association makes the fence feel like a design choice rather than a budget constraint.
17. Dog-Ear Pallet Fence Panel With Cap Rail for a Polished Finish
Adding a cap rail — a horizontal 2×4 or 2×6 lumber member running flat across the top of the fence posts and pallet panels — gives a pallet fence the same finished profile as a professionally built cedar fence. The cap rail covers the uneven board tops typical of pallet construction, protects the fence structure from direct rainfall, and creates a clean horizontal line that unifies the entire fence run.
Cut the pallet boards to a consistent height — typically 72 inches from grade — before assembly. Variable board heights under a cap rail are less visible than on an exposed top, but significant height differences will telegraph through the cap rail as unevenness. Aim for consistency within half an inch across all boards in a panel section.
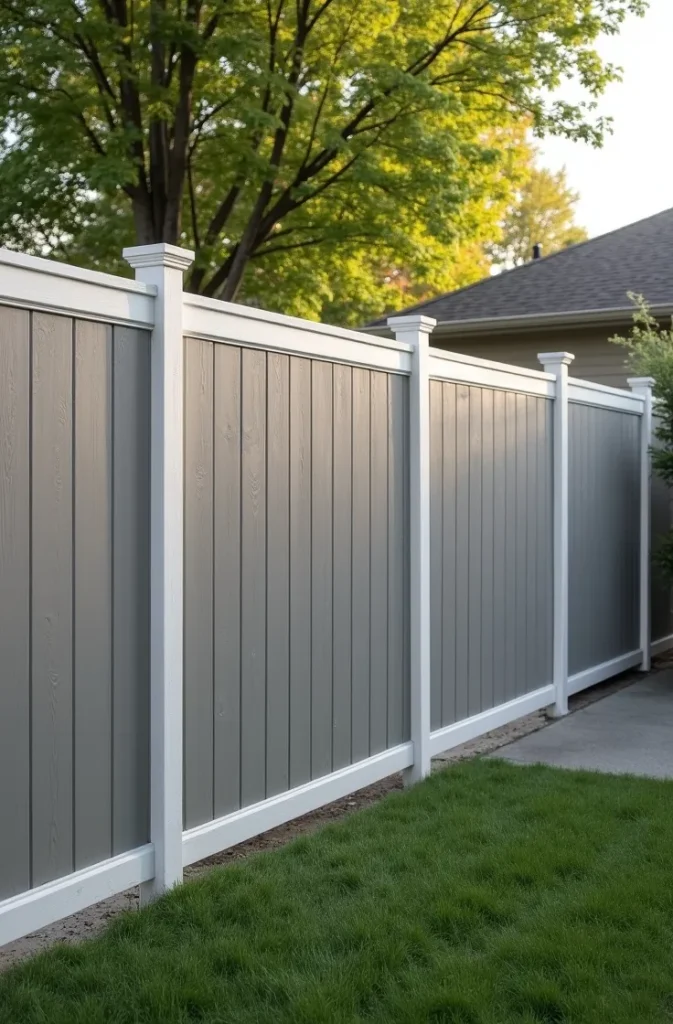
The cap rail itself should overhang each post face by one inch on both sides and be cut at a 10-degree bevel on the top surface to shed water. A flat cap rail holds standing water that accelerates rot at the center. A beveled or peaked cap rail drains immediately and dries between rain events. This detail adds five to ten minutes of work per rail section and extends the lifespan of the entire fence top significantly.
Finish the cap rail in a contrasting paint or stain to the fence body for a two-tone effect, or match the body finish for a monolithic appearance. A white cap rail on a gray fence body is the most versatile combination — it reads cleanly in photographs, complements nearly any home exterior color, and is the finish most often associated with a well-maintained residential property.
18. Pallet Fence Painted in Deep Navy for a Bold Backyard Statement
A pallet fence finished in deep navy blue exterior paint is one of the most visually striking brilliant DIY pallet fence applications for a contemporary or coastal-influenced backyard. Navy reads as confident and considered rather than neutral, and it holds its visual quality throughout the weathering cycle longer than lighter colors because fading is less dramatic on a dark saturated hue.
Use exterior satin or eggshell paint rather than matte for a navy fence. Matte navy on exterior wood chalk and dulls quickly with UV exposure and surface dirt. Satin or eggshell holds the depth of the navy color significantly longer between repaints and wipes clean more easily — relevant for a fence at garden level where soil splash is inevitable.
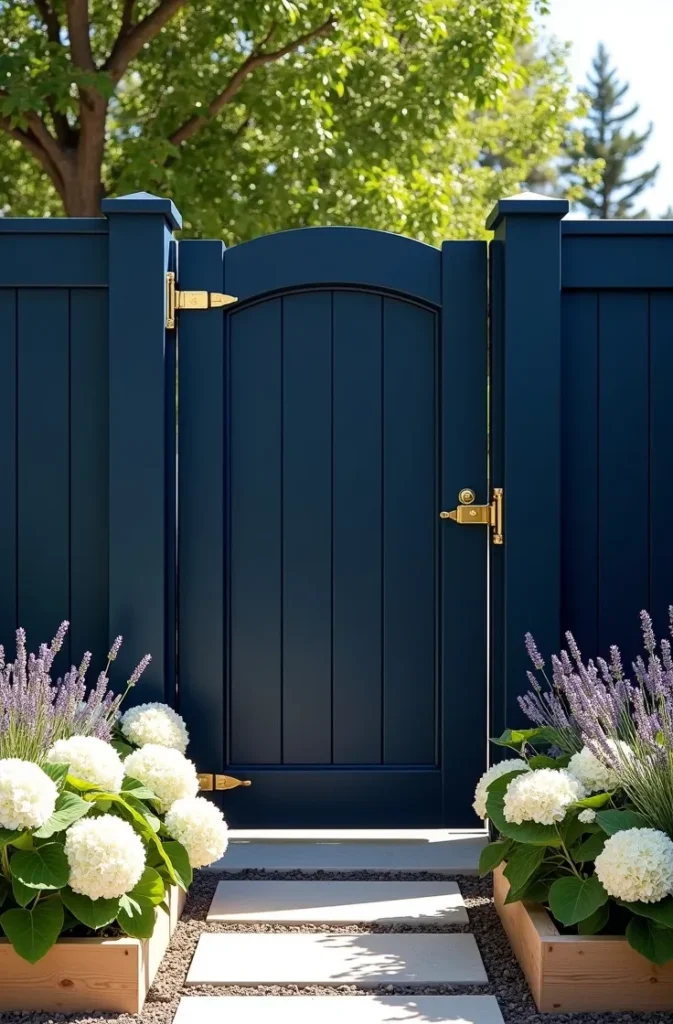
Navy pairs strongly with natural wood accents — a cedar or teak bench along the fence line, natural wood planter boxes at the base, or a warm-toned gravel surround. White or cream planting — white hydrangeas, white garden roses, white alyssum as ground cover — directly in front of a navy fence creates one of the highest-contrast, most visually dramatic garden compositions achievable with a DIY fence structure.
Avoid combining navy fence panels with chrome or bright silver hardware — the cool pairing reinforces a sterile, commercial association. Opt for brass, aged bronze, or matte black hardware on a navy fence. These warm or neutral metal tones balance the coolness of the navy and maintain the residential, designed quality of the finished result.
Final Thoughts
A brilliant DIY pallet fence is not just a budget alternative to conventional fencing — when built with the right materials, structural technique, and finish, it is a genuinely designed outdoor feature that serves your yard for years rather than seasons. The difference between a pallet fence that holds up and one that warps, rots, or leans within a year comes down to the decisions made before the first post goes in: pallet selection, post footing depth, framing method, and finish choice.
Save this post before you source materials or start building. Coming back to the right design reference during the planning and finishing stages is where most of the value in a guide like this is found — not just at the inspiration stage.
When you are ready to go further, explore DIY fence post setting guides for your soil type, exterior wood stain selection by climate zone, and outdoor climbing plant guides matched to your USDA hardiness zone. The fence is the structure — the plants and finishes are what make it a garden feature.