Summer craft decor ideas often fail not because the projects are too difficult, but because the final result lacks the design intentionality that makes handmade pieces look curated rather than casual. This guide covers 14 specific craft projects built around material decisions, proportion principles, and placement logic so your finished pieces look like they belong in your space, not on a craft fair table. Each idea includes what works, what to avoid, and exactly when the project makes sense for your home.
1. Painted Terra Cotta Pots With Geometric Patterns That Elevate Any Plant Display
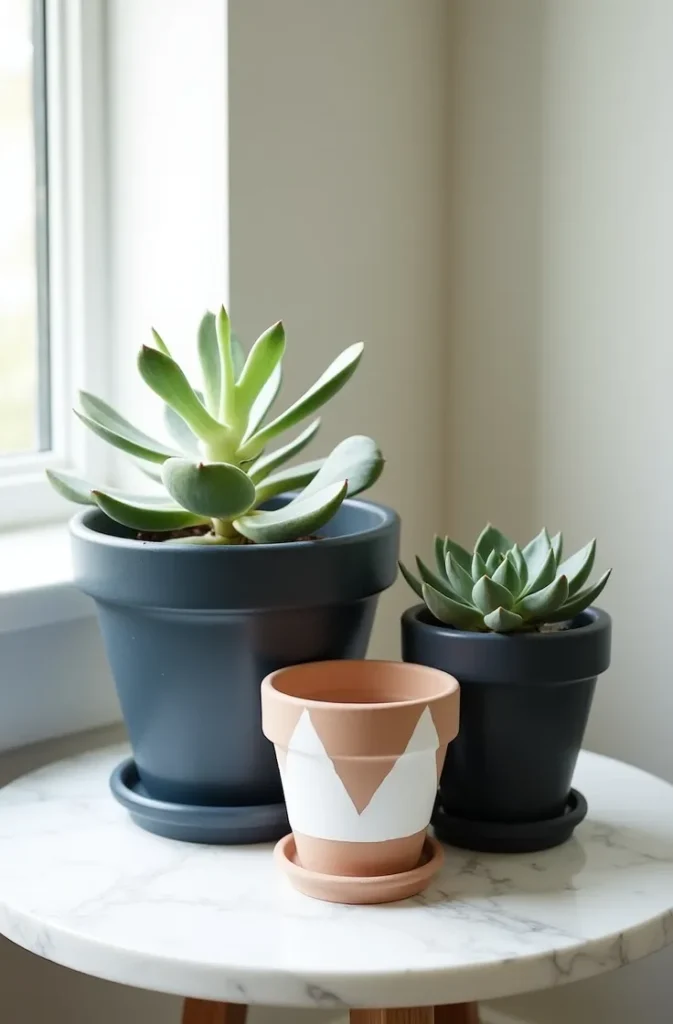
Painted terra cotta is one of the highest-return summer craft decor projects because the material cost is low, the execution is accessible at most skill levels, and the finished result, when done with restraint, reads as designed rather than decorated. The distinction between the two outcomes comes down entirely to color and pattern selection.
Limit each pot to a maximum of two colors, the base terra cotta tone counting as one if left exposed, and choose patterns with clean edges rather than freehand brushwork. Painter’s tape is the tool that separates beginner results from professional-looking outcomes. Horizontal bands, triangle sections masked with tape, and simple dipped-base techniques all produce geometric results that hold up under visual scrutiny in a way that freehand designs rarely do.

Use outdoor-rated or all-surface acrylic paint and seal with a matte clear coat rated for exterior use. Unsealed painted terra cotta exposed to summer watering will begin peeling at the paint edges within four to six weeks. The sealing step is not optional if you want the project to last a full season.
For display, group painted pots in odd-number clusters of three or five at two or three distinct heights using plant stands or inverted pots as risers. A single painted pot in isolation reads as an object. A clustered group reads as a vignette.
2. DIY Macrame Wall Hanging That Works as a Focal Point in a Bedroom or Living Room
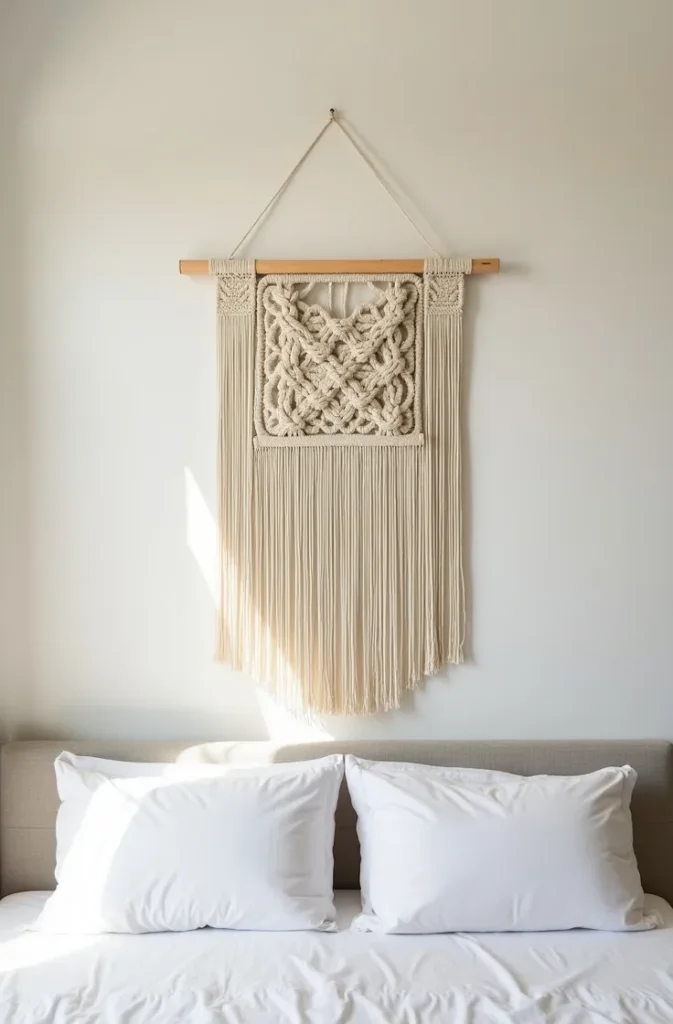
Macrame has held consistent visual relevance in American home decor for several years because it introduces natural texture and organic line work that no printed or manufactured piece can replicate. The challenge is scale. Most first-time macrame projects are too small to function as a focal point and end up looking like filler rather than a feature.
For a wall hanging to read as a focal point rather than an accessory, it needs to occupy at least one third of the available wall width above its intended placement. Above a bed, that typically means a minimum width of 24 to 30 inches for a queen-size bed, wider for a king. Above a sofa, aim for a piece that spans at least half the sofa width. Below these thresholds, the piece competes awkwardly with the furniture scale rather than anchoring it.
Use 3mm to 5mm single-strand cotton cord for a clean, modern macrame aesthetic. Thinner cord produces a delicate look that suits smaller accent pieces. Thicker rope cord reads as more rustic. The mounting dowel should be a natural wood branch or a smooth birch dowel no shorter than the finished piece width plus two inches on each side.
Keep the design in the lower two-thirds of the hanging, with a straight fringe or cut fringe at the base and a relatively open knotted body. Overly dense knotwork makes the piece read heavy and dark from a distance, which counteracts the light, airy quality that makes macrame work in summer interiors.
3. Summer Citrus Garland Made From Dried Orange and Lemon Slices That Lasts All Season
A dried citrus garland is one of the few summer craft decor ideas that is both genuinely low-cost and genuinely impressive in a finished space. The key is in the drying technique. Improperly dried citrus slices develop mold within the first week, which is the failure point most guides skip.
Slice citrus to a consistent thickness of approximately one quarter inch. Thicker slices take longer to dry and are prone to interior moisture retention. Thinner slices become brittle and crack during stringing. After slicing, blot both cut surfaces firmly with paper towels before placing on a wire cooling rack on a baking sheet. Bake at 200 degrees Fahrenheit for four to five hours, flipping the slices every 90 minutes. The finished slice should feel dry and slightly flexible, not tacky on the surface or rigid and cracked.
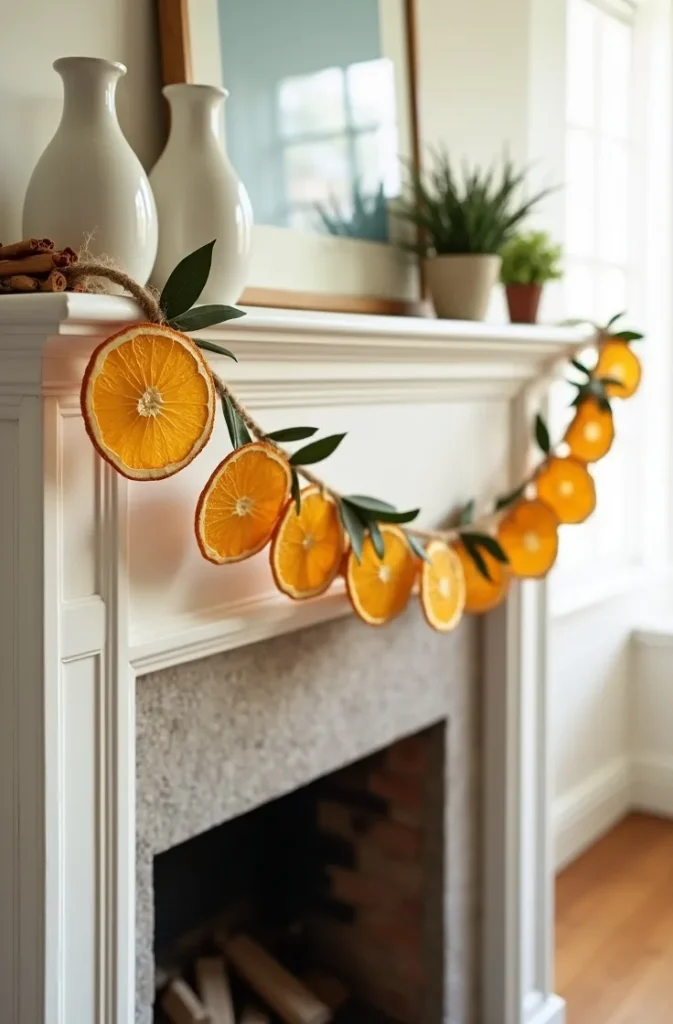
String the dried slices on jute twine, natural cotton cord, or thin wire using a large upholstery needle. Alternate orange and lemon slices with dried bay leaves, cinnamon sticks, or small dried rosemary sprigs to build a garland with visual rhythm. A garland of only citrus slices lacks textural variety and reads as single-note.
Display across a mantle, along a kitchen open shelf, draped across a window frame, or hung behind a bar cart. The garland works indoors only. Outdoor humidity will rehydrate the slices and accelerate mold growth regardless of how thoroughly they were initially dried.
4. Wax-Resist Painted Canvas Tote Bags That Double as Summer Home Storage
Painted canvas tote bags sit at the intersection of summer craft and functional home storage, making them one of the more practical summer home craft ideas in this category. In a home decorating context, a set of painted canvas totes used as plant pot covers, magazine holders, or poolside storage reads as an intentional design decision rather than a craft project when the painting is executed cleanly.
The wax-resist technique, applying melted wax or a wax crayon pattern to the canvas before painting over with fabric paint or ink, produces watercolor-effect patterns with crisp negative-space lines that look more sophisticated than direct-paint designs. The wax blocks the paint from absorbing into the canvas fibers in those areas, creating a natural-looking botanical or geometric resist pattern.
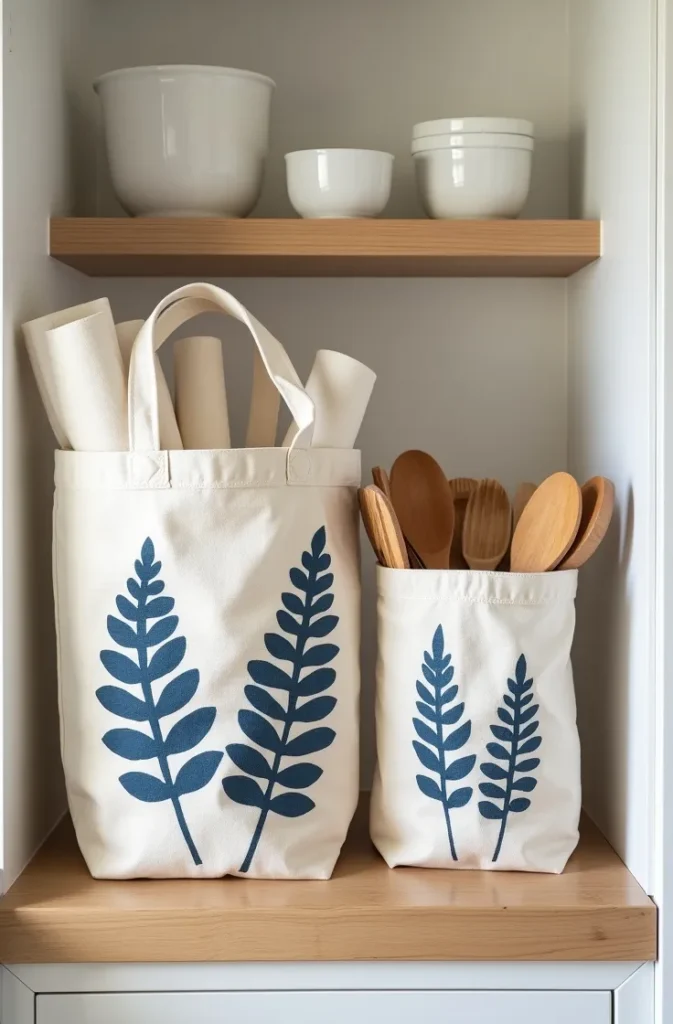
For a cohesive set, choose two canvas tote sizes, a larger market tote and a smaller lunch-size tote, and apply the same resist pattern to both in coordinating colorways. A consistent pattern across different sizes reads as a designed collection. Mismatched patterns across a set read as separate items.
Iron the finished painted tote with a paper bag between the iron and canvas surface to remove the wax residue. Skip this step and the wax will remain tacky and pick up dust and debris throughout the season.
5. Sea Glass and Pebble Mosaic Tray That Works as a Coastal Coffee Table Display
A mosaic tray made from sea glass, smooth river pebbles, or a combination of both is one of the more visually elevated summer crafts for home decor because the finished piece has the material weight and surface quality of a purchased artisan object. The functional application as a tray also means it earns a permanent display position rather than being stored after the season.
Use a plain wood tray or a thrifted serving tray as the base. Sand lightly and seal with a coat of exterior-grade primer before adhering the mosaic elements. This prevents moisture from the grout from warping or staining the wood base. Standard white tile grout works for this project, though unsanded grout is easier to apply cleanly around small irregular pieces like sea glass.
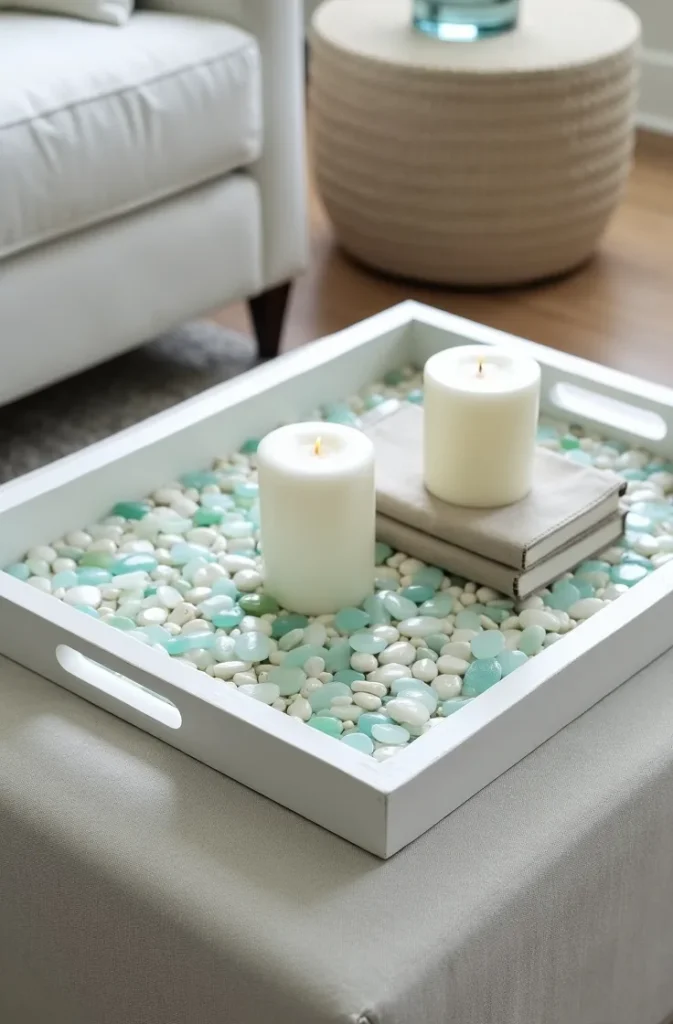
Arrange the glass and pebble pattern dry before committing to adhesive. Spend time with the layout, balancing color distribution and ensuring no single area is too dense or too sparse. The most common mistake is clustering the prettiest pieces in the center and filling the outer areas with less interesting material, which makes the tray read as having an obvious focal point rather than a considered overall composition.
Seal the finished grouted surface with a clear tile sealer after the grout cures for the recommended time, typically 24 to 72 hours. Unsealed grout on a functional tray will stain within the first use.
6. Block-Printed Linen Napkins That Upgrade an Outdoor Dining Table in One Afternoon
Block printing on linen napkins is a summer craft decor project with a very high finish-to-effort ratio because the materials are inexpensive, the technique is forgiving, and the result functions as a real, usable textile that improves every outdoor table setting through the season.
Foam stamps, carved rubber blocks, or hand-carved linoleum blocks are all viable printing tools. For beginners, foam stamps in botanical shapes, leaves, botanicals, or geometric forms, produce clean results without requiring carving skill. Apply fabric ink or fabric paint to the stamp surface using a flat foam roller rather than a brush to ensure even ink coverage. Uneven ink application is the most common cause of a blotchy or faded print.
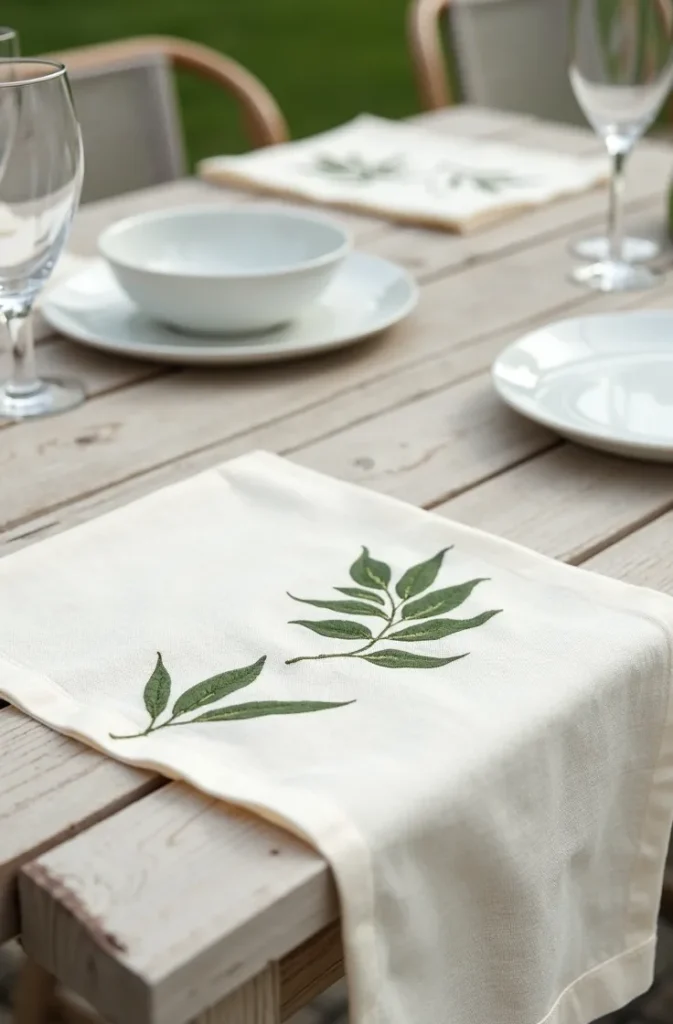
Choose linen napkins in natural, white, or a light solid color as the printing surface. Pre-wash the linen before printing to remove the manufacturer’s finish that can prevent ink adhesion. Print a single repeated motif in a consistent placement, such as one corner or one end of each napkin, rather than covering the full surface. A single well-placed motif reads as an intentional design choice. An all-over pattern on a first block-printing attempt is rarely executed with enough consistency to look deliberate.
Heat set the ink with an iron according to the fabric ink manufacturer’s instructions before washing. Skipping this step results in the print fading or washing out entirely after the first laundering.
7. Painted Glass Bottle Vase Cluster That Transforms Recycled Glass Into Shelf Decor
A cluster of painted glass bottles used as bud vases is a summer craft idea that succeeds or fails entirely on color discipline. When executed with a unified palette in two or three tones, a grouping of varied-height painted bottles reads as a cohesive decorative object. When painted in unrelated colors, the same grouping reads as a miscellaneous collection.
Select bottles at three distinct heights, a tall wine bottle, a medium olive or vinegar bottle, and a small sauce or bitters bottle. The height variation is what gives the cluster visual structure. All the same height, regardless of painting quality, reads as flat and static.
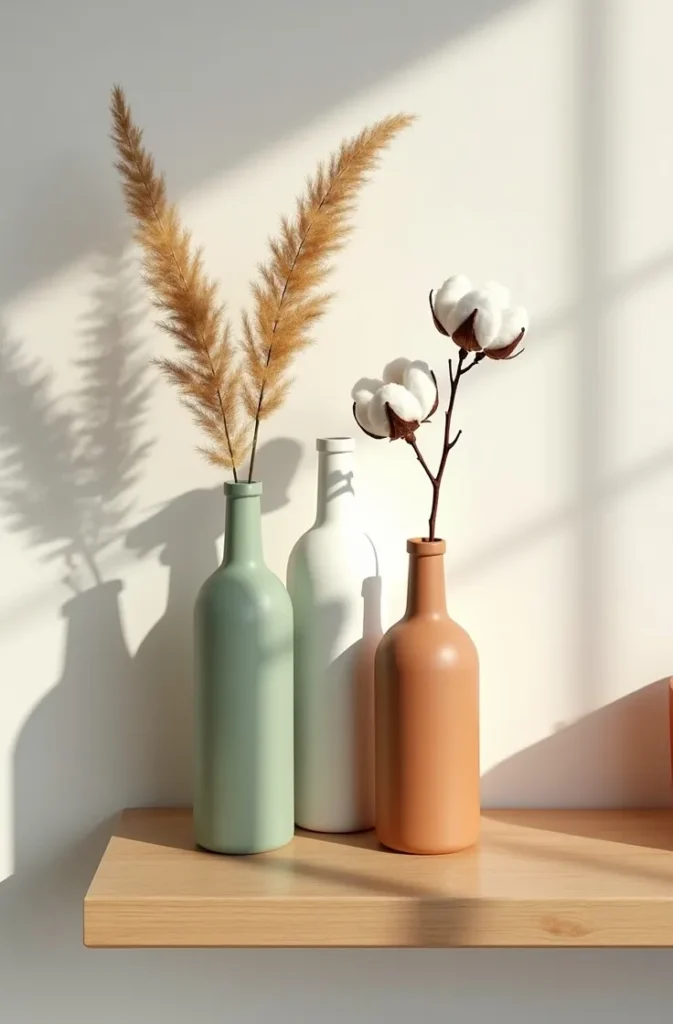
For the paint, chalk paint or spray chalk paint in matte finish adheres to glass without primer and produces the chalky, low-sheen surface that reads best in a home decor context. Glossy painted glass reflects light unevenly and has a craft-fair quality that matte finishes avoid. Apply two thin coats rather than one heavy coat to prevent dripping at the bottle curves.
Choose one accent color, one mid-tone, and one near-neutral for the three bottle heights. A cluster of white, sage green, and dusty terracotta, for example, reads as cohesive and seasonally appropriate for summer while maintaining a palette that works in most interior color schemes.
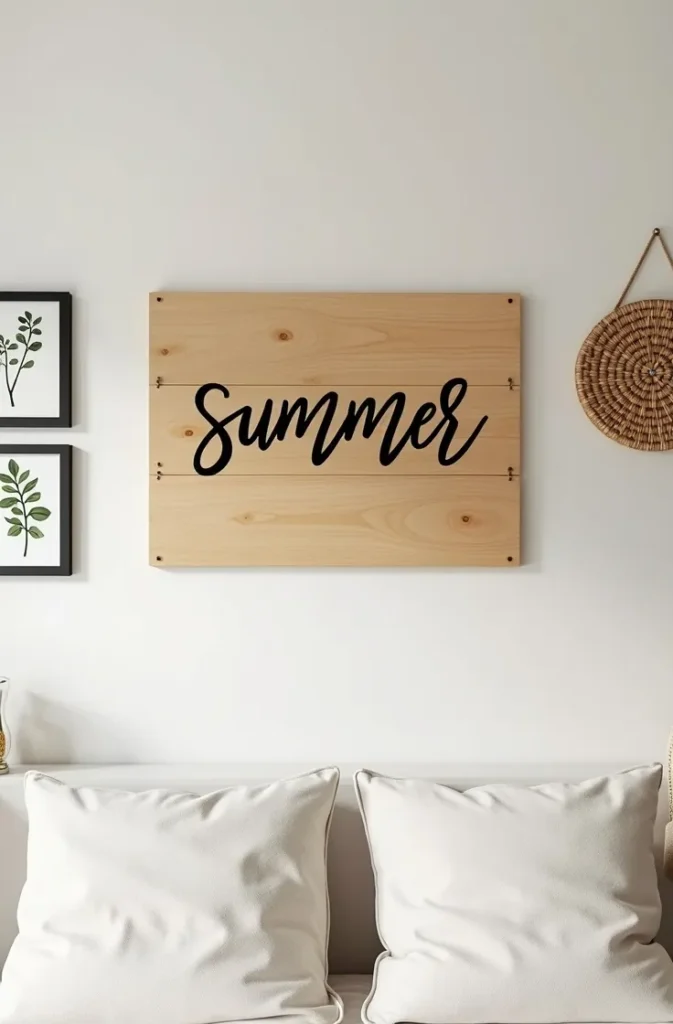
8. Hand-Lettered Wooden Signs With Summer Phrases That Work in a Gallery Wall
Hand-lettered wood signs are a well-established category of summer home craft ideas, but most fall short because the lettering itself lacks the visual confidence of a designed piece. The solution is not calligraphy skill, it is layout planning before the brush touches the wood.
Sketch the letter layout on paper first, sizing the text to fit comfortably within the wood dimensions with a minimum of half an inch of margin on all sides. Transfer the lettering outline to the wood surface using chalk or a water-soluble transfer pencil before painting. Freehand lettering directly onto the finished wood surface without a guide is the primary reason hand-lettered signs read as beginner work.
Choose a wood surface with visible grain for a natural, organic quality, or a sanded smooth plywood panel for a cleaner, more modern look. Paint the background first if using a colored backdrop, allow it to cure fully, then letter over it. Paint the background color wash in a single thin coat applied with a dry brush so the wood grain remains partially visible.
Keep the phrase itself short, three to seven words reads best at sign scale. Longer phrases require smaller lettering relative to the sign size, which reduces the visual impact from across a room. Display as part of a larger gallery wall grouping rather than as an isolated piece to avoid the standalone sign looking like a craft project in an otherwise decorated space.
9. Woven Seagrass Basket With Painted Rim Detail That Upgrades Basic Storage
A plain seagrass or rattan basket with a painted rim is a summer craft decor project that takes an ordinary functional object and converts it into a decorative one without compromising its usability. The painted rim technique requires about thirty minutes of work and produces a finished piece that retails at boutique home stores for significantly more than the cost of the base basket and paint combined.
Use a natural seagrass or woven rattan basket with a visible woven edge at the rim. Apply painter’s tape two to three inches below the rim edge, pressing the tape firmly into the weave pattern to prevent paint from bleeding under the edge. Paint the rim section above the tape with two thin coats of chalk paint or exterior acrylic, allowing full drying between coats.
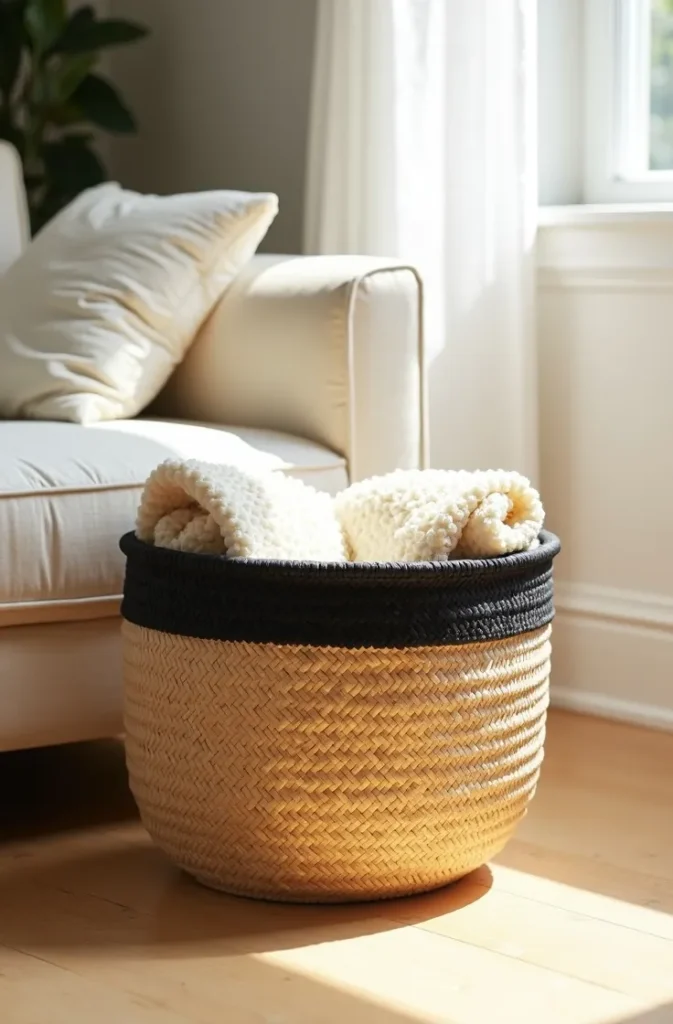
Geometric painted rim details work better than organic brushstroke designs on woven baskets because the weave texture already provides organic irregularity. A clean stripe, a thin gold metallic band, or a single solid color rim in contrast to the natural basket tone gives the piece a finished, product-quality look that freehand painted textures on top of woven texture cannot achieve.
Use the finished basket as a blanket storage piece in a living room, a plant pot cover for a medium indoor plant, or as a magazine and book holder beside a sofa. In all three applications, the painted detail reads as an intentional design accent rather than a craft addition.
10. Pressed Wildflower Resin Coasters That Look Store-Bought When Done Correctly
Pressed flower resin coasters are one of the most photographically successful summer crafts for home decor because the transparency of cured resin combined with real botanical material creates a result that photographs with a quality that few other craft projects match. The challenge is execution, and the two most common failure points are air bubbles in the resin and botanical material that was not fully dry before encasing.
Press wildflowers, ferns, or garden clippings for a minimum of two to three weeks between heavy books or in a dedicated flower press before using them in resin. Botanical material that retains any moisture will discolor or rot inside the cured resin, producing a brown deteriorated appearance rather than preserved color. Silica gel drying beads used in conjunction with pressing accelerate the process and produce more vibrant color retention.
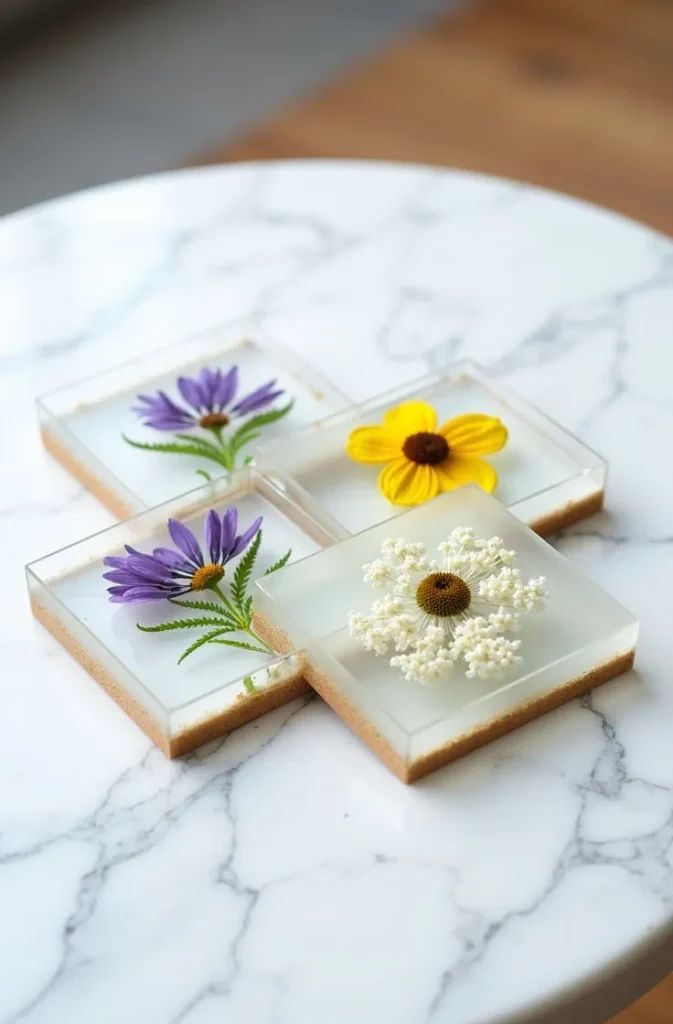
Use a two-part casting resin rated for jewelry or coaster depth rather than a surface coating resin, which is designed for thin applications only. Pour the first layer, allow it to reach a gel state (tacky but not liquid), then place the pressed botanicals face down into the gel layer. Pour the second layer to encapsulate. This two-pour method prevents botanical material from floating to the surface during a single pour.
Sand the cured coasters through progressive grits from 220 through 800 and finish with a polishing compound for a glass-smooth surface. Skipping the sanding process leaves a cloudy surface finish that makes even well-executed resin coasters read as unfinished.
11. DIY Rope-Wrapped Plant Stand That Adds Texture and Height to an Indoor Corner
A rope-wrapped plant stand is a summer craft project that addresses two functional needs simultaneously, adding a display height option for potted plants and introducing a natural texture element to a room that may lack tactile variety. The base plant stand can be a simple purchased wood or metal stand, or a repurposed stool or side table.
Use natural manila rope or jute rope in a diameter of half an inch to three quarters of an inch for visual impact. Thinner rope requires significantly more wrapping passes and produces a finer, less distinct texture from a distance. Begin wrapping from the base of each leg and work upward, applying a strong craft adhesive or hot glue in sections as you wrap to prevent the rope from slipping or unwinding over time.
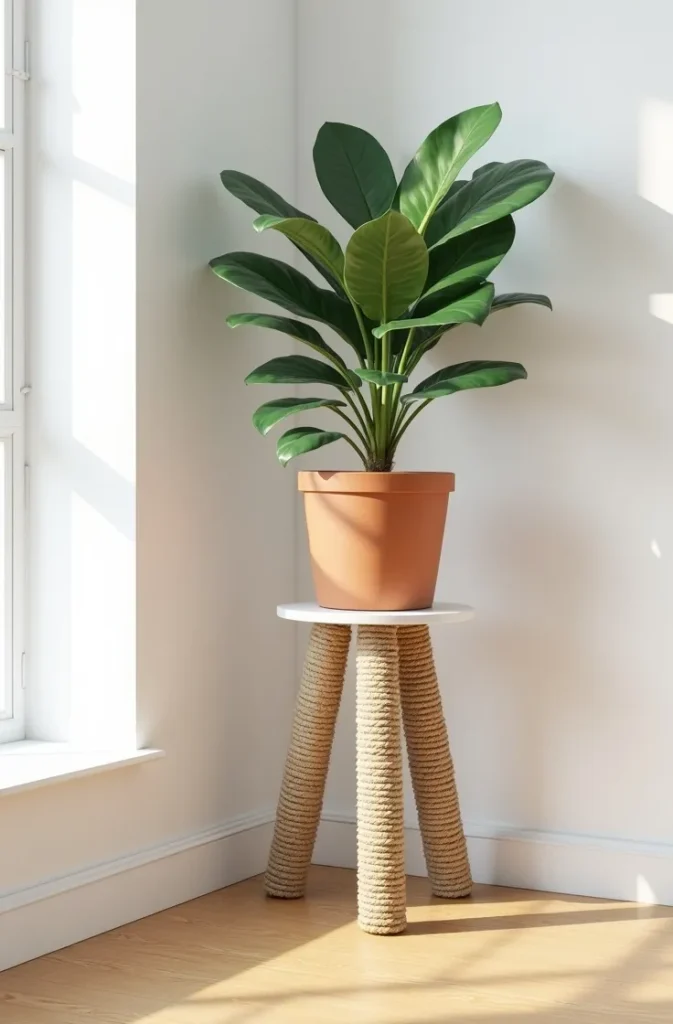
Wrap only the legs of the stand rather than the entire surface including the platform top, which tends to make the piece read as oversized and rustic rather than textured and modern. A rope-wrapped base with a natural wood, slate, or ceramic tile top surface creates a more refined material contrast.
Finish with a simple knot or tuck the rope end under a previous wrap turn and secure with a dab of adhesive. A clean rope termination is what makes the finished piece read as deliberate craft rather than an in-progress project.
12. Stamped Concrete Pot Saucers Turned Into Decorative Catchall Trays
Plain concrete pot saucers are sold at garden centers for minimal cost and have a flat, open profile that makes them directly functional as a tray or catchall dish. With rubber stamping and paint, they convert into surface decor pieces with a handmade concrete artisan quality.
Apply a concrete-specific primer to the saucer surface and allow it to cure before stamping. Without primer, paint adhesion to unsealed concrete is inconsistent and leads to peeling within days. Use rubber stamps in botanical patterns or geometric shapes with outdoor-grade acrylic paint applied to the stamp via a foam brayer rather than a brush for even ink distribution.
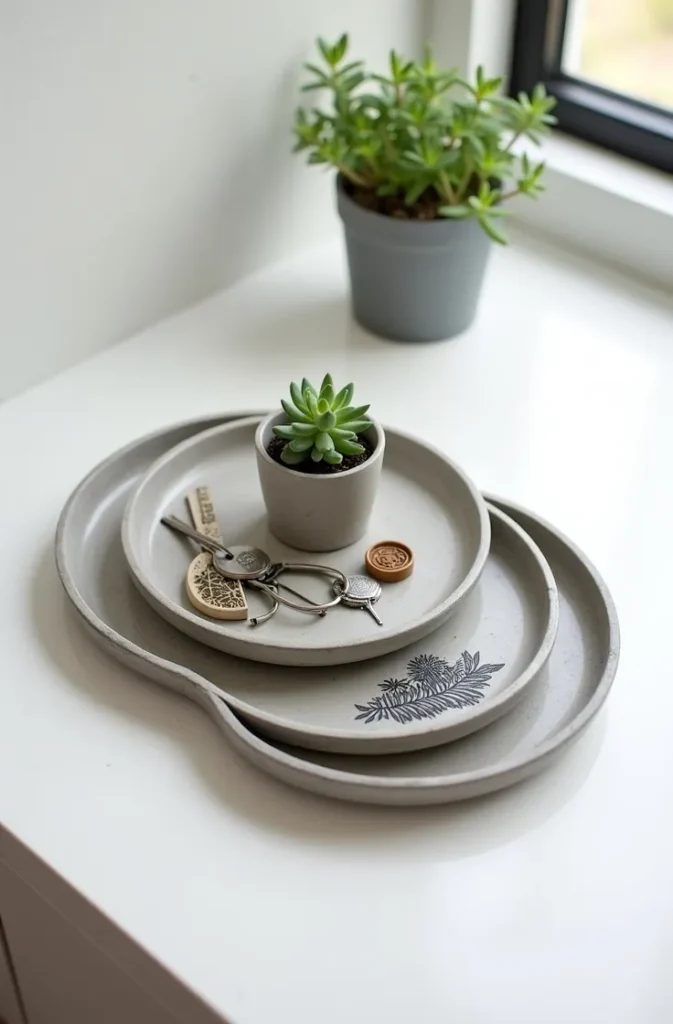
After stamping and drying, seal with a clear concrete sealer in matte finish. Matte finish preserves the natural concrete surface quality. A gloss sealer makes the concrete look plastic and undermines the material integrity of the finished piece.
Use the finished saucers on a coffee table as a ring holder and key catchall, on a kitchen counter for a loose items tray, or layered at different sizes as part of a shelf display. A set of three at small, medium, and large reads as a collected set. One standalone saucer reads as an orphaned garden accessory.
13. Tie-Dye Outdoor Throw Pillow Covers That Add Summer Color Without Permanent Commitment
Tie-dye pillow covers are a summer craft decor idea that solves a specific problem: introducing bold seasonal color to an outdoor or indoor space without purchasing new cushions or making a permanent change to the room palette. Because the dyeing is applied to removable covers, the base cushion inserts remain usable with other covers after the season.
Use outdoor-rated fabric paint diluted to a fluid consistency rather than traditional fiber reactive dye, which requires a chemical fixative and produces unpredictable results on synthetic outdoor fabrics. Most outdoor pillow cover fabric is polyester or a polyester blend, and fiber reactive dye does not bond to synthetic fibers. Outdoor fabric paint formulated for synthetic fabrics is the correct material for this application.

Choose a two-color palette for the dyeing, a dominant warm tone and a secondary complementary tone, rather than attempting a rainbow multi-color approach on a first project. Two-color tie-dye produces results that are easier to control and more likely to read as cohesive with existing outdoor furniture when placed in the finished space.
After dyeing, heat-set the color according to the paint manufacturer’s instructions. For outdoor fabric paint on polyester, this typically means tumble drying on high heat for 30 minutes rather than ironing, as the synthetic fibers can scorch under direct iron contact.
14. Layered Sand and Shell Shadow Box Display That Works as Coastal Wall Art
A shadow box filled with layered sand, shells, and coastal finds is a summer craft project that reads as finished wall art when executed with the same compositional rules that govern framed artwork. The most common version of this project fails because it treats the shadow box as a container to fill rather than a frame to compose within.
Use a deep-profile shadow box frame, a minimum of one and a half to two inches of interior depth, to allow for layered dimensional arrangement rather than a flat pressed composition. A shallow shadow box with shells simply glued to a flat background reads as elementary craft. Depth and layering are what elevate the result.
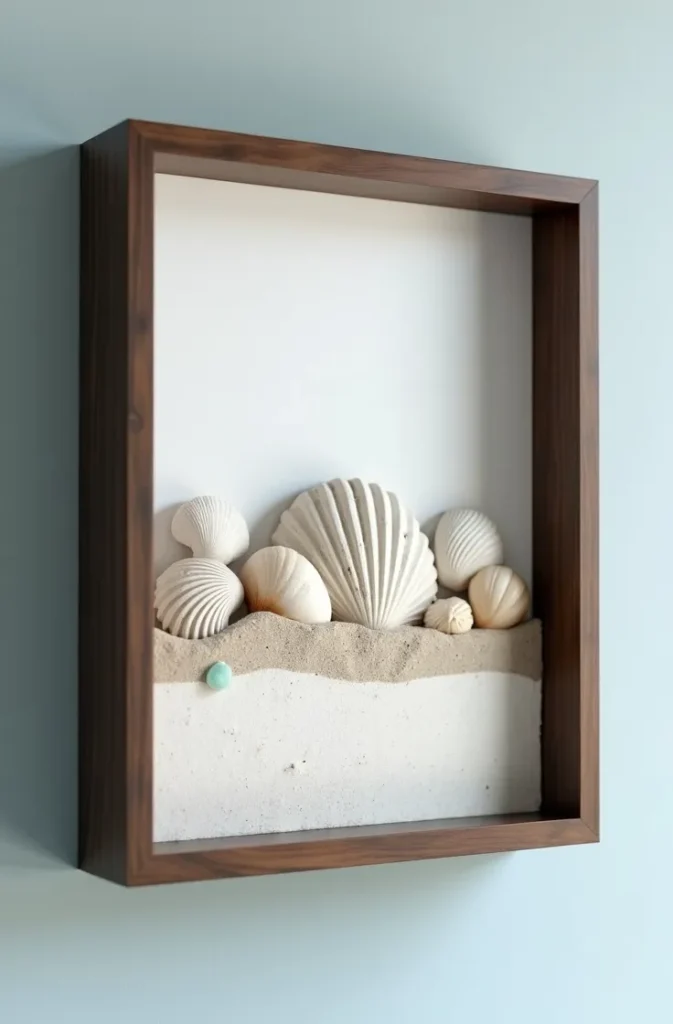
Pour a one-quarter inch base layer of clean white sand across the bottom of the shadow box interior. Seal the sand with a thin coat of Mod Podge or clear-drying craft adhesive before adding shell layers. Unsealed sand shifts during handling and installation, disrupting the arrangement before the piece reaches the wall.
Arrange shells and coastal objects in groups of three or five at varying heights above the sand layer, using museum putty or a strong clear-drying adhesive to secure each piece. Balance the largest and most visually interesting pieces at one third and two thirds across the horizontal plane of the box rather than centering them, which produces a more dynamic, curated composition.
Conclusion
Summer craft decor ideas work best when the material choices, proportions, and placement decisions are as deliberate as they would be for a purchased piece. The projects in this guide are each built around that premise, giving you a framework for execution that moves the finished result from homemade to intentional.
If any of these ideas fit a space you are currently decorating or a project you are planning for the season, save this post to your Pinterest boards now so you can return to the specific technique details when you are ready to start. These are reference resources meant to be revisited, not one-time reads.
The strongest home craft decor outcomes usually come from completing one project well and integrating it thoughtfully, rather than attempting several simultaneously. Choose the project that solves a real gap in your current space and start there.