If you are searching for backyard greenhouse ideas 2026, you are likely dealing with the same challenge most homeowners face — limited space, unclear layout choices, and no idea where to start. This guide breaks down 13 practical greenhouse setups designed for real yards, real budgets, and real growing goals. Each idea includes what works, what to avoid, and how to decide if it is right for your space.
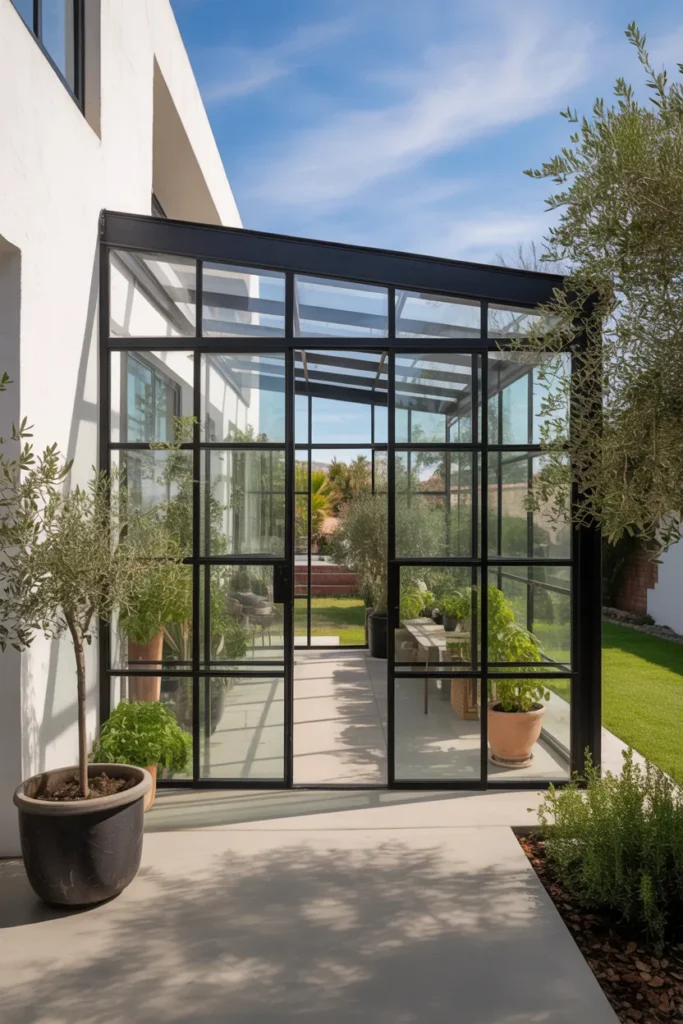
1. The Lean-To Greenhouse That Turns a Blank Wall Into a Growing Space
A lean-to greenhouse attaches directly to an existing exterior wall of your home or garage, using that structure as one full side. This cuts your material cost significantly and gives you a naturally insulated back wall that retains heat overnight.

This layout works best on a south- or west-facing wall where sunlight exposure is longest. If your yard is narrow or you are working with a side yard corridor, this is one of the most space-efficient backyard greenhouse ideas available. It fits comfortably in spaces as small as 4 feet wide by 8 feet long.

The most common mistake with lean-to builds is ignoring drainage. Water runoff from your roofline will pool at the base if you do not grade the ground or install a channel drain before construction. Plan that detail early.
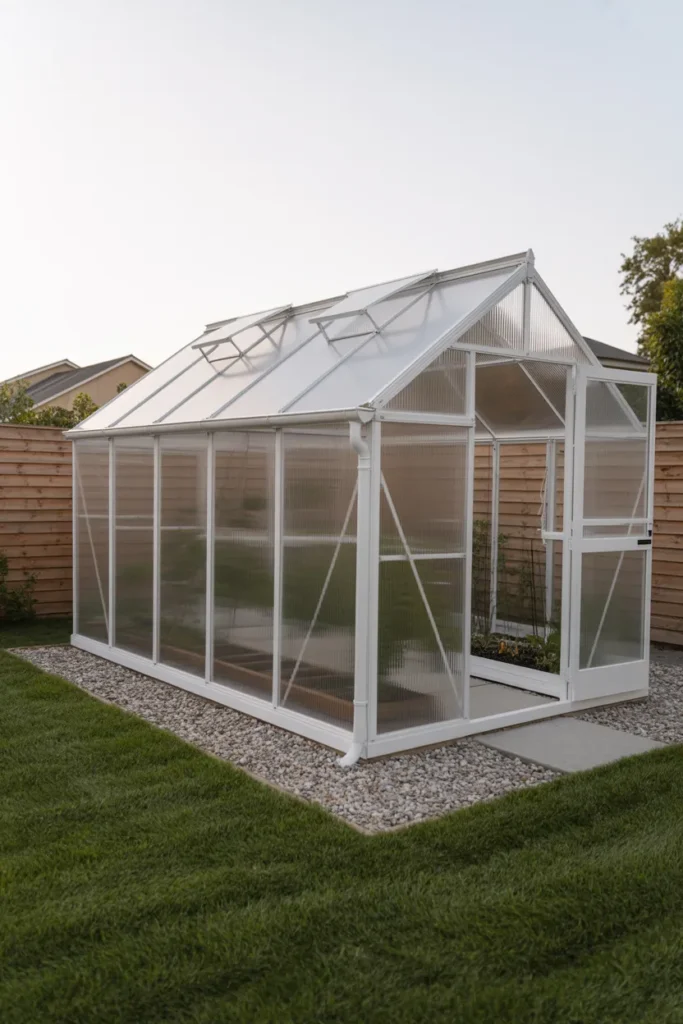
2. The Freestanding A-Frame Greenhouse for Mid-Size Backyards
The A-frame is the most recognizable greenhouse silhouette, and for good reason. The steep pitched roof sheds rain and snow load naturally, making it a strong choice for homeowners in the Pacific Northwest, Midwest, or Northeast where weather is unpredictable.
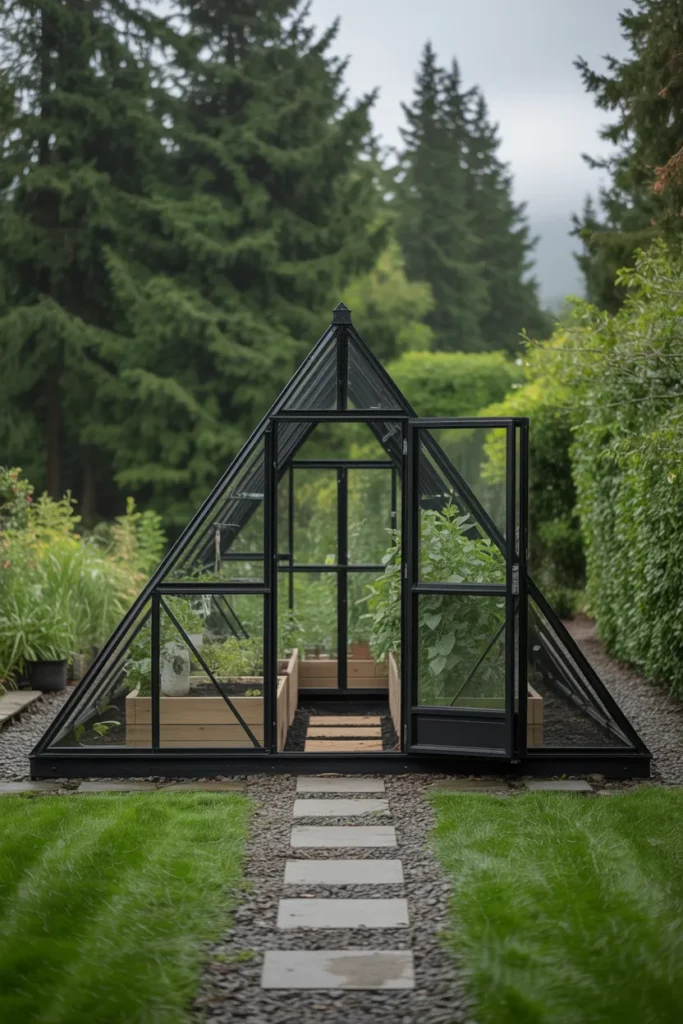
A standard A-frame fits well in backyards that are at least 20 feet deep. The interior height peaks at the center ridge, which gives you room to hang grow lights, install overhead irrigation, or grow taller plants like tomatoes and peppers without feeling cramped. Beds run along both side walls with a central walking path.
Avoid placing an A-frame greenhouse directly under or near large trees. Leaf debris clogs gutters and blocks roof panels, reducing light transmission by as much as 30 percent over a single season.
3. The Mini Hoop House for Raised Bed Gardeners Who Want Season Extension
A hoop house is not a permanent structure, and that flexibility is exactly its strength. Built over an existing raised bed using bent conduit or PVC arches and covered with greenhouse film or row cover fabric, it extends your growing season by four to six weeks on either end without any foundation or permit requirements in most US counties.
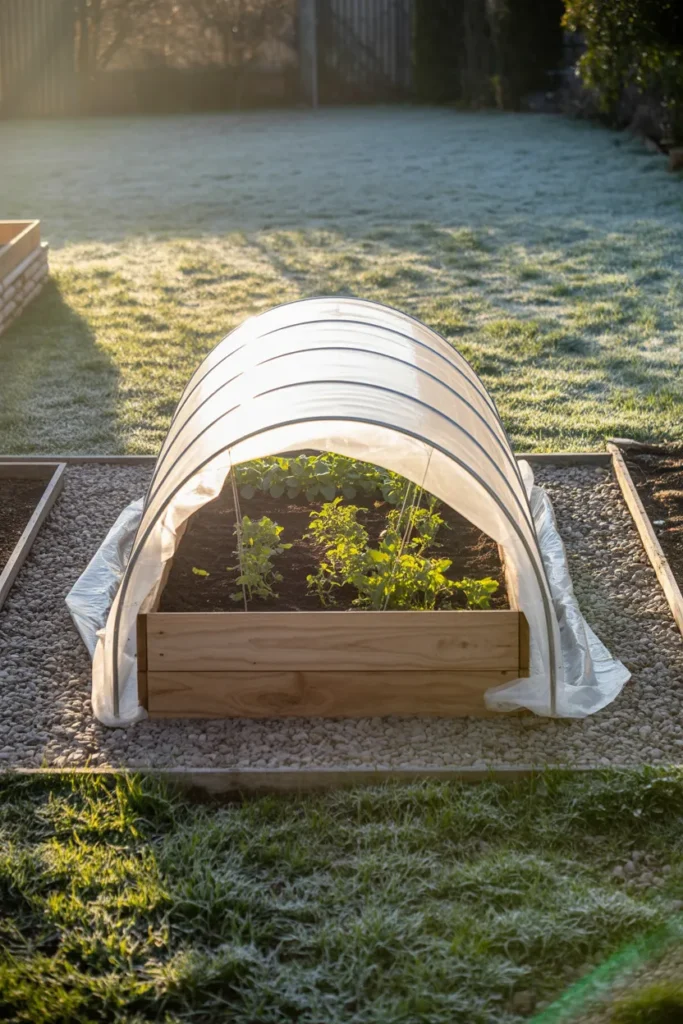
This is the most practical starting point for new greenhouse gardeners. You are not committing to a permanent build, you are testing what you want to grow and how much space you actually need. The cost to cover a standard 4×8 raised bed is minimal, and the setup takes an afternoon.
Where hoop houses fall short is ventilation. On a sunny spring day, temperatures inside can spike fast. Always include a way to roll up the sides or remove end panels easily, or you will cook your seedlings.
4. The Victorian-Style Greenhouse That Doubles as Outdoor Living Space
A Victorian greenhouse, sometimes called a conservatory greenhouse, uses decorative ridge caps, ornate end panels, and steeply angled glass walls to create a structure that is as visually intentional as it is functional. It functions as both a plant space and an extension of your entertaining area.
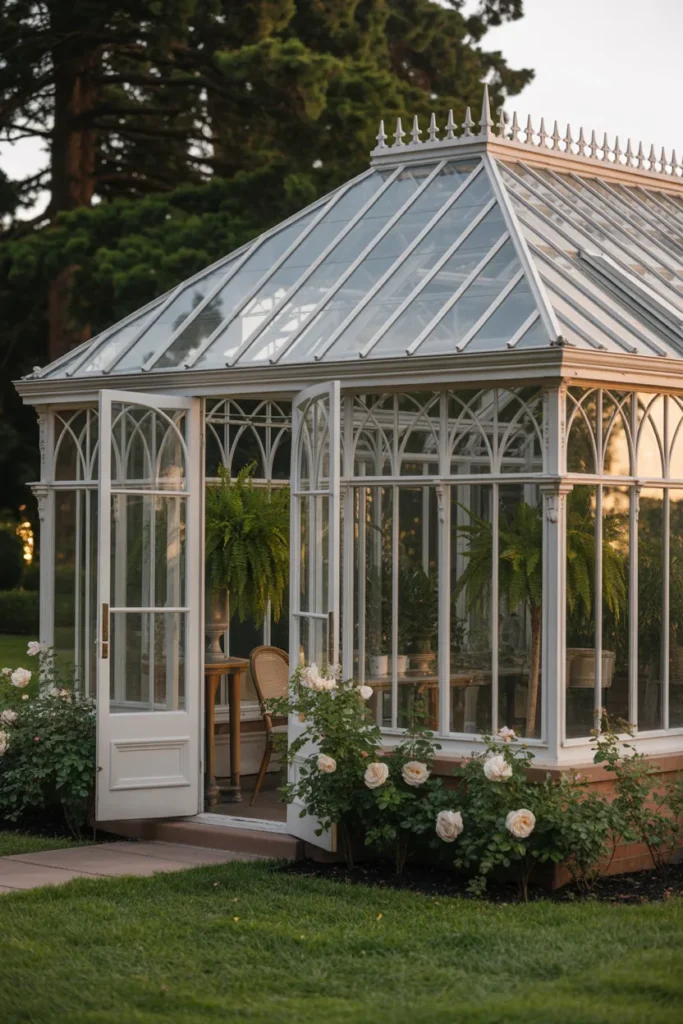
This style suits larger backyards and works especially well as a transitional space between your home and garden. Many homeowners furnish one section with seating and use the remaining space for growing. The tall glass walls and roof lanterns flood the interior with light from multiple angles throughout the day.
If you are considering this layout, prioritize ventilation at the ridge. Heat rises and the ornate roof design can trap it if ridge vents are not part of the original structure plan. This is a detail many buyers overlook when purchasing prefabricated Victorian kits.
5. The Underground Walipini Greenhouse for Cold Climate Gardeners
A walipini, also called a pit greenhouse, is built by excavating two to four feet into the ground and covering the opening with a polycarbonate or film roof at a slight angle. The earth surrounding the walls acts as thermal mass, keeping interior temperatures stable even when outdoor temperatures drop well below freezing.
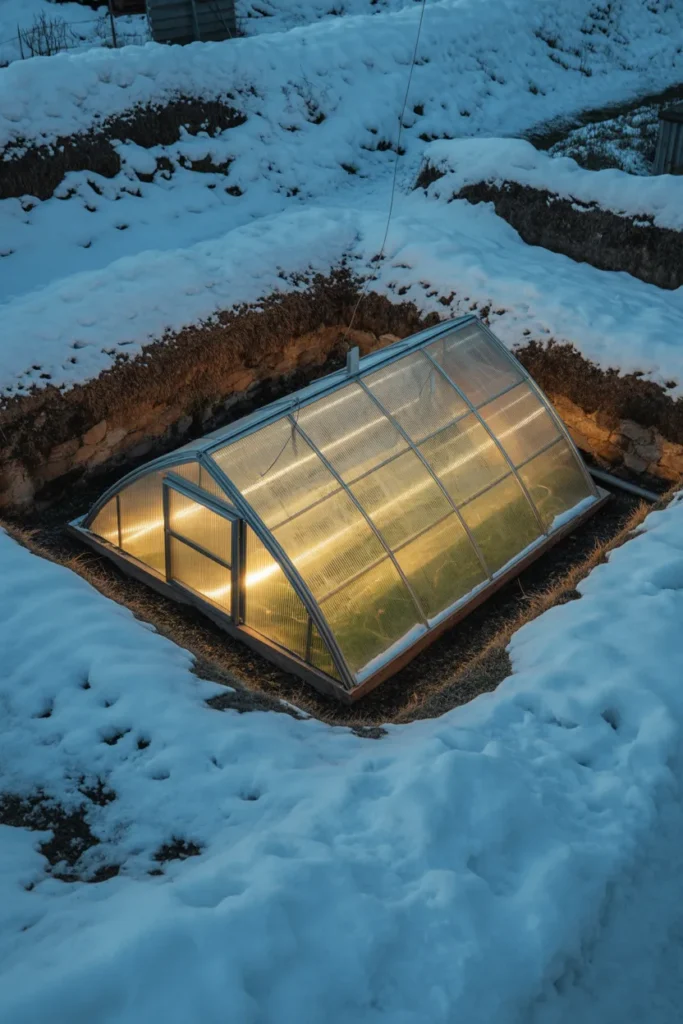
This is one of the most underused backyard greenhouse ideas for gardeners in USDA zones 3 through 5. If you are in Montana, Minnesota, Wyoming, or any state with severe winters, a walipini can allow year-round growing without supplemental heating in many cases. The ground itself does the work.
The critical planning detail is water table depth. Before you excavate, test how deep your water table sits. Building below the water table turns your greenhouse into a drainage problem. A minimum of six feet of clearance between your excavation floor and the water table is the standard threshold.
6. The Attached Sunroom Greenhouse for Urban and Suburban Lots
An attached sunroom greenhouse is built directly against the home and shares a wall with an interior room, often a kitchen or living room. Unlike a lean-to, it is finished to a higher interior standard, with insulated framing, proper flooring, and in many cases a direct door entry from inside the house.
The appeal here is convenience. You step into your greenhouse from inside your home without going outdoors. For families who grow vegetables year-round or keep tropical plants through winter, that daily access removes enough friction that the growing habit actually sticks.
From a planning standpoint, this is the most permit-sensitive option on this list. In most US municipalities it is treated as a room addition, which means you will likely need a building permit and compliance with local setback rules. Get that confirmed before any design work begins.
7. The Geodesic Dome Greenhouse for Unusual Lots and High Wind Areas
A geodesic dome distributes structural stress evenly across its triangulated surface, which makes it one of the strongest greenhouse shapes relative to the materials used. For backyards in coastal areas, open plains states, or anywhere with sustained high winds, this structural advantage is practical, not just visual.
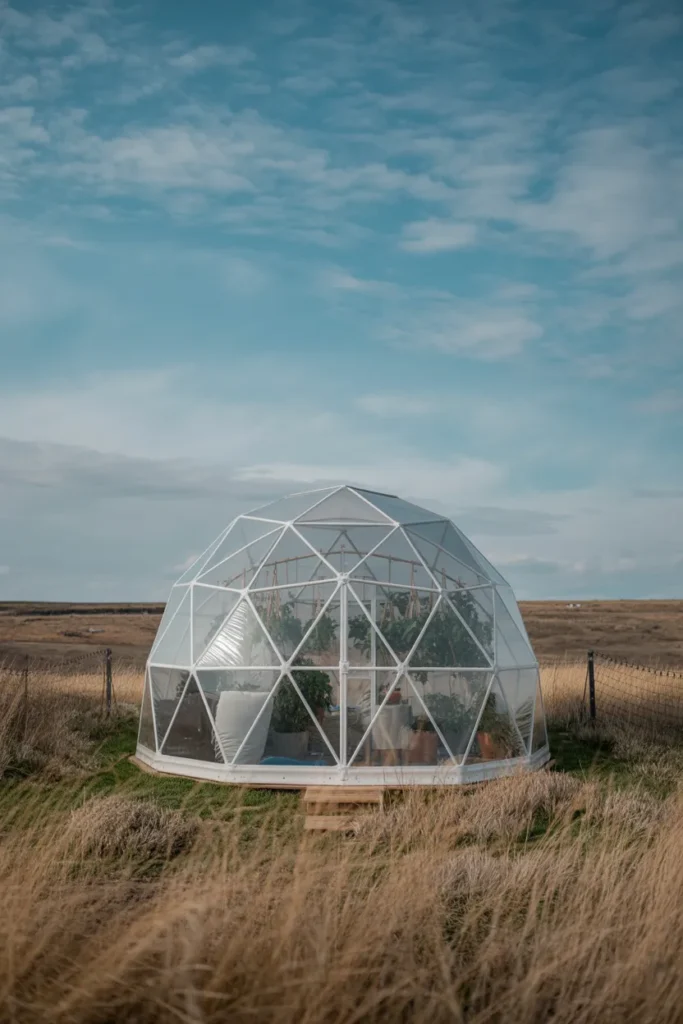
Domes also perform well on irregular or sloped lots where a rectangular footprint is difficult to establish. Because the dome requires only a single central foundation point or a simple perimeter ring, it can be installed on terrain that would challenge a traditional rectangular greenhouse.
Growing inside a dome requires some adjustment. The curved walls reduce usable vertical space near the perimeter, so most productive planting happens in the central two-thirds. Plan your layout with raised beds or tiered shelving that steps down toward the outer edge.
8. The Cold Frame Greenhouse Row for Small Yard Vegetable Gardeners
A cold frame is essentially a bottomless box with a transparent lid, angled to catch sunlight and trap heat. A row of cold frames arranged across a garden bed creates a modular greenhouse system that you can expand one unit at a time as your growing needs grow.
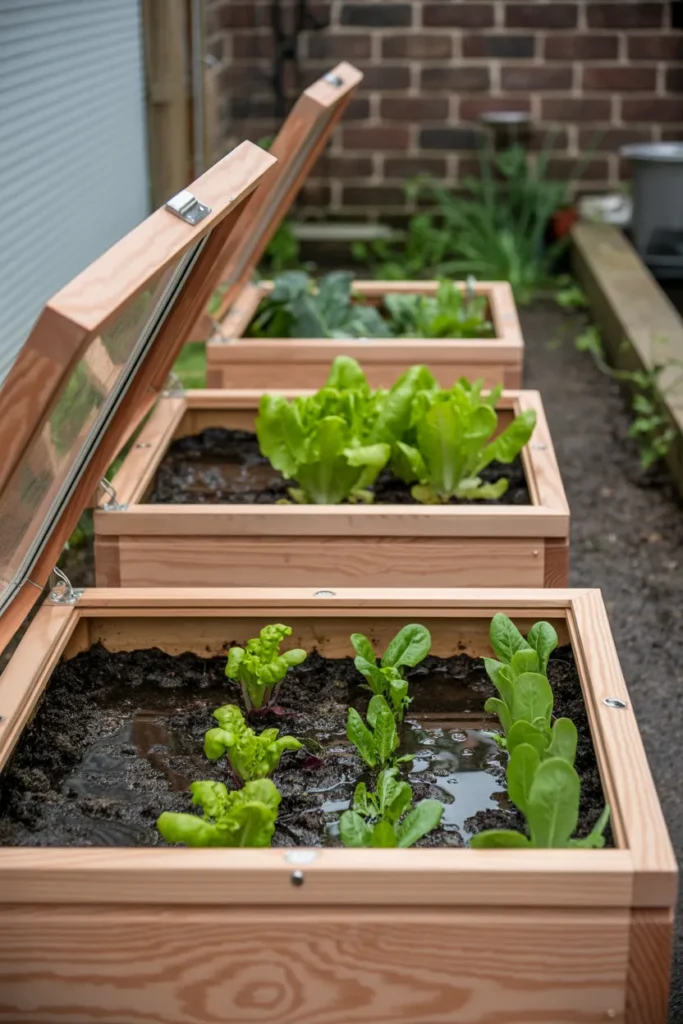
This approach is ideal for homeowners with backyards under 500 square feet or renters who cannot build permanent structures. Cold frames require no foundation, no permits, and no professional installation. They are also one of the few greenhouse solutions you can take with you if you move.
The layout works best when the lid angles south at roughly 30 to 45 degrees to optimize winter sun exposure. The most common mistake is using cold frames on flat ground without any wind protection. Even a low fence or hedge upwind adds meaningful heat retention on cold nights.
9. The Greenhouse Shed Combo for Gardeners Who Need Storage Too
A greenhouse shed is split into two functional zones under one roof. One half is a fully glazed growing space with shelving, grow lights, and climate control. The other half is an enclosed shed with solid walls for storing tools, soil, pots, and equipment. One structure, two functions.
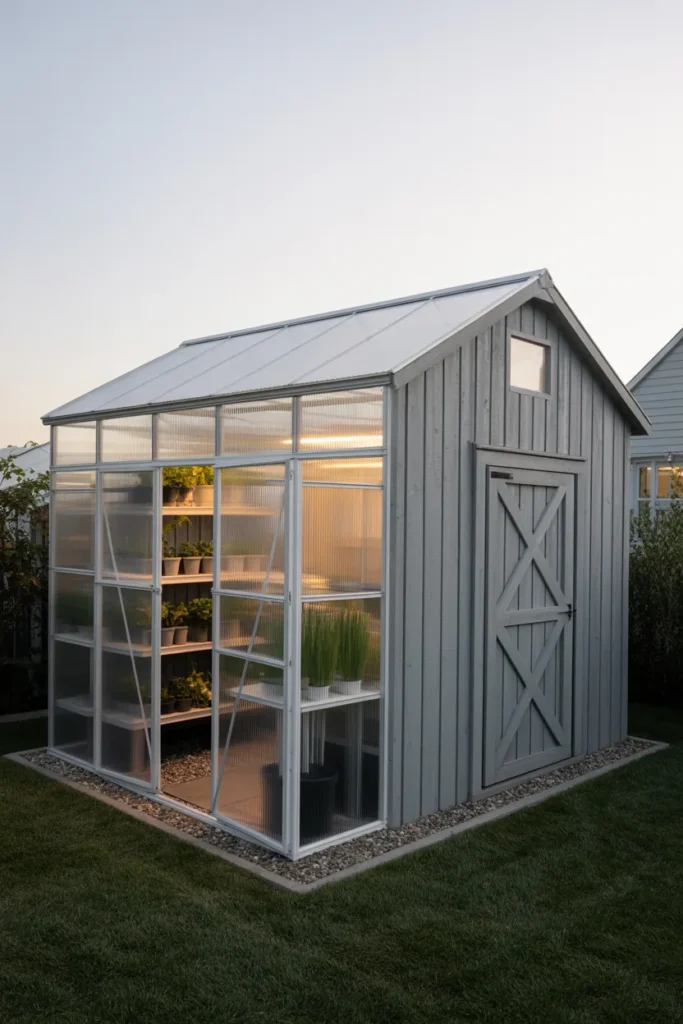
This is a smart layout for homeowners who want a greenhouse but also need to reclaim garage or basement space currently used for garden storage. By combining the two, you reduce the total footprint compared to building each separately.
The dividing wall between the two zones is important. It should include a door with a good seal to prevent humidity from migrating into the dry storage side, which causes rust and mold on metal tools and bags of stored fertilizer.
10. The Rooftop or Balcony Greenhouse for City Homeowners
For homeowners in dense urban areas with no usable ground-level yard, a rooftop or large balcony becomes the greenhouse site. Lightweight aluminum frame greenhouses with polycarbonate panels can be installed on structurally sound rooftop decks or generous balconies, creating a functional growing space where no traditional yard exists.
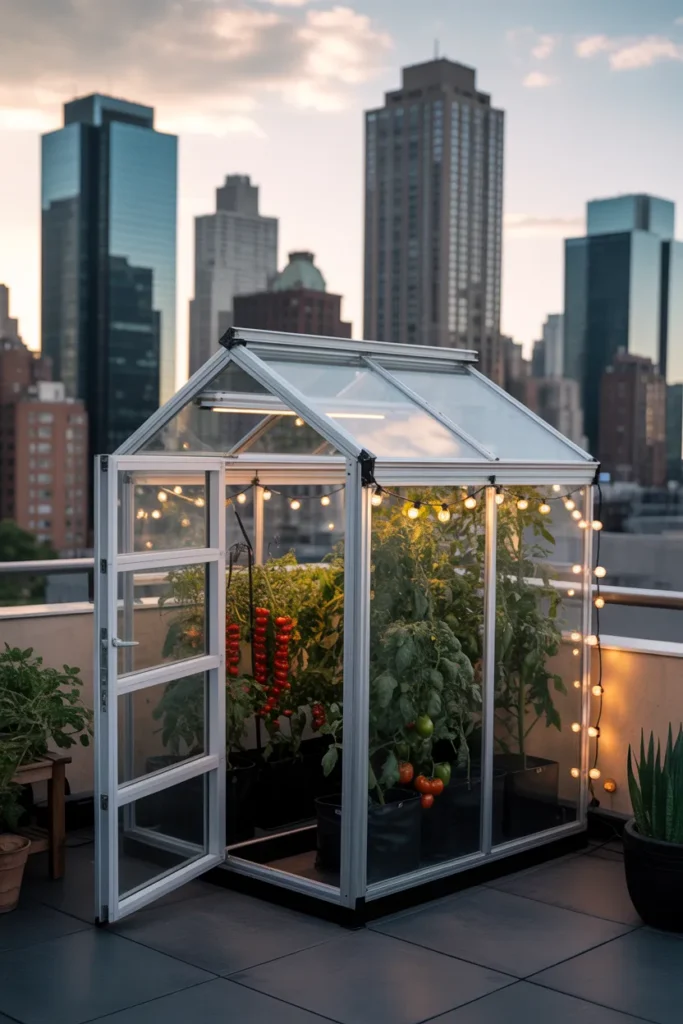
Before planning this setup, a structural load assessment is non-negotiable. Soil, containers, water, and the greenhouse frame itself add significant weight per square foot. Most residential flat roofs are engineered for around 20 to 30 pounds per square foot of live load. Exceeding that creates a serious risk.
Use lightweight growing media such as coco coir blends or perlite-heavy mixes rather than standard garden soil. Self-watering containers reduce the weight of standing water and lower maintenance frequency significantly in a rooftop setting.
11. The Passive Solar Greenhouse Oriented for Maximum Winter Light
A passive solar greenhouse is oriented and designed specifically to capture and hold the most solar energy possible without mechanical heating. The long south-facing wall is fully glazed. The north, east, and west walls are insulated and opaque. Thermal mass, typically barrels of water or a poured concrete floor, absorbs heat during the day and releases it at night.
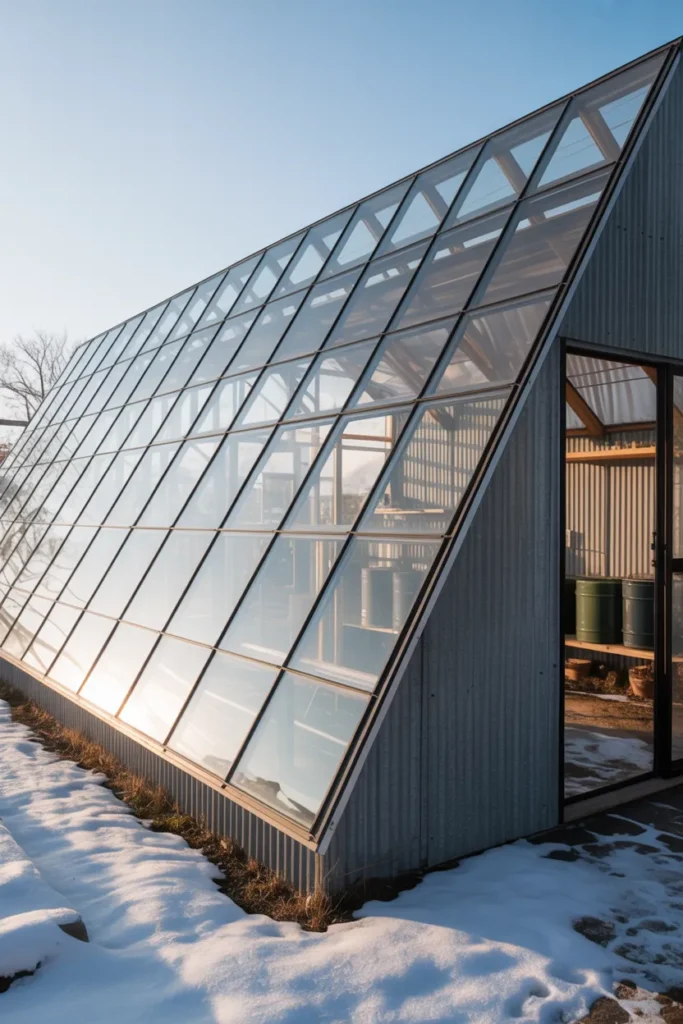
This design is built for gardeners who want to grow through winter in zones 5 through 7 without paying for propane or electric heat. Done correctly, a passive solar greenhouse can maintain interior temperatures above freezing on nights that reach the single digits outdoors.
The most important variable is the glazing angle on the south wall. For most of the continental US, an angle of 50 to 60 degrees from vertical captures the most low winter sun. Flat vertical glass works acceptably but collects snow and loses some efficiency in December and January.
12. The Potting Shed Greenhouse for Serious Propagators and Seed Starters
This layout prioritizes workspace over growing beds. The majority of the interior is a long, deep potting bench running the full length of one or both walls, with grow lights suspended above and outlets wired in for heat mats. The floor is usually poured concrete or pavers for easy hosing down. A utility sink is a common addition.
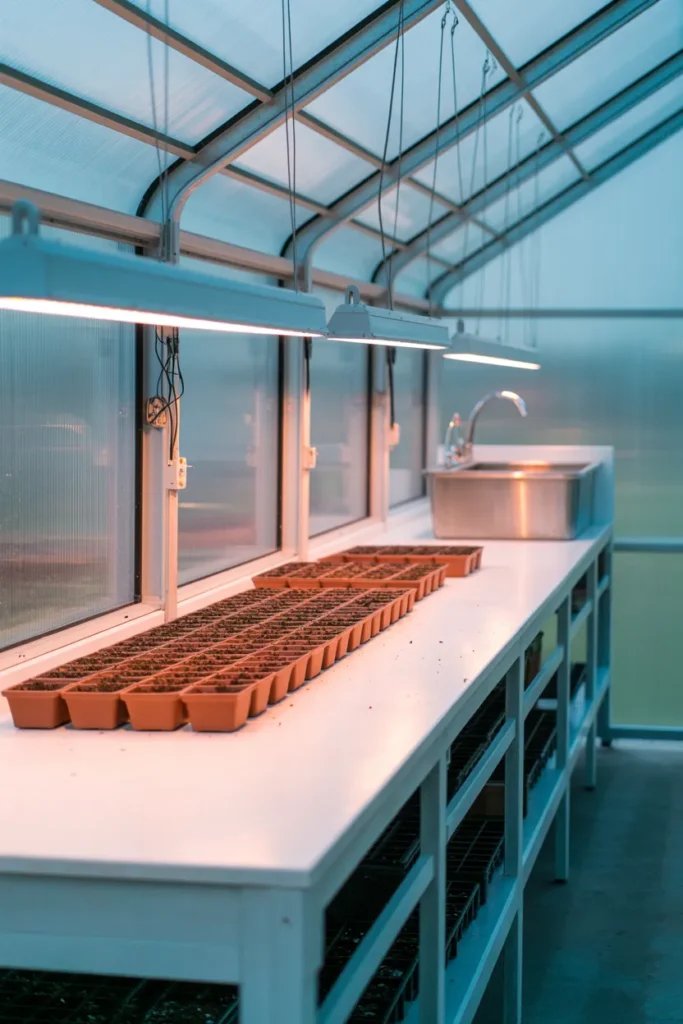
This setup is designed for gardeners who start hundreds of seeds each spring, propagate cuttings year-round, or operate a small plant-selling operation from home. It is less about growing food in the greenhouse and more about using the greenhouse as a controlled production environment.
Electrical planning is the most critical detail in this layout. Heat mats, grow lights, a small fan, and a circulation heater can draw significant amperage simultaneously. Have a licensed electrician size the circuit correctly before you run any wiring into the structure.
13. The Modular Panel Greenhouse That Grows With Your Garden
A modular panel greenhouse uses a standardized framing system where additional bays can be added to the end of the structure over time. You start with an 8×8 or 8×12 footprint and add another 8-foot bay when you need more space, without rebuilding the whole structure.
This is the most future-proof choice for gardeners who are unsure how serious their growing hobby will become. You invest in a quality base structure and expand on your own timeline. Many aluminum panel systems are designed with this in mind, with modular end walls that disassemble cleanly when a new section is added.
The key purchase decision is making sure the system you buy is genuinely expandable and not just marketed as expandable. Confirm that the manufacturer still sells expansion kits for the specific model before committing, and check that the foundation you install at the start is sized for the expanded footprint you may eventually build.
Final Thoughts
Whether you are starting with a single cold frame or planning a full passive solar build, the right backyard greenhouse idea for 2026 is the one that fits your space, your climate, and how you actually plan to use it. Use this guide to narrow down the layout that makes the most sense before you spend anything, and avoid the common planning mistakes that cost homeowners time and money after the build.
If you found this useful, save this post to your Pinterest boards so you can come back to it during your planning process. There is a lot to consider, and having these ideas organized in one place makes the decision much easier when you are ready to move forward.