Getting a dart board wall setup wrong is easy — the board ends up at the wrong height, the wall gets destroyed, or the whole area looks like an afterthought. This guide covers 18 distinct setups across different room types, wall materials, and design styles, with real mounting logic, wall protection strategies, and layout guidance so you can build a setup that works correctly from day one and looks intentional doing it.
1. The Regulation-Height Wall Mount That Eliminates the Most Common Setup Mistake
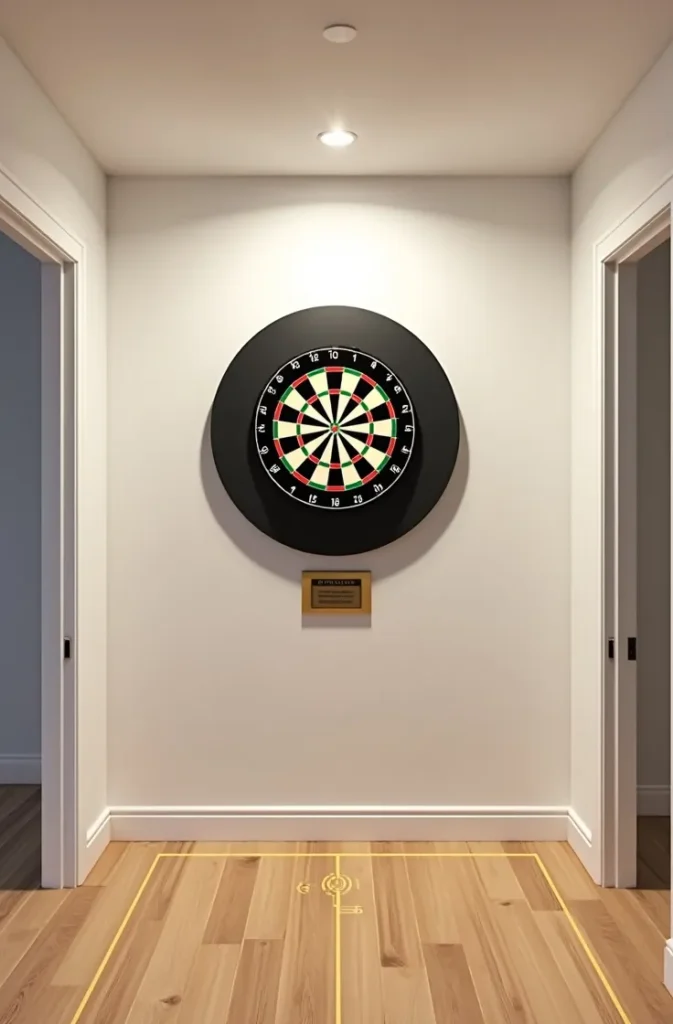
The single most common dart board installation error in home setups is incorrect hanging height. Regulation height places the center of the bullseye at exactly 5 feet 8 inches from the floor — this applies to both steel-tip and soft-tip boards and is the standard used in every competitive setting in the USA.
The throwing distance varies by dart type: 7 feet 9.25 inches for steel-tip darts measured from the face of the board, and 8 feet for soft-tip. Mark both the standing line and the hanging height before drilling a single hole — doing it in reverse order leads to off-center mounting that is difficult to correct after the fact.

Why does correct height matter beyond competition rules? At the wrong height, your throwing mechanics change unconsciously to compensate, which builds bad habits and reduces accuracy over time. A setup calibrated to regulation dimensions is simply more enjoyable to play on.
Use a stud finder before mounting. A dart board weighs between 10 and 12 pounds — combined with the repeated vibration from dart impacts, a mount into drywall alone will loosen and pull over time. Always anchor into a wall stud or use a proper toggle bolt rated for dynamic loads.
2. The Full Plywood Backer Panel That Protects Any Wall From Errant Darts
A dedicated plywood backer panel — a sheet of three-quarter-inch plywood mounted flush to the wall behind and around the dart board — is the single most practical upgrade for any home dart setup. It gives errant darts a surface to stick into rather than punching holes in drywall, painted plaster, or tile.
The standard backer size is 4 by 4 feet, centered on the board. This covers the most common miss radius without dominating the wall. For players still developing accuracy, extending to a 4-by-6-foot panel is worth the additional material cost.
Plywood can be finished in multiple ways depending on the room: painted to match the wall color for a seamless look, wrapped in cork or felt for a textured visual contrast, covered in chalkboard paint to add a scoring surface, or left in natural wood for a raw workshop aesthetic. Each finish changes the visual character of the setup entirely.
The mistake to avoid is using thin MDF or particle board as a backer. These materials split and crumble at dart impact points rather than gripping the dart cleanly — the surface degrades quickly and looks worse than a bare wall within a few months.
3. The Integrated Barn Door Cabinet That Hides the Board When Not in Use
A barn door dart cabinet mounts the dart board inside a recessed or surface-mounted wooden cabinet, with two doors that swing or slide open during play and close flat to conceal the board completely when the room is being used for other purposes. This is the right solution for living rooms, home offices, and shared spaces where a visible dart board does not fit the everyday aesthetic.
The cabinet doors are the visual feature of this setup — they carry the design load when the board is hidden. Natural wood with a matte varnish, painted MDF in a moody dark color, or reclaimed timber with visible grain all work well. The doors can also be used as a scoring surface on the interior face with a chalkboard or whiteboard panel.
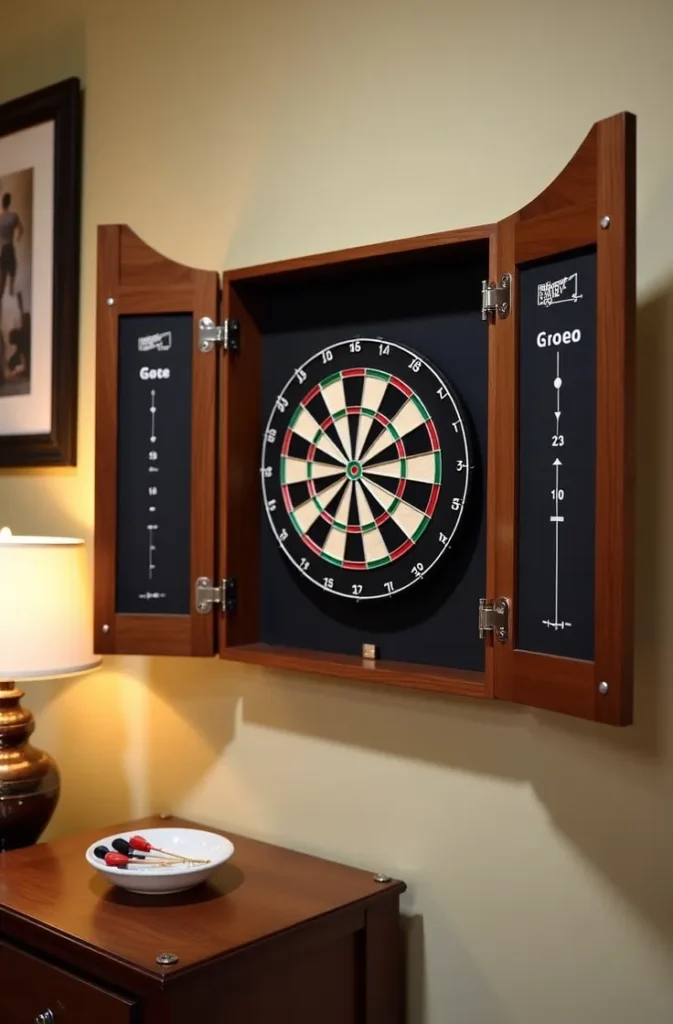
Depth is the critical design consideration. The cabinet needs at least 3 inches of interior depth to house the board and surround without the doors pressing against dart flights when closed. Most standard dart boards are 1.5 inches deep — add the surround thickness and at least 1 inch of clearance on all sides.
This format is not suited to rooms with very limited wall space. The cabinet typically occupies 30 by 30 inches of wall area minimum, and the doors need clearance to open fully without hitting adjacent furniture or doorframes.
4. The Cork Wall Panel Setup That Makes Every Dart Stick and Looks Sharp Doing It
A full cork wall panel — either a single large sheet or an arrangement of interlocking cork tiles — creates a complete dart-safe surface that is also visually warm and tactile. Unlike plywood, cork has natural sound-dampening properties that reduce the sharp impact noise of steel-tip darts, a meaningful benefit in apartments or thin-walled rooms.
Standard cork tiles in 12-by-12-inch or 24-by-24-inch formats can be arranged to cover whatever area is needed. The dart board mounts directly into the cork surface without requiring a separate backer — the cork itself provides sufficient grip for most dart types.

Cork panels work particularly well in home offices, dens, and study rooms because the surrounding surface can also serve as a pinboard for notes, maps, or schedules. The dual function justifies the full-wall or half-wall installation in a way that a plywood backer alone does not.
The visual limitation of cork is its natural tan color, which reads as neutral to warm. In rooms with a cool grey or white modern palette, raw cork can feel slightly out of place. Painted cork — available in several dark colors — addresses this, though it reduces the surface’s use as a pinboard.
5. The Recessed Alcove Dart Setup That Keeps Darts Out of the Main Room Sightline
In open-plan homes or multipurpose rooms, a dart board mounted in a recessed wall alcove — a niche cut or built into the wall — keeps the play area visually separated from the main living space. The board sits back from the main wall plane, and the alcove framing creates a natural visual container that makes the setup feel like an architectural feature rather than equipment mounted on a wall.
Alcove construction requires either an existing recess in the room — a former fireplace opening, a built-in shelving niche, or a space between structural framing — or the addition of a built-out false wall that creates the recessed appearance. The latter adds cost but can be built to exact dimensions.
The throwing line in this setup must account for the depth of the alcove. If the board sits 8 inches back from the main wall plane, the throwing distance is measured from the face of the board, not from the main wall. Mark the throwing line on the floor clearly — a recessed setup often causes this to be placed incorrectly.
Use this approach in living rooms or dining rooms where the dart area needs to feel designed and intentional, not recreational equipment installed in a domestic space.
6. The Basement Game Room Setup With Full Scoreboard Wall Integration
A basement dart board wall setup benefits from fewer aesthetic constraints than an upstairs living space, which allows for a more comprehensive game room integration. The full setup in this context combines the dart board, a dedicated scoring surface — chalkboard or whiteboard — and direct lighting all within a single designed wall section.
The wall section is typically 6 to 8 feet wide, with the dart board at center, the scoring surface to one side (minimum 24 by 36 inches for comfortable writing), and a dart holder or organizer on the opposite side. Everything is at arm’s reach during a game without stepping out of the throwing zone.
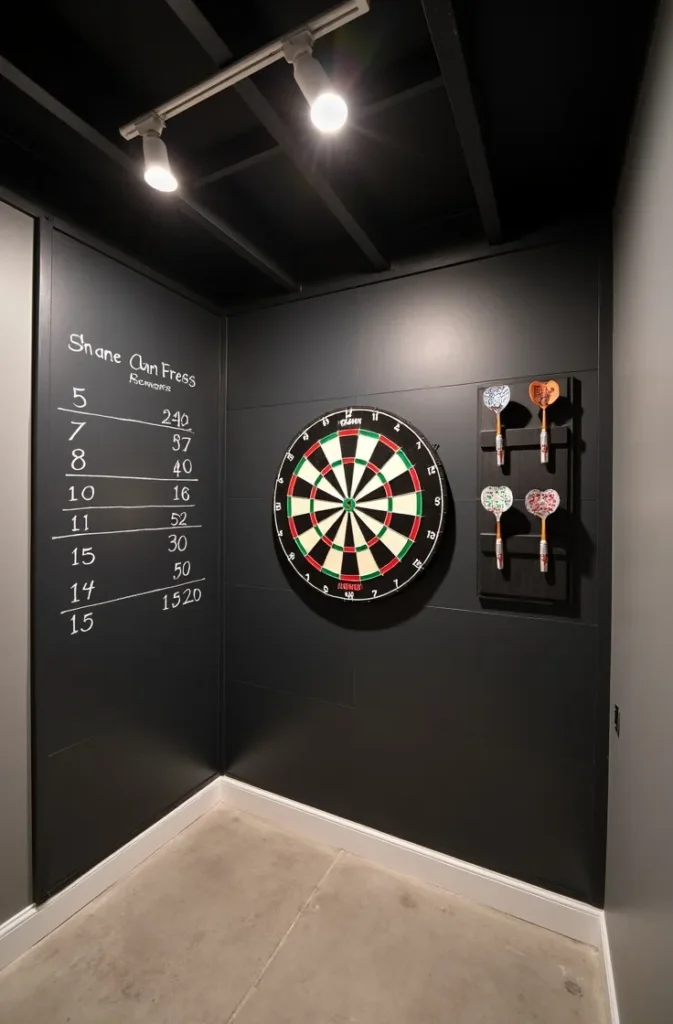
Lighting in a basement setup needs to be directional and positioned above the board — not in front of it. A surface-mounted fixture or two track lights angled down at 45 degrees illuminate the board without casting shadow from the dart or the player’s arm during release. Overhead lighting directly above the player creates the most problematic shadow pattern.
Concrete or painted drywall basement walls hold anchors reliably, but if the wall is unfinished block or stone, a freestanding dart board stand eliminates mounting concerns entirely and keeps the setup portable.
7. The Pub-Style Wooden Backboard With Carved Surround for a Classic Home Bar Look
A traditional pub-style dart setup uses a thick solid wood backboard — typically red oak, walnut, or pine — shaped as a wide circle or shield, with the dart board inset into the center and a carved or routed decorative border around the perimeter. This is the design that most people associate with dart boards in bar settings, and it translates directly into home bar rooms without feeling dated.
The board insets flush into the backboard so that the playing surface sits proud of the surrounding wood frame by no more than a quarter inch. This matters because darts that miss the board clip the surrounding wood cleanly rather than bouncing off a gap between board and backboard.
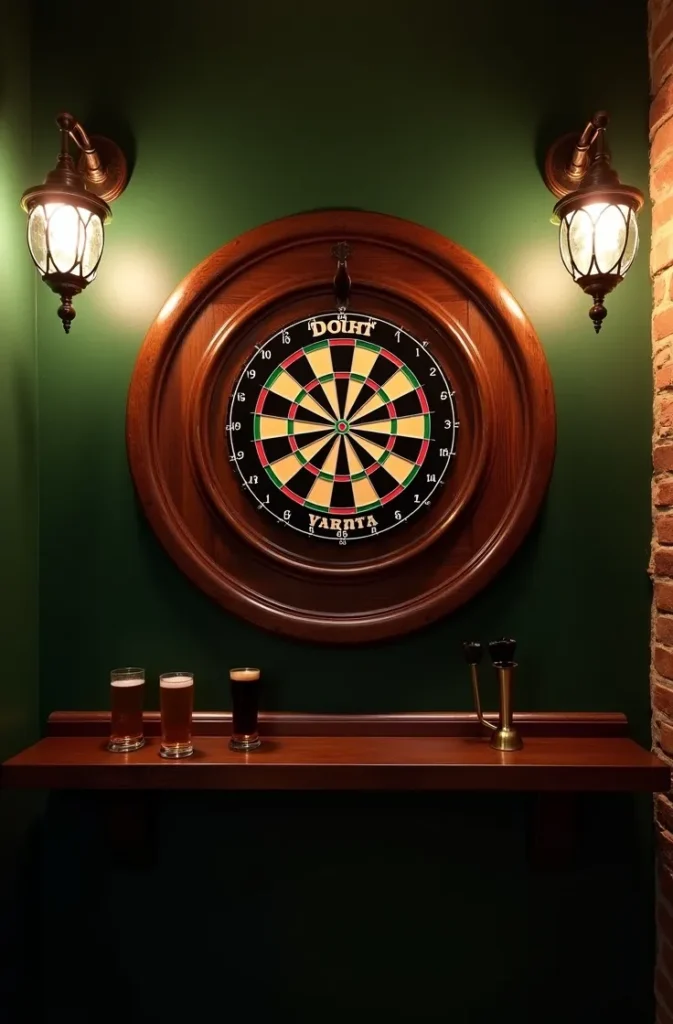
Wood species selection affects both aesthetics and durability. Softer woods like pine accept dart impacts in the surrounding area without splitting but dent visibly over time. Harder woods like oak resist denting but require a sharper dart tip to penetrate if a dart grazes the surround. For purely decorative purposes where darts almost never hit the surround, either works.
This format is best suited to dedicated home bar rooms, man caves, and game rooms with a warm, traditional material palette — leather seating, dark wood shelving, antique-style lighting. It reads as out of place in minimalist or Scandinavian-style spaces.
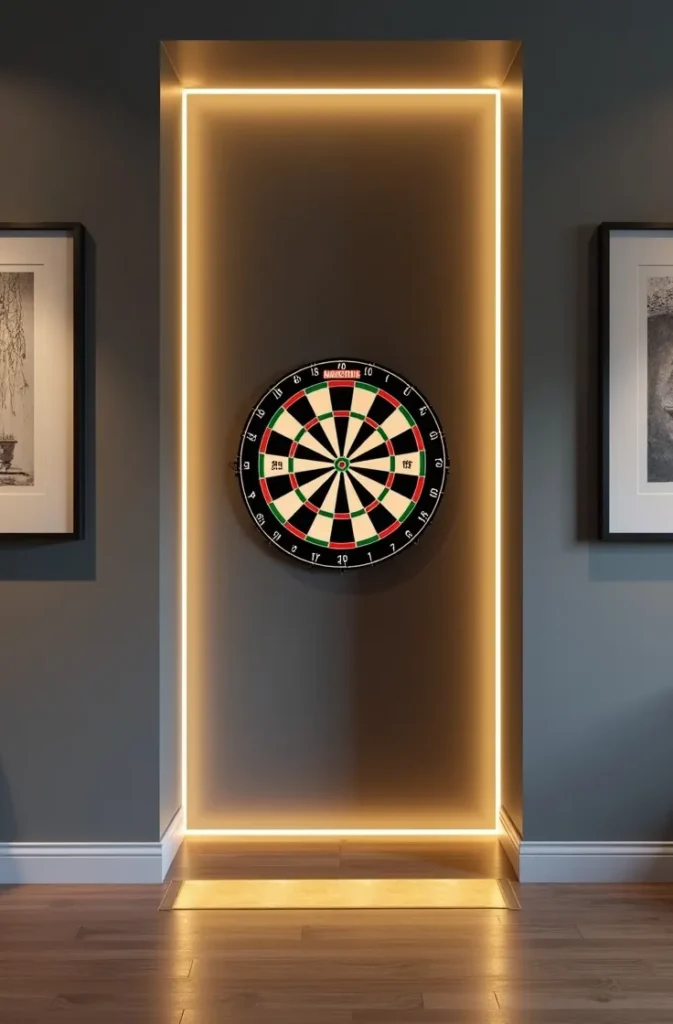
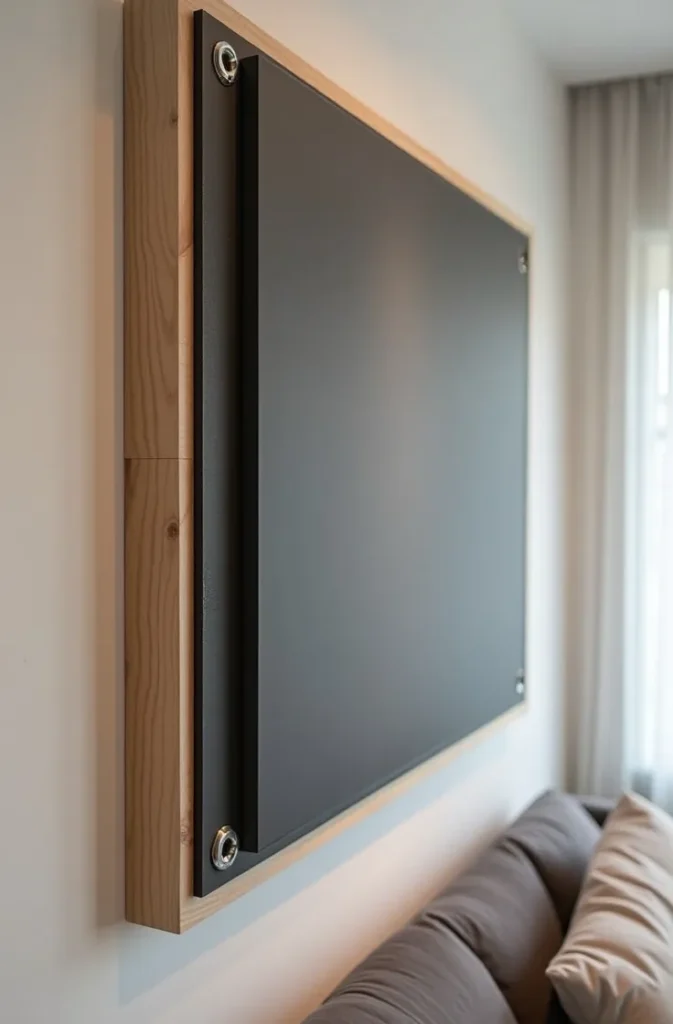
8. The Modern Minimalist Setup With an Invisible Wall Mount and No Visible Surround
A minimalist dart board wall setup strips the installation back to the bare essentials: the board, a flush wall mount that hides completely behind the board, and nothing on the wall surrounding it. No cabinet, no backboard, no visible hardware — just the board appearing to float against a clean wall surface.
This works visually only when dart accuracy is high enough that the surrounding wall rarely takes damage. For this reason, it is more appropriate for experienced players than beginners. The wall behind and around the board will take occasional hits regardless — choose a wall surface that can be touched up easily, such as flat-finish paint over smooth drywall.
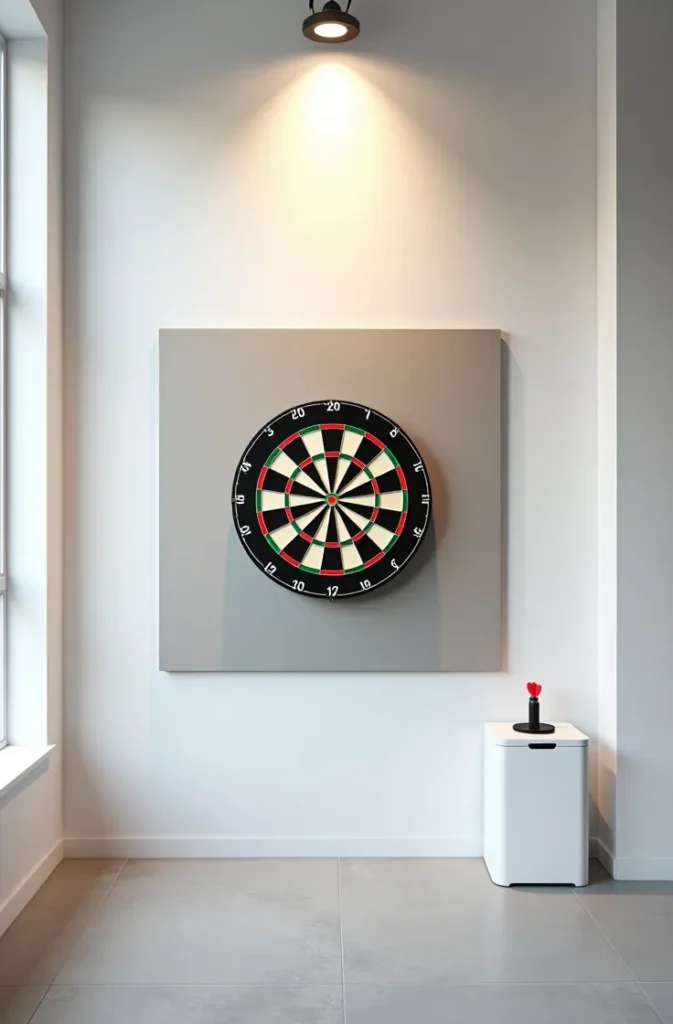
The mount itself is a slim bracket that bolts through the board’s center mounting point and anchors into a stud. The board rotates on the mount — a critical maintenance practice that ensures even wear across all segments rather than concentrating wear on the most frequently hit numbers.
Use this setup in modern living rooms, home offices, and loft apartments where a clean uncluttered wall is a design priority and the room is used for purposes beyond gaming.
9. The Garage Workshop Dart Wall With Steel Pegboard and Industrial Mounting
A garage or workshop dart setup prioritizes function over aesthetics and uses materials already common in the space — steel pegboard, exposed timber framing, utility lighting, and raw metal hardware. The result is a setup that looks like it belongs in the environment rather than being added to it.
Steel pegboard makes an ideal backer in a garage setting. It is rigid, holds dart impacts in the surrounding area without cracking, accepts a standard board mount, and can also organize tools, extension cords, or gear on the same surface. A 4-by-4-foot section of steel pegboard centered on the garage wall handles both functions simultaneously.
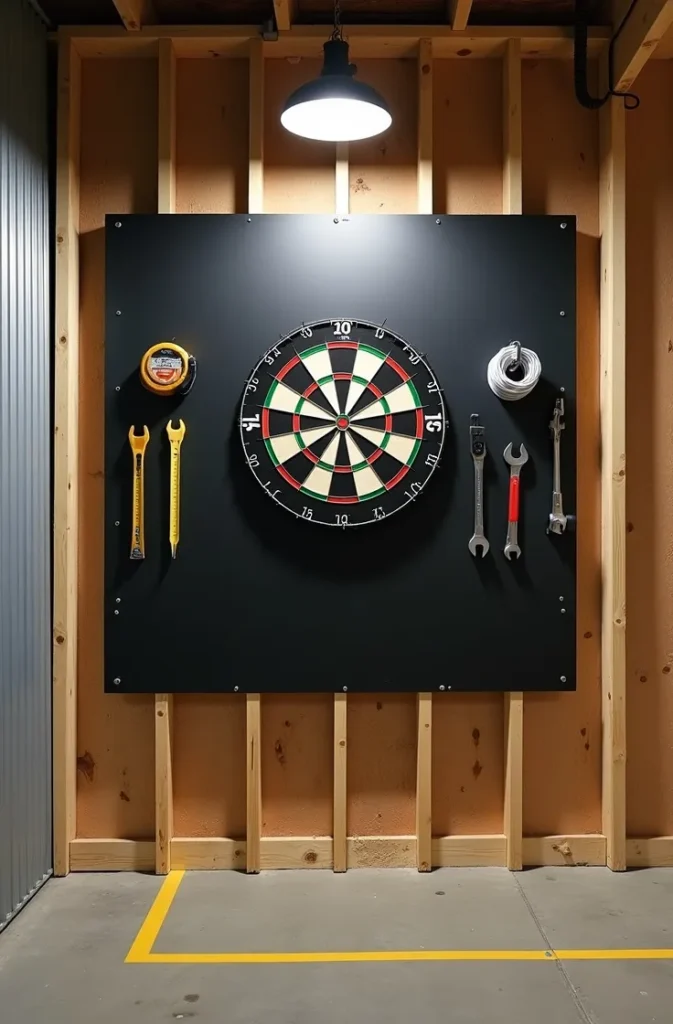
Garage floors are typically concrete, which makes throwing line marking simple — painter’s tape holds temporarily during games and peels cleanly without residue. For a more permanent line, a strip of colored epoxy or a routed groove in a rubber floor mat works well.
Lighting in a garage setup typically comes from above. A single shop light or LED utility fixture mounted directly above the board and angled forward provides the clearest illumination without shadows. Avoid placing the fixture directly behind the player — it creates a shadow across the board during play.
10. The Chalkboard Surround Setup That Integrates the Scoring System Into the Wall Design
Surrounding the dart board with a full chalkboard panel — rather than a separate scoring whiteboard — creates a unified visual element where the board and the scoring system occupy the same wall zone. The chalkboard acts as the backer, the surround, and the scoreboard simultaneously.
Chalkboard paint applied directly to drywall or plywood creates the surface. A standard setup uses a 4-by-4-foot panel of chalkboard surface with the dart board mounted at center, leaving roughly 12 to 18 inches of chalkboard space on each side for game tallies, player names, and running scores.
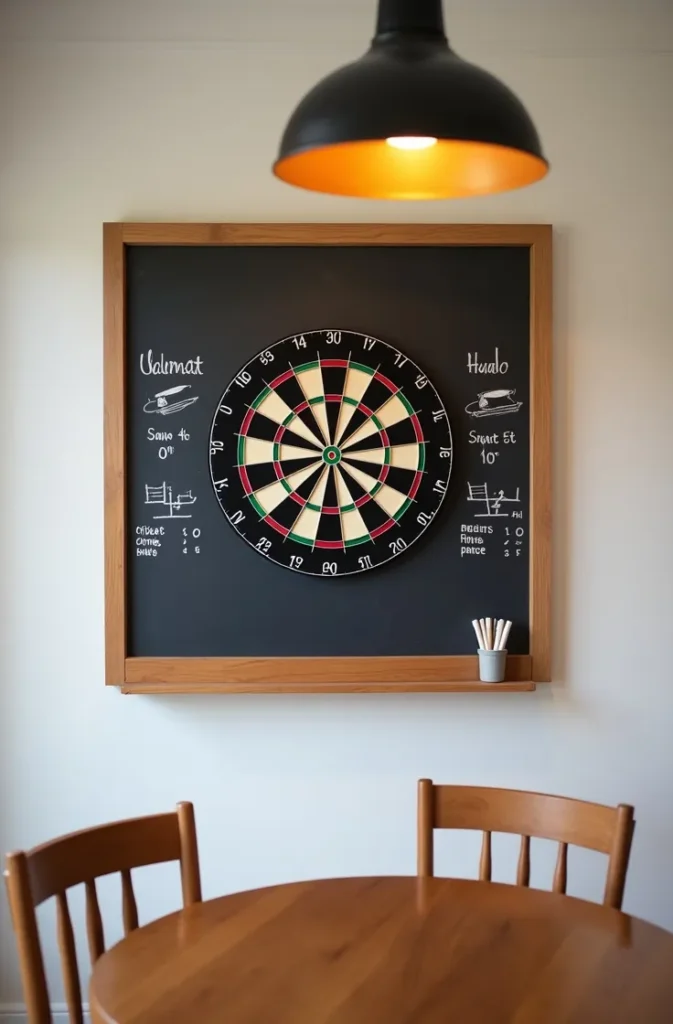
The color relationship between the dark chalkboard surface and the dart board is visually strong — the contrast makes the board stand out clearly and the chalk writing highly readable. It is one of the cleanest-looking functional setups available for a casual game room or family entertainment space.
Chalk dust is the practical consideration. In a room with upholstered furniture or carpet, chalk dust spreads and settles. Liquid chalk markers reduce airborne dust significantly while maintaining the chalkboard writing experience — they erase cleanly with a damp cloth.
11. The Kids and Family Room Setup With a Soft-Tip Board and Foam Surround Panel
A soft-tip dart board setup for a family room or children’s game room uses plastic-tipped darts that register electronically rather than embedding in a fiber or sisal surface. The board itself is typically lighter and thinner than a steel-tip board, which affects mounting strategy.
The surround panel for a soft-tip family setup uses foam rather than cork or plywood. High-density foam — at least 2 inches thick — absorbs bounced darts without allowing them to penetrate through to the wall behind. It is also the safest material in a room where young children may run between the throwing area and the board.
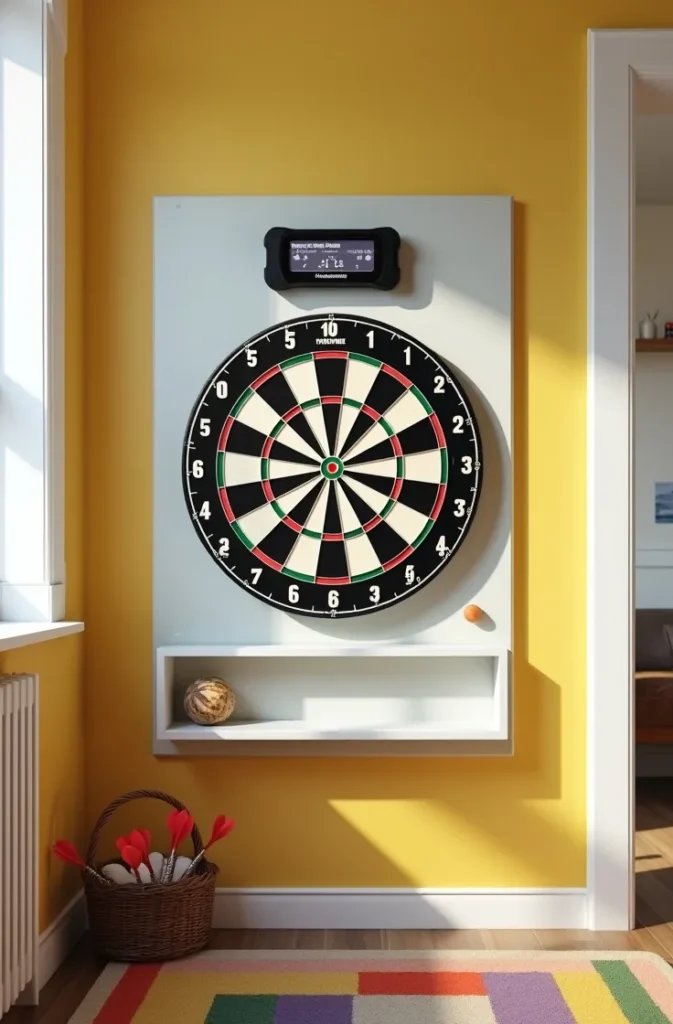
The throwing distance for soft-tip boards is 8 feet, slightly longer than for steel-tip. In a family room with furniture, marking the throwing line clearly — a mat, a piece of colored tape, or a floor strip — prevents arguments about where to stand and keeps younger players from standing too close.
The design consideration in a family room is that the setup needs to look intentional during non-game hours. A soft-tip setup with a foam surround benefits from being mounted on a painted plywood panel that matches the room’s color palette — it reads as wall art rather than gym equipment.
12. The Man Cave Neon Accent Wall Setup That Makes the Dart Area the Room’s Focal Point
A dart board wall setup anchored by neon or LED accent lighting transforms the playing area into the visual centerpiece of a man cave or entertainment room. The board is no longer a piece of equipment on a wall — it is a lit focal point with deliberate atmosphere.
The most effective lighting approach positions a ring or halo light behind or around the board, creating a glow that silhouettes the board and draws the eye from anywhere in the room. This is combined with LED strip lighting along the baseboard of the dart wall section or running horizontally across the back panel to define the entire zone.
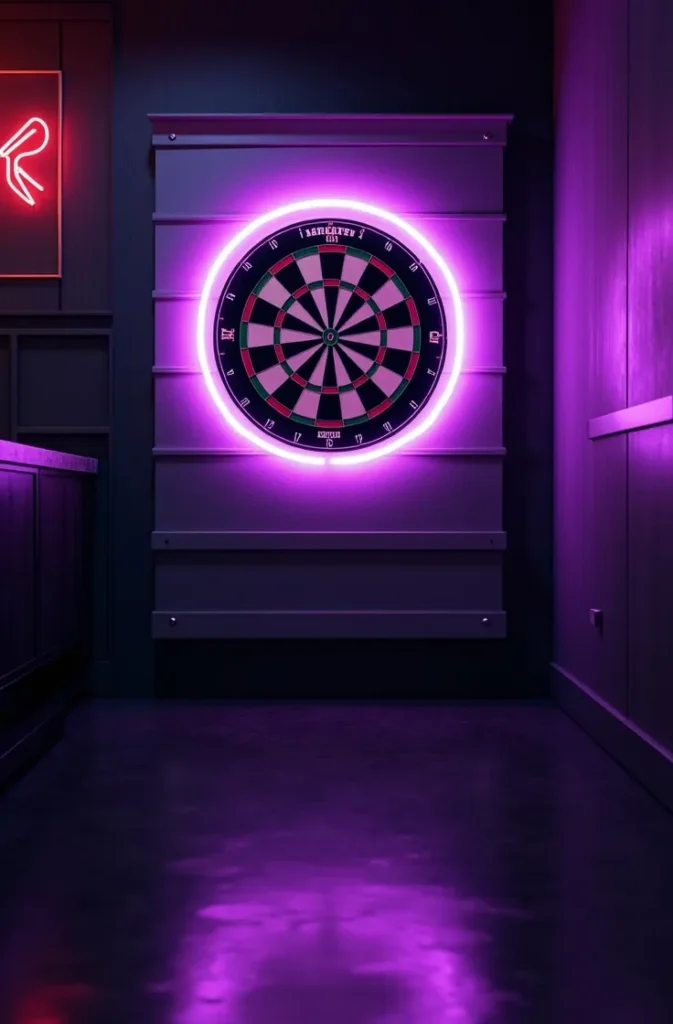
The color temperature of accent lighting in this setup should stay in the cooler range — blue, purple, or white LED — rather than warm amber. Cool tones read as modern and energized, which suits the visual tone of a gaming or entertainment space better than warm light.
Neon or LED accent setups work in rooms with controlled natural light — basements, windowless rooms, or spaces with blackout curtains. Abundant natural daylight washes out the glow effect and undermines the visual impact entirely.
13. The Floating Shelf and Dart Holder Setup That Organizes the Throwing Zone
A dart board wall setup is incomplete without organized dart storage at arm’s reach. A floating shelf — mounted at hip to chest height directly below the board — holds dart cases, chalk, spare flights, and a drink during play without requiring a secondary table or floor surface.
The shelf should be positioned 18 to 24 inches below the board, which places it below the throwing trajectory and out of the line of sight during play. Depth of 6 to 8 inches is sufficient for most dart accessories without protruding far enough to interfere with close-range dart retrieval.
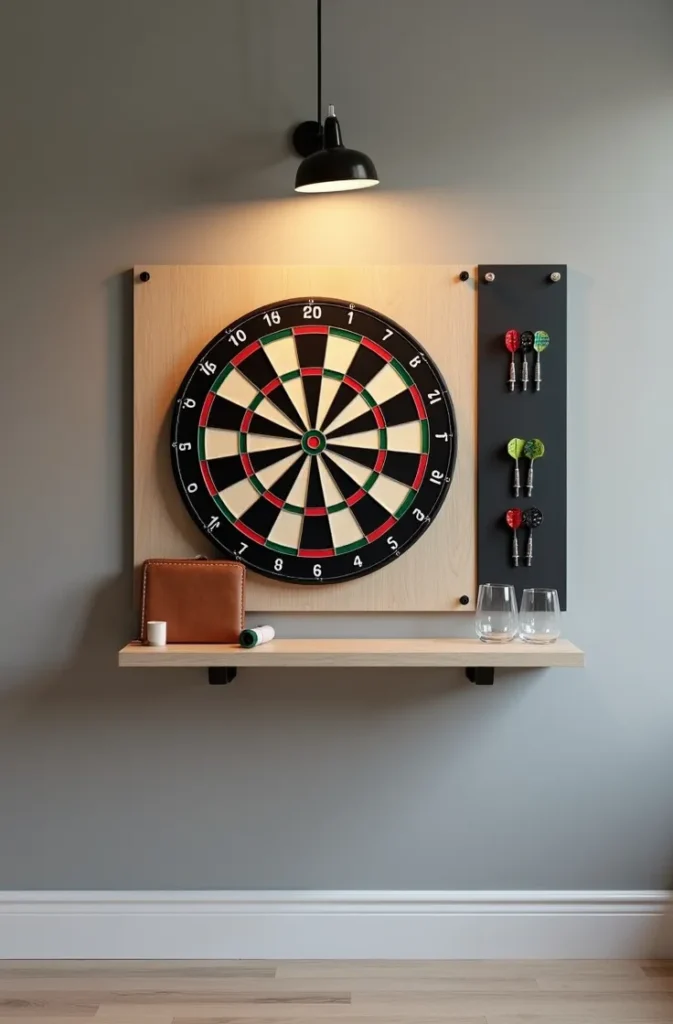
A dedicated wall-mounted dart holder — a horizontal rack with individual clips or a magnetized strip — keeps multiple sets of darts organized and on display. Mounting it directly to the side of the backer panel or to the adjacent wall section keeps everything centralized in one zone.
The mistake in this type of setup is over-organizing. A shelf loaded with too many items becomes visual clutter that detracts from the clean look of the board. Keep the shelf to the four or five items you actually use during every game — nothing more.
14. The Soundproofing Panel Setup for Apartments and Thin-Walled Rooms
The acoustic impact of steel-tip darts on a sisal fiber board is a real and underestimated problem in apartments, condominiums, and homes with thin interior walls. Each dart strike produces a sharp impact sound that transmits easily through standard drywall into adjacent rooms. A sound-dampening panel behind and around the board addresses this directly.
Mass-loaded vinyl (MLV) sandwiched between two layers of plywood creates the most effective dampening backer for a dart setup. The MLV layer absorbs vibration before it transfers into the wall structure. This is a more involved installation than a standard backer panel but produces a measurable reduction in transmitted sound.
A simpler alternative is a thick felt or acoustic foam panel mounted behind the plywood backer. It does not dampen vibration as effectively as MLV but significantly reduces the surface-level impact noise and provides the wall protection of a standard backer simultaneously.
For apartment residents specifically, combining a sound-dampening backer with rubber isolation pads between the mount bracket and the wall surface produces the best result. The isolation pads prevent the vibration from the dart strike traveling directly from the mount hardware into the wall stud.
15. The Outdoor Covered Patio Dart Setup for Year-Round Backyard Play
A dart board installed on a covered outdoor patio or pergola creates a legitimate outdoor game zone that functions year-round in most USA climates. The key word is covered — direct sun and rain exposure will warp a sisal board within a single season. A fully covered installation with overhead protection is the baseline requirement.
Outdoor-rated sisal boards with UV-resistant coatings extend lifespan significantly compared to indoor boards used outside, but they still require shade from direct afternoon sun. Position the board on a north or east-facing wall where direct sun exposure is minimal throughout the day.
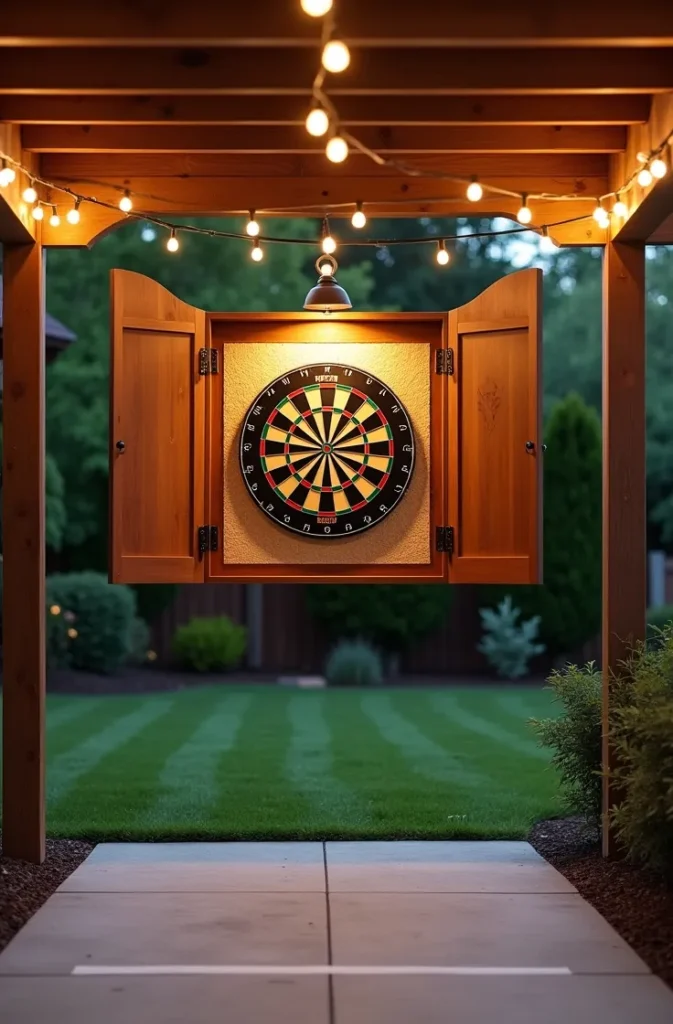
The mounting surface outdoors is typically wood siding, masonry, or a structural post. Each requires different anchoring hardware. For masonry, masonry anchors rated for the combined weight and vibration load are necessary. For wood siding, anchor directly into the underlying structural framing — not just the siding itself.
A weatherproof dart cabinet with sealed doors protects the board between sessions and extends its usable life significantly. Even under a covered patio, nighttime humidity and temperature swings affect the sisal surface and wire segment dividers over time.
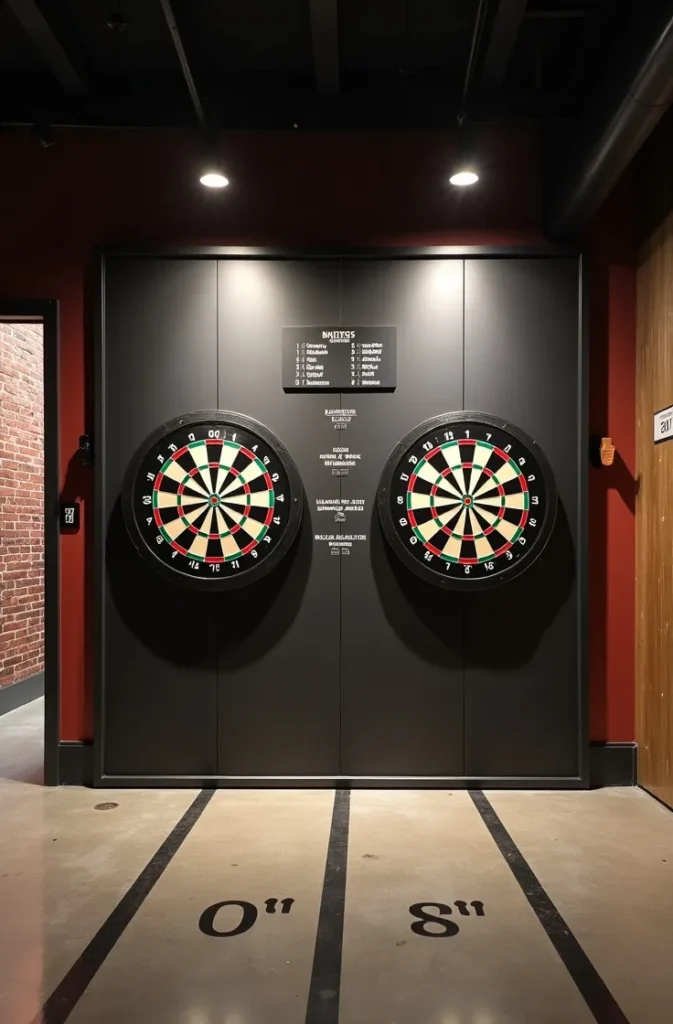
16. The Two-Board Side-by-Side Setup for High-Traffic Game Rooms
A two-board dart wall setup — two boards mounted side by side on the same backer panel — allows two separate games to run simultaneously without either throwing line conflicting with the other. In a dedicated game room that regularly hosts gatherings of six or more players, this format eliminates the bottleneck of a single board.
The boards need a minimum of 5 feet of horizontal separation, center to center, to keep the throwing zones from overlapping. Each throwing line should be marked independently on the floor, with at least 3 feet of lateral separation so players at each board are not standing adjacent to each other.

The backer panel for a two-board setup runs at minimum 10 feet wide. This is a full-wall installation in most rooms — plan the surrounding space accordingly, including adequate depth from the back wall to the throwing line, which requires roughly 10 to 12 feet of unobstructed floor space.
Lighting each board independently with its own directional fixture ensures each playing zone is evenly lit without one fixture creating shadows on the adjacent board. Track lighting with adjustable heads is the most flexible solution for a two-board wall.
17. The Custom Mural Backboard That Turns the Dart Wall Into Functional Wall Art
A painted mural or custom-printed graphic on the backboard panel behind and around the dart board turns a functional installation into a piece of wall art. The board mounts at center of the mural, which is designed around it — the visual composition treats the dart board as an element within the artwork rather than an object placed in front of it.
Custom vinyl wraps applied to a plywood backer are the most practical execution method. The wrap is printed digitally, applied like a large decal, and sealed with a matte laminate that accepts dart impacts in the surrounding area without peeling or cracking. When the backer eventually needs replacing, the wrap is simply reprinted.
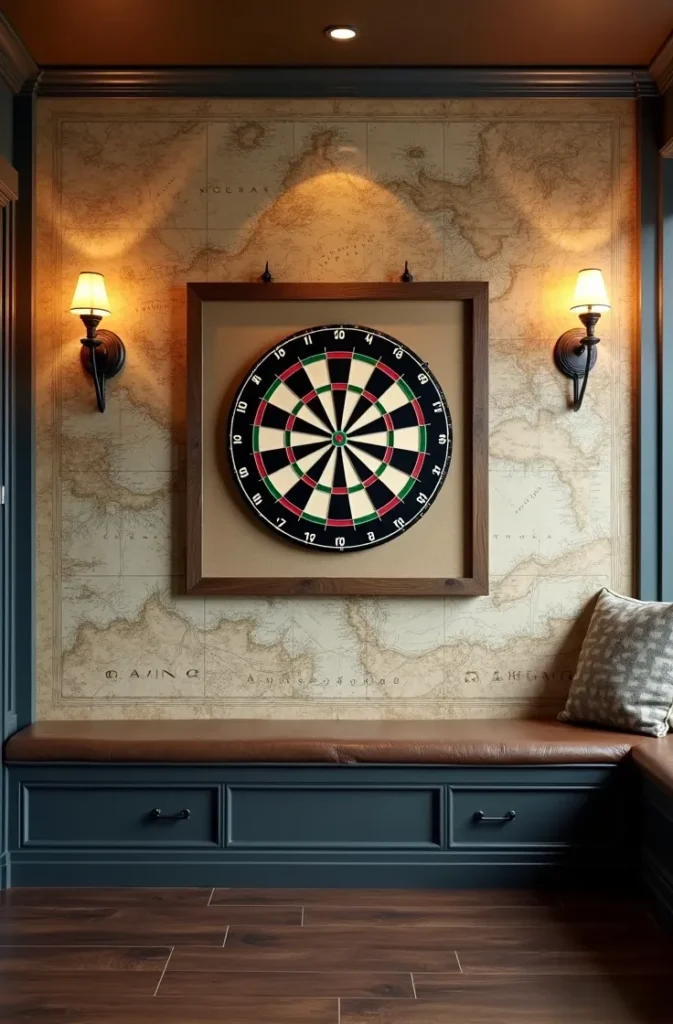
Design themes range from topographic maps, city skylines, team graphics, and vintage pub illustrations to abstract geometric patterns. The rule is that the design should not compete visually with the dart board during play — high-contrast busy patterns around the bullseye zone are distracting. Keep the area immediately surrounding the board visually quieter than the outer border of the panel.
This setup is most effective in man caves, sports rooms, and game rooms where personalization is a priority. In shared living spaces, the mural approach works best with more neutral or abstract design choices.
18. The Freestanding Floor Stand Setup for Rooms Where Wall Mounting Is Not an Option
A freestanding dart board stand — a weighted base with a vertical post and adjustable bracket that holds the board at regulation height without any wall contact — is the right solution for rental apartments, concrete-walled rooms where drilling is prohibited, or rooms where the layout makes wall mounting impractical.
Quality freestanding stands use a wide base of at least 18 inches in diameter and weigh enough at the base to resist tipping from dart impacts. Lightweight folding stands sold as temporary solutions tip and shift during play — they are not a functional substitute for a properly weighted permanent stand.
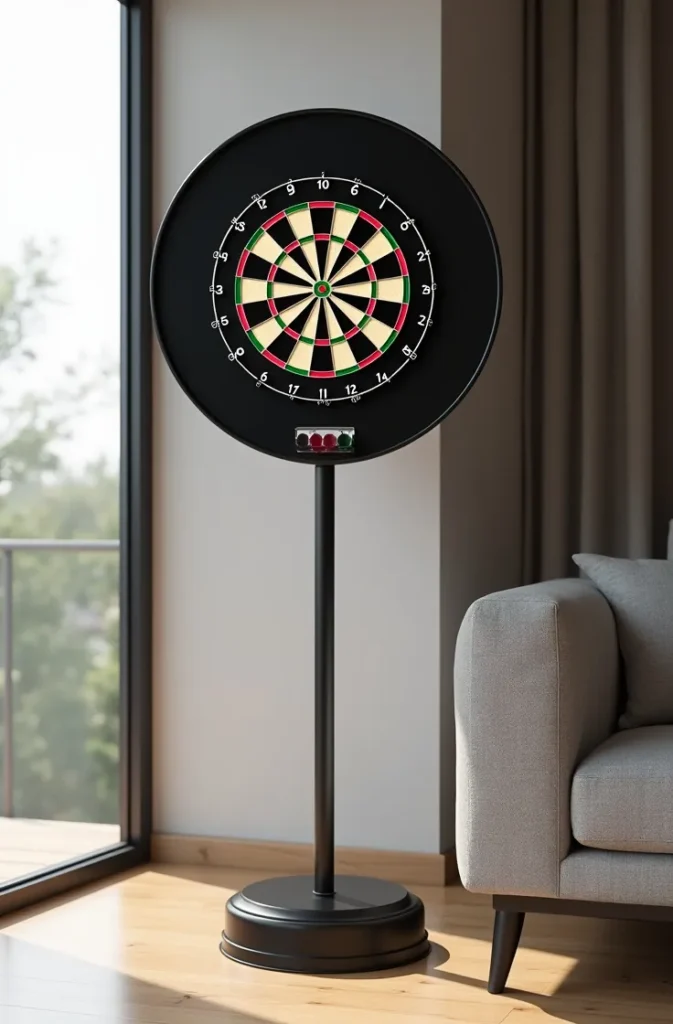
The backer consideration is different with a freestanding stand. Since the stand places the board away from the wall, misses travel past the board and hit whatever is behind it — which could be a window, furniture, or a person. A separate freestanding backer panel or a surround attached directly to the stand that extends significantly beyond the board edge is essential.
Freestanding setups are also the most portable of all dart board wall setup formats — ideal for players who want to set up in different rooms, take the setup to a friend’s house, or store it when not in use.
Final Thoughts
A well-planned dart board wall setup is not complicated, but it does require making the right decisions in the right order — height, backing, lighting, and storage — before a single hole is drilled. The 18 setups in this guide cover every major room type, wall condition, and design style so that wherever your board is going, there is a format here that applies directly to your situation.
Save this post to return to it when you are ready to buy materials, plan your wall section, or show a contractor what you are aiming for. The image prompts alongside each section give you a clear visual reference for each approach. For your next step, explore home game room layout ideas and basement entertainment room designs to plan the full space around your dart setup.