Most kitchens are underlighted, poorly layered, or dependent on a single overhead fixture that flattens the entire space and creates shadows exactly where you need to see most clearly. This guide covers 11 distinct kitchen lamp ideas 2026 — each addressing a specific lighting problem, kitchen layout, or design direction — so you can make decisions that improve both how your kitchen functions and how it looks at every hour of the day.
1. Pendant Lights Over a Kitchen Island That Balance Task Lighting With Visual Proportion
Pendant lights hung over a kitchen island are the single most impactful lighting decision in any island kitchen layout. They define the island as a dedicated functional zone, provide the downward task light needed for food preparation and dining, and introduce a design element at eye level where it is seen constantly from the kitchen, the adjacent living area, and across the open plan.
The most important variable in island pendant lighting is sizing relative to the island. A pendant that is too small for the island length looks decorative but functionally inadequate and visually timid. The standard sizing guideline: the combined diameter of all pendants above an island should span approximately 60 to 70 percent of the island’s total length. For a 72-inch island, two pendants of 12 to 14 inches in diameter, spaced 24 to 30 inches apart and centered on the island, fulfill both the functional and proportional requirements.
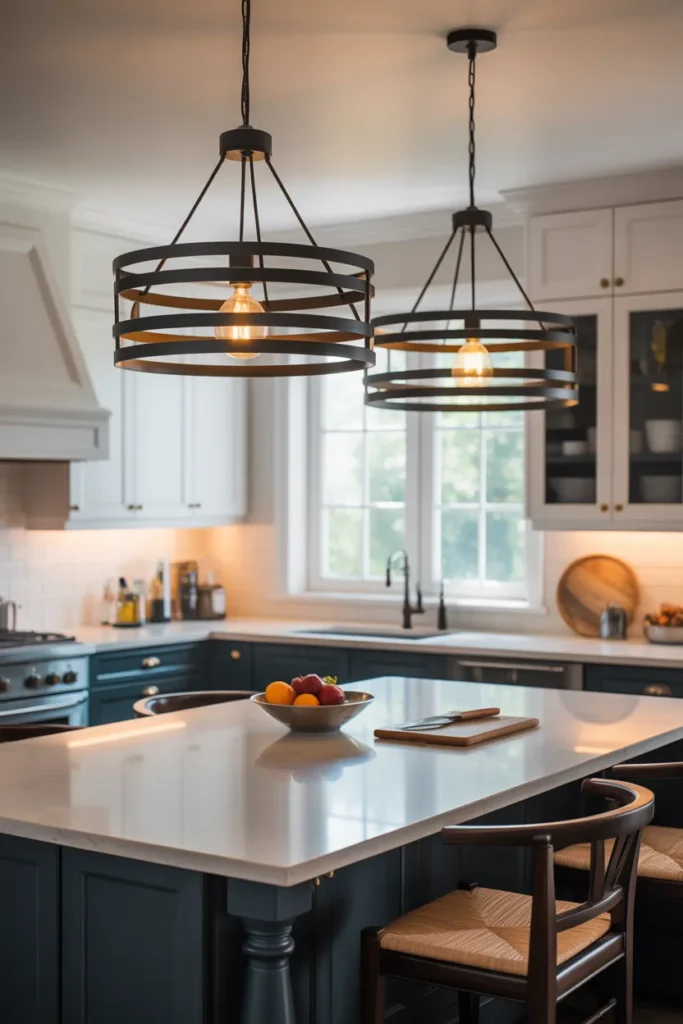

Hanging height determines whether pendant lights function correctly as task lights. The bottom of the pendant shade should sit 30 to 36 inches above the island surface for standard 8 to 9-foot ceiling heights. Pendants hung too high lose their directional task light function and begin to behave like ambient ceiling fixtures. Pendants hung too low create obstructed sightlines across the island and become a physical hazard during food preparation.
Material and finish selection for island pendants should connect to at least one other metal or material already present in the kitchen — cabinet hardware, faucet finish, or appliance trim. A brushed brass pendant in a kitchen with polished chrome hardware and stainless appliances introduces a metal conflict that fragments the room’s visual coherence. Consistency across metal finishes, even in a space with mixed materials, is what makes a kitchen lighting scheme read as designed rather than assembled.
2. Under-Cabinet LED Strip Lighting That Eliminates Counter Shadow and Improves Cooking Safety
Under-cabinet lighting is the most functionally significant kitchen lamp upgrade available at any budget level, yet it remains one of the most commonly absent elements in American kitchens — including newly renovated ones where the opportunity to install it during construction was missed. Counter shadow — the shade cast by upper cabinets blocking overhead light when a person stands at the counter — is the direct cause of poor visibility during food preparation, and under-cabinet LED strips solve this problem completely and permanently.
The installation principle is straightforward: a continuous LED strip mounted to the underside of upper cabinets, positioned toward the front edge rather than the back, illuminates the full counter surface without creating a hotspot or leaving dark zones near the wall. The front positioning is critical — strips mounted at the back of the cabinet underside project light primarily onto the wall above the backsplash rather than onto the counter where it is needed.
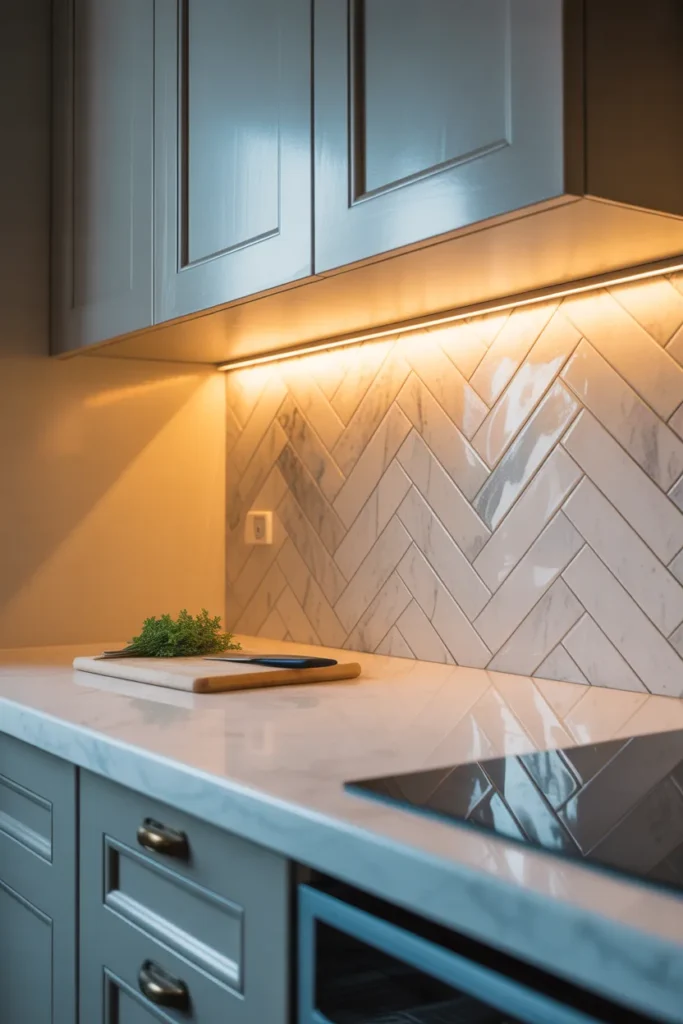
Color temperature selection matters significantly in a kitchen context. Under-cabinet lights for cooking task purposes should be in the 3000K to 4000K range — warm enough to feel domestic, bright enough to accurately render food colors and surface conditions. Lights below 2700K make it difficult to assess meat doneness, vegetable freshness, and surface cleanliness accurately. Lights above 4500K feel clinical and harsh in a residential kitchen environment.
For kitchens with a visible backsplash between the upper cabinets and the counter — a tile, stone, or glass surface that reflects light — under-cabinet strips also serve an accent function, washing the backsplash in warm light that adds depth and glow to the kitchen’s material palette. This dual function — task light and accent light simultaneously — makes under-cabinet LED strips the highest-return lighting investment in any kitchen layout.
3. A Statement Chandelier Over a Kitchen Dining Table That Unifies the Eat-In Zone
In a kitchen with an integrated dining area — an eat-in kitchen, a breakfast nook, or a table positioned at the edge of the kitchen’s open plan — a dedicated chandelier or statement light fixture above the dining table performs the same function that a pendant performs above an island: it marks the zone, delivers functional light for dining, and creates a visual anchor that makes the space feel deliberately composed.
The most common mistake in eat-in kitchen lighting is using a single overhead fixture that attempts to light both the cooking zone and the dining zone from a single source. This approach inevitably compromises both areas — the cooking zone is underlighted while the dining table is inconsistently lit from above rather than from a dedicated, properly positioned source. A separate, dedicated fixture over the dining table resolves both zones correctly.
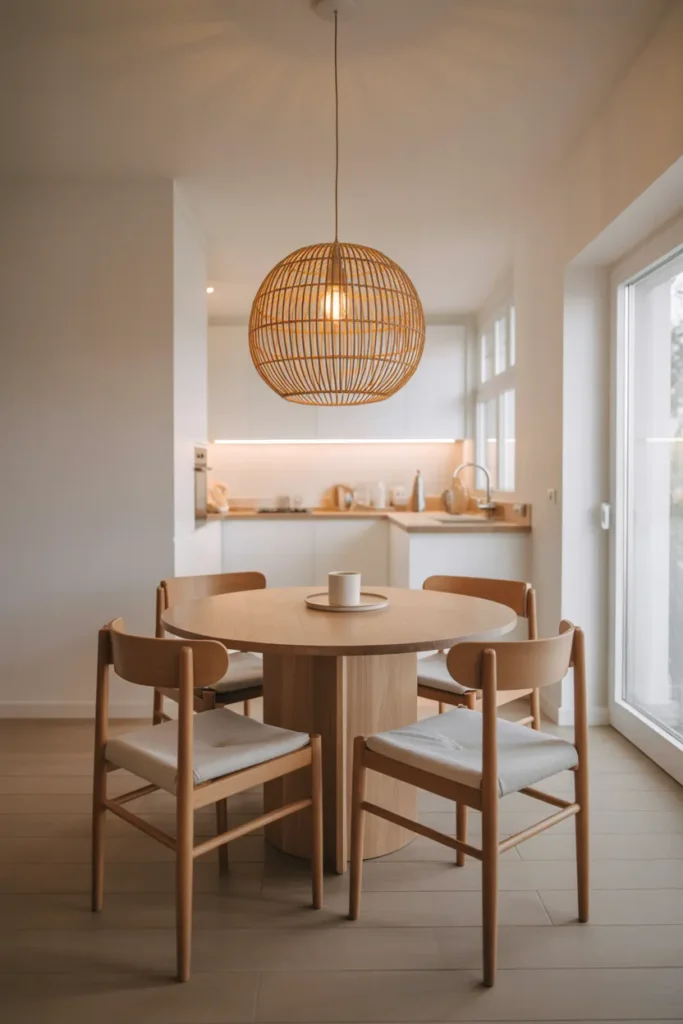
For 2026 kitchen lamp design, the chandelier over a kitchen dining table has moved toward more casual, unfussy silhouettes — a rattan or woven shade in a globe form, a simple multi-arm fixture with exposed bulbs, or a sculptural single pendant in an oversized format that makes the dining zone feel as considered as the rest of the kitchen. Elaborate crystal or heavily ornate chandelier styles create a stylistic inconsistency in most contemporary kitchen environments.
Hanging height over a dining table follows the same principle as island pendants but with a slightly different rule of thumb: the bottom of the fixture should sit 28 to 34 inches above the tabletop for standard ceiling heights. Lower than 28 inches creates a visual obstruction across the table during conversation; higher than 34 inches loses the intimate, focused quality that makes a dining light different from a general overhead source.
4. Recessed Lighting on a Dimmer System That Gives Every Kitchen Layout Full Lighting Control
Recessed downlights — ceiling-mounted fixtures with no visible housing below the ceiling plane — are the most architecturally invisible kitchen lighting option and the most versatile ambient light source available. In combination with a dimmer control system, they provide the full range of light levels needed across different kitchen activities and times of day: bright functional light for cooking, mid-level light for casual kitchen use, and low ambient light for evening atmosphere.
The dimmer system is what transforms recessed lighting from a functional tool into a genuinely responsive lighting layer. Without dimming, recessed lights are permanently at full output — useful for cooking but harsh and inflexible for every other kitchen moment. With dimming, the same fixtures that provide 800 lumens of cooking task light at full brightness can be dialed back to 150 lumens of warm ambient light for evening kitchen use or entertaining.
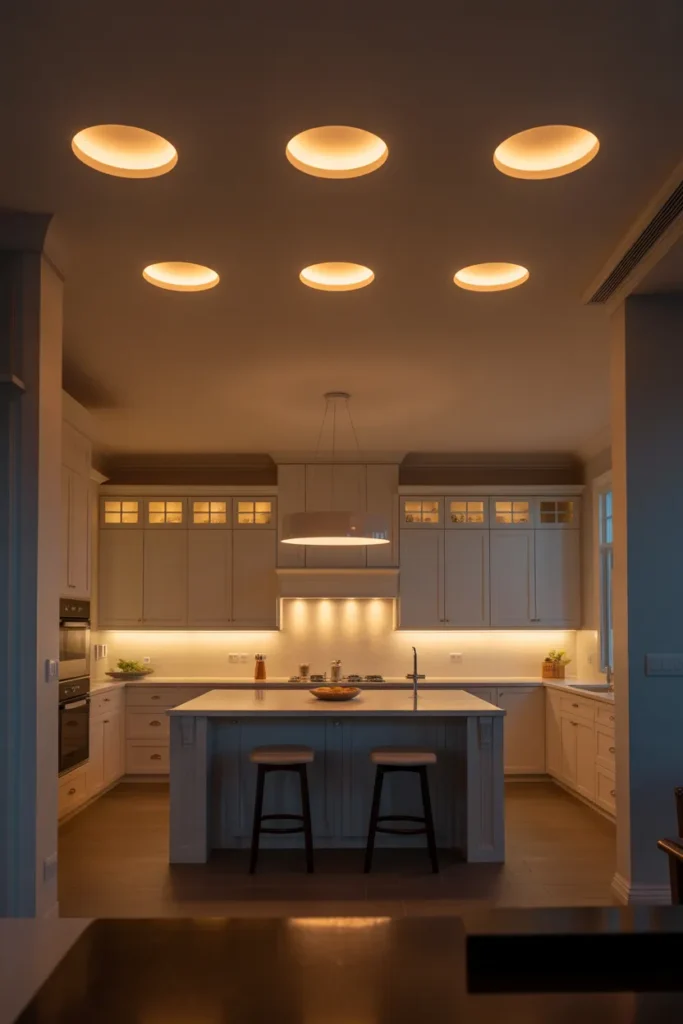
Layout of recessed lights in a kitchen follows a spacing formula based on ceiling height. For 8-foot ceilings, space recessed fixtures approximately 4 feet apart in each direction. For 9-foot ceilings, increase spacing to 4.5 to 5 feet. Position fixtures to avoid placement directly above the front edge of upper cabinets — lights in this position create glare on the cabinet face rather than illuminating the counter below, which is one of the most common and most frustrating recessed lighting installation mistakes in kitchen design.
Trim finish and bulb type consistency are essential for a recessed lighting installation that looks intentional. All fixtures in the kitchen should share the same trim finish — white, chrome, or brushed nickel — and the same bulb color temperature. A kitchen with some recessed lights at 2700K and others at 4000K will have visibly different color zones across the ceiling, which creates an uncomfortable and unresolved visual result regardless of the fixture quality.
5. A Plug-In Swing-Arm Wall Lamp That Adds Task or Accent Light Without Any Electrical Work
A plug-in swing-arm wall lamp — a wall-mounted, articulable lamp that draws power from a standard outlet via a cord managed along the wall — is the most accessible kitchen lamp idea for renters, for kitchens in older homes with limited electrical access, and for homeowners who want to add a specific light source in a location where hardwiring is impractical or cost-prohibitive.
In a kitchen context, a swing-arm lamp mounted beside a specific work zone — a coffee bar station, a baking prep corner, a recipe tablet stand — provides focused accent and task light for that activity without requiring a new circuit or recessed light placement. It is a targeted solution for a targeted problem, which is exactly the kind of specific thinking that produces well-resolved kitchen lighting rather than a generic upgrade.
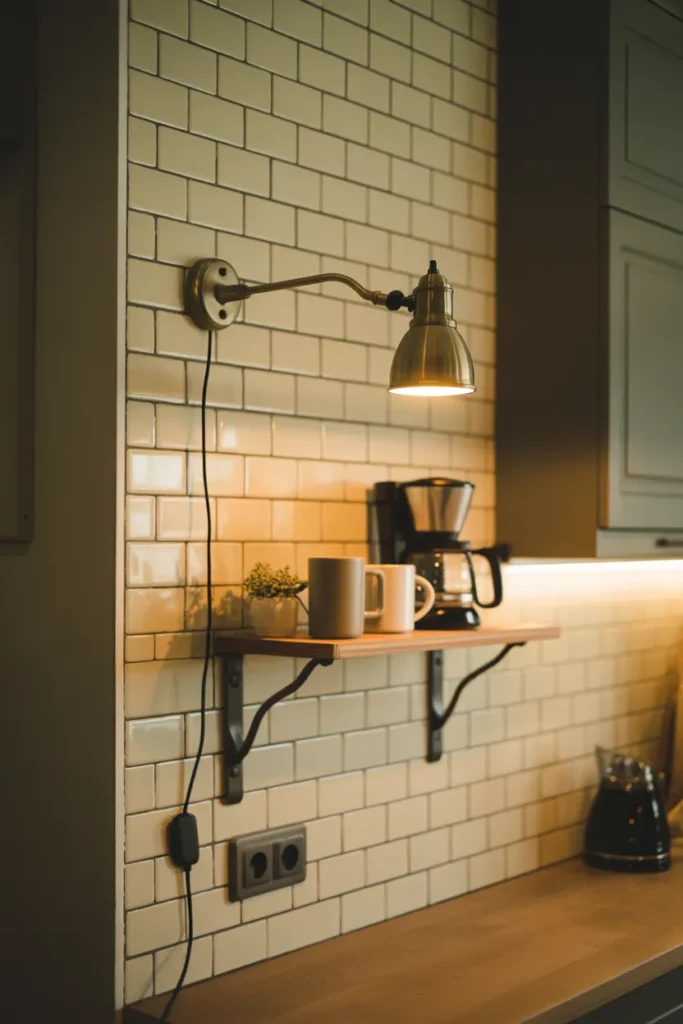
The cord management is the practical challenge with any plug-in wall lamp. A cord that runs visibly down the wall to an outlet is an aesthetic issue in a kitchen environment. The cleanest solution is to mount the lamp close to an existing outlet at counter height and use a cord cover — a slim plastic channel painted to match the wall — to manage the cord’s run to the outlet. In a kitchen with a tile backsplash, the cord can often be routed behind the tile or along the grout line inconspicuously.
Style selection matters in a kitchen lamp context because the swing-arm lamp is a visible design element at close range. A simple brushed brass arm with a small cream shade suits a warm traditional or farmhouse kitchen. A matte black articulating arm with an exposed bulb suits an industrial or modern farmhouse direction. A polished chrome arm with a white cone shade suits a contemporary kitchen. Connect the lamp’s finish to the existing kitchen hardware for visual coherence.
6. Oversized Industrial Pendants in a Galley Kitchen That Make a Narrow Space Feel Intentional
A galley kitchen — two parallel runs of cabinets and counters with a corridor between them — is one of the most functionally efficient kitchen layouts and one of the most challenging to make feel designed rather than utilitarian. Oversized industrial pendant lights hung in a linear series above the galley corridor address both the lighting and the design problem simultaneously: they provide directional task and ambient light along the full working length of the kitchen while creating a strong visual narrative that makes the narrow format feel deliberate rather than constrained.
The industrial pendant style — cage shades, enamel dome shades, large-diameter metal drum shades — suits the galley format particularly well because the galley’s inherent linearity and functional efficiency align with the industrial aesthetic’s emphasis on purposeful design. An ornate or decorative pendant style in a galley kitchen creates a stylistic mismatch; the industrial pendant feels native to the layout.
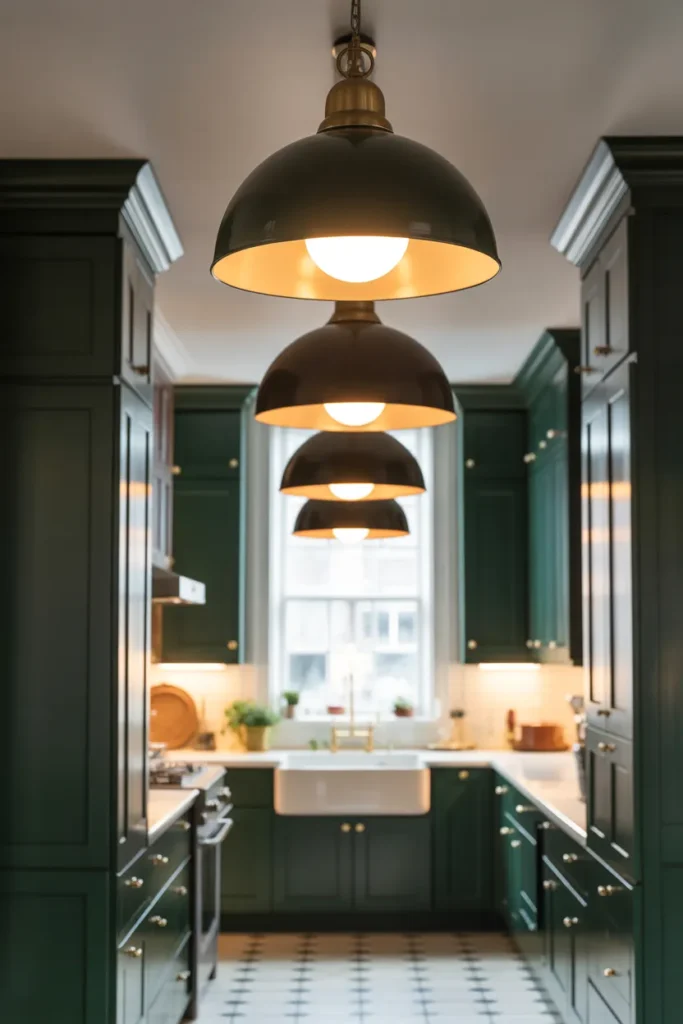
Sizing for a series of pendants in a galley kitchen should be more generous than typical pendant sizing guidance suggests. In a narrow corridor where the pendants hang at the center, a large pendant of 14 to 18 inches in diameter reads correctly — the scale of the fixture gives the narrow kitchen a sense of importance and intention. Small pendants of 8 to 10 inches in the same position look undersized and tentative, like decorative afterthoughts rather than central design decisions.
Spacing between pendants in a series should be consistent and calculated to distribute light evenly along the galley’s working length. For a galley of 10 to 14 feet, three pendants spaced at equal intervals provide consistent coverage without creating dark zones between fixtures. The outer pendants should sit above the main work zones — typically above the sink at one end and the primary prep area at the other — with the center pendant above the midpoint of the corridor.
7. A Lantern-Style Pendant That Adds Warmth and Character to a Traditional or Transitional Kitchen
A lantern-style pendant — a pendant fixture with an open or glass-enclosed metal frame structure referencing historical lantern forms — brings a warmth and material character to kitchen lighting that more minimal or industrial pendants do not provide. In traditional, transitional, colonial, and craftsman-style kitchens, the lantern pendant reads as architecturally appropriate and historically grounded rather than as a style import from a different design direction.
The glass-enclosed lantern pendant serves an additional practical function beyond its aesthetic contribution: the glass panels diffuse and soften the bulb’s light output, reducing glare while maintaining directional warmth. In a kitchen where the island or table is at eye level from adjacent seating, a bare or cage pendant can create glare when viewed from certain angles. The lantern’s glass panels eliminate this problem by distributing the light more evenly across the fixture’s surface.
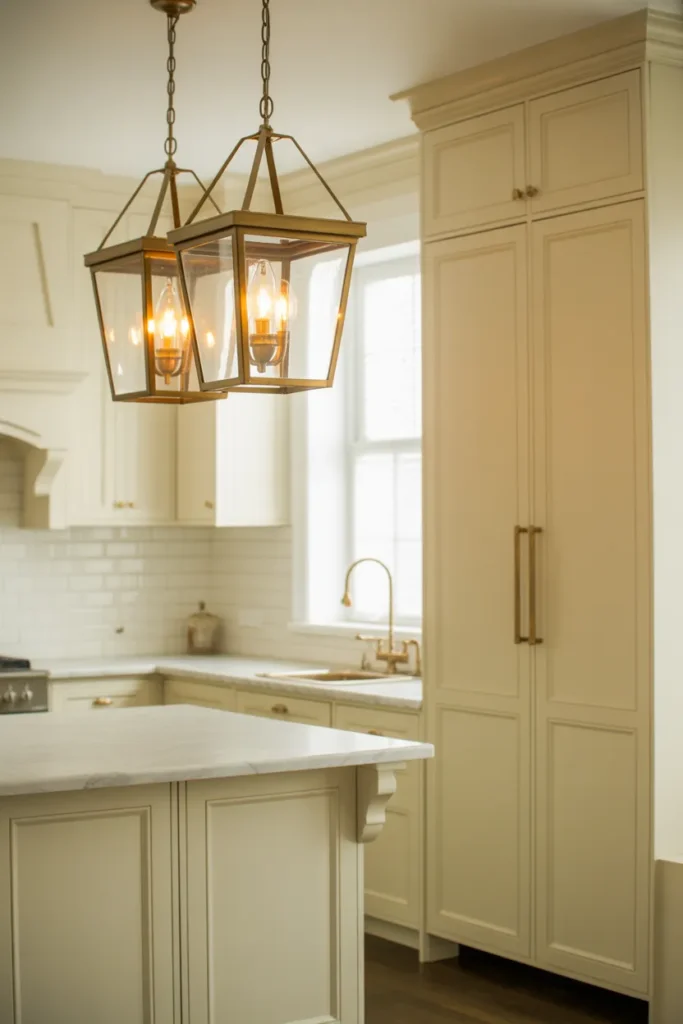
Metal finish on a lantern pendant is the primary design decision. Aged brass or unlacquered bronze lanterns suit warm, traditional kitchens with wood tones, subway tile, and classic cabinetry profiles. Matte black lanterns with clear glass panels suit more contemporary versions of the transitional style and work well in kitchens where other fixtures and hardware are also in matte black. Antique iron or dark bronze lanterns suit craftsman and colonial kitchen aesthetics with their heavier architectural profiles.
One sizing note specific to lantern pendants: the open frame structure makes lanterns appear lighter than solid shade pendants of the same diameter. A lantern pendant needs to be sized somewhat more generously than a solid drum or dome shade of equivalent visual weight. A lantern of 14 to 16 inches in height and 10 to 12 inches in width suits a standard island width of 36 to 42 inches; larger islands of 48 inches or more benefit from lanterns in the 16 to 20-inch height range.
8. LED Toe-Kick Lighting That Creates a Floating Effect and Improves Nighttime Kitchen Navigation
Toe-kick lighting — LED strips installed within the recessed toe-kick channel at the base of kitchen cabinets — is one of the most underused and most visually striking kitchen lamp ideas available for both new and existing kitchens. When lit, the toe-kick strip projects a thin line of light along the floor plane that makes the cabinets appear to float above the floor, adding an architectural depth to the kitchen that overhead lighting alone cannot create.
The practical function of toe-kick lighting is nighttime kitchen navigation. When someone enters the kitchen at 2am for water or a late-night snack, activating a full kitchen lighting system is disruptive — both to the eyes of the person in the kitchen and potentially to others sleeping nearby. Toe-kick lights on a separate switch or motion sensor provide just enough light to navigate safely without the full kitchen illumination system.
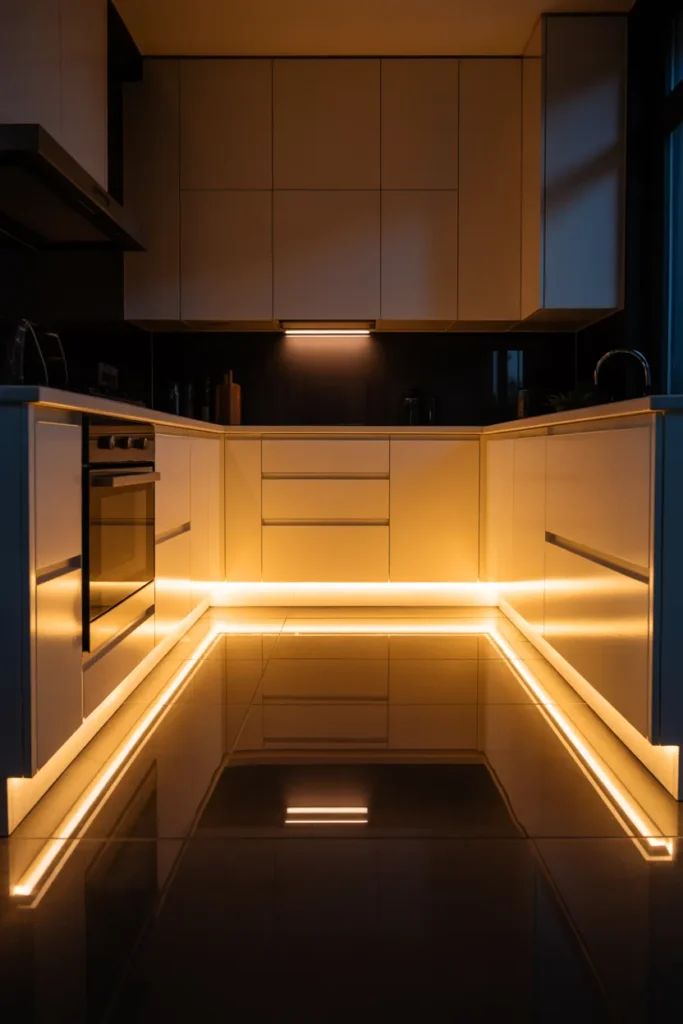
Color temperature for toe-kick lighting should be consistent with the kitchen’s other light sources — warm white at 2700K to 3000K for most residential kitchens. Cool white or blue-toned LEDs in a toe-kick application create an incongruent, almost clinical quality at floor level that conflicts with the warm ambient light sources above. Consistency at every light source in the kitchen creates a unified, professional result.
Installation in an existing kitchen requires removing the existing toe-kick panels, mounting the LED channel within the recessed space, and routing the low-voltage wiring to a switch or smart dimmer. In most kitchens, this is a feasible DIY project for homeowners comfortable with basic low-voltage electrical work. The visual result — a clean, continuous light line at floor level — is disproportionate to the installation complexity and cost.
9. A Semi-Flush Ceiling Fixture That Solves the Low-Ceiling Kitchen Lighting Problem
In kitchens with 8-foot or lower ceilings — common in older American homes, apartment kitchens, and bungalow-style houses — the standard recessed downlight often cannot be installed due to the ceiling assembly depth, and pendant lights hang too close to head height for safe and comfortable use. The semi-flush ceiling fixture — which mounts close to the ceiling with a short stem or direct mount, leaving 4 to 12 inches of clearance between the ceiling and the shade — is the correct solution for this specific constraint.
A semi-flush fixture provides the downward ambient light function of a pendant without the hanging depth that creates clearance problems in low-ceiling kitchens. In an apartment kitchen or a small galley kitchen in a brownstone or older home, a semi-flush fixture in the center of the ceiling is often the only lighting option that satisfies both building constraints and aesthetic requirements simultaneously.
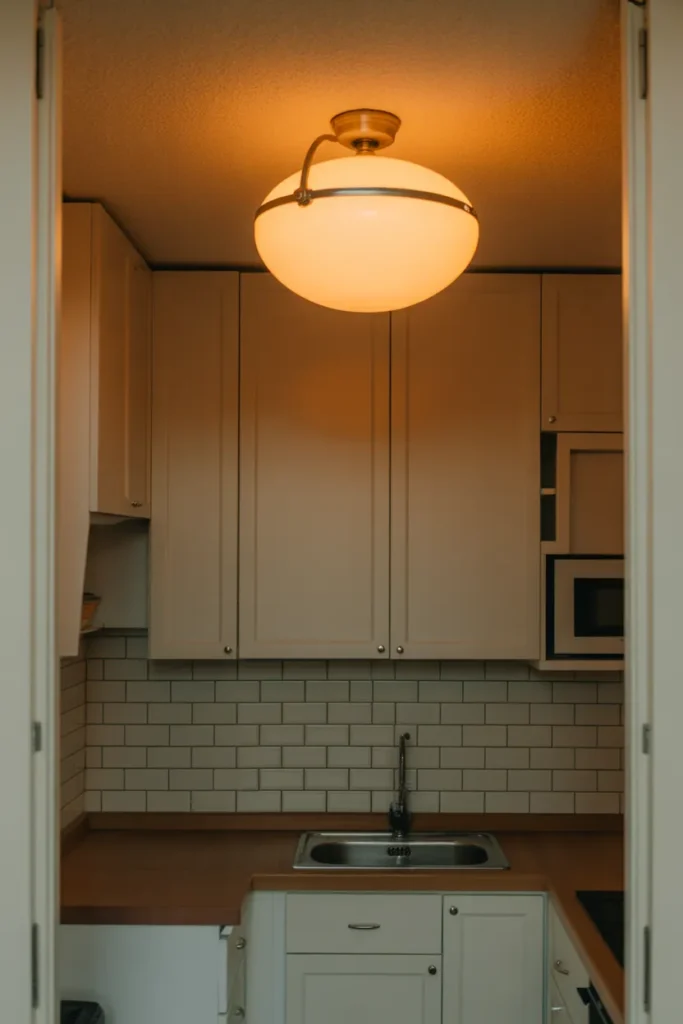
For 2026 kitchen lamp design, the semi-flush fixture has moved beyond the utilitarian dome shade associated with builder-grade installations toward more interesting silhouettes — a drum shade in linen or metal, a globe in opal glass, a cage form with a visible filament bulb, or a sculptural shade in hammered or textured metal. These options deliver genuine design character while remaining within the physical constraints that the low-ceiling kitchen imposes.
The practical selection criterion for a semi-flush fixture in a kitchen is lumen output. Kitchen ambient lighting requires more lumen output than bedroom or living room ambient lighting because of the task-oriented nature of kitchen activities. A semi-flush fixture for a kitchen of 80 to 120 square feet should deliver a minimum of 1500 to 2000 lumens. Decorative fixtures with ornamental shades that restrict light output are inappropriate as primary kitchen light sources in kitchens without supplementary task lighting.
10. Open Shelf Lighting With Integrated LED Strips That Showcase Kitchenware as a Design Feature
Open kitchen shelving — a design choice that replaces upper cabinet doors with exposed shelves, displaying dishware, glassware, and kitchen objects as part of the room’s visual composition — reaches its full design potential when the shelves are lit from within using integrated LED strips. Lighted open shelves transform stored kitchenware from functional objects into a curated display that contributes to the kitchen’s atmosphere at every hour of the day and especially in the evening.
The installation approach for shelf lighting places a slim LED channel along the front underside of each shelf, angled slightly downward to illuminate the items on the shelf below. This placement illuminates the objects on the shelves from above and slightly in front, creating depth and shadow that makes the display three-dimensional. LED strips mounted at the back of the shelf illuminate the wall behind the objects rather than the objects themselves — a common installation mistake that produces a glowing back wall with poorly lit kitchenware in the foreground.
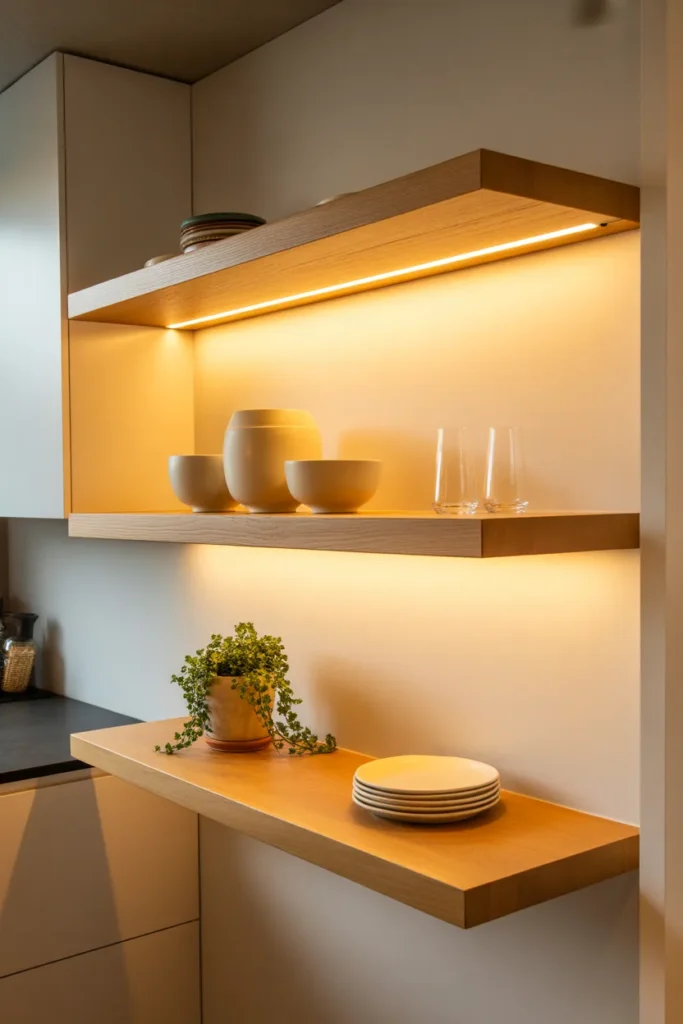
Object selection and arrangement on lighted open shelves requires more discipline than unlighted shelves because the LED light emphasizes everything on the shelf with equal attention. A carefully curated selection of consistent ceramic dishware, glassware in graduated sizes, and one or two natural objects — a small plant, a piece of wood — looks intentional under warm LED light. Mixed packaging, inconsistent objects, and visual clutter become significantly more obvious under direct shelf illumination.
Color temperature on open shelf lights should match the kitchen’s other warm light sources at 2700K to 3000K. The warm tone flatters ceramic, wood, and glass objects by adding a slight golden quality to their surfaces. Cooler color temperatures at 4000K and above make ceramic glazes and glass look colder and less appealing, which defeats the display purpose of the lighted shelf entirely.
11. A Portable Rechargeable Table Lamp on the Kitchen Counter That Adds Warmth Where Fixed Lighting Cannot Reach
A portable, rechargeable table lamp — a self-contained lamp with a built-in battery that requires no power cord and can be placed anywhere on any surface — is one of the most flexible and increasingly relevant kitchen lamp ideas for 2026. As kitchen design continues to incorporate breakfast nooks, built-in banquettes, kitchen islands with seating, and dedicated coffee stations, the need for a warm, intimate light source that can be positioned at table level rather than ceiling level has grown significantly.
The rechargeable lamp solves a specific problem: warm, low-level ambient light in a kitchen zone where fixed lighting is either absent or inappropriate in scale. A kitchen banquette lit only by ceiling recessed lights feels institutional during an evening meal — the light is too high and too broad for the intimate scale of the seating. A rechargeable lamp placed on the banquette table or on the kitchen island’s seating surface brings the light source down to dining height, creating an atmosphere that fixed kitchen lighting cannot replicate without dedicated circuit work.
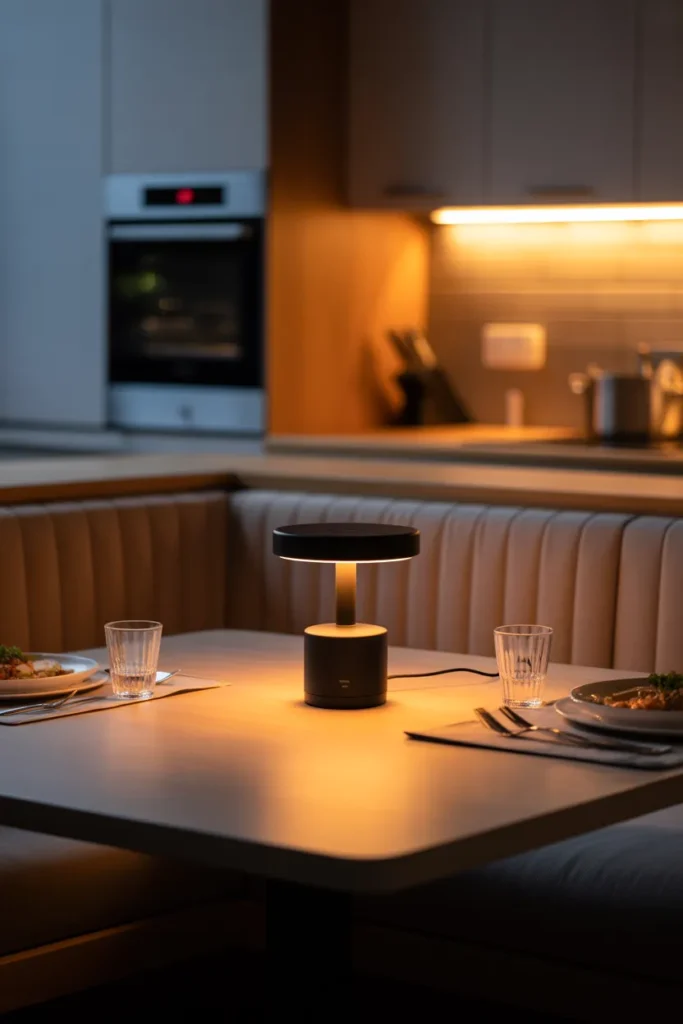
Battery life and charging requirements are the primary practical considerations with a rechargeable lamp. Quality rechargeable lamps in 2026 offer 8 to 20 hours of runtime at low brightness settings on a full charge, which covers multiple days of kitchen use between charges. The charging interface — USB-C is the current standard — should be considered alongside the lamp’s design, as a lamp with an inaccessible or inconvenient charging port becomes a friction point in daily use.
For a kitchen context, the rechargeable lamp should be water-resistant at minimum — kitchen environments involve steam, spills, and humidity that a purely decorative lamp body may not tolerate. Look for lamps with sealed bases and coated shades rather than open-weave or fabric shades that can absorb moisture and odors in a cooking environment.
Final Thoughts
The best kitchen lighting is not about one statement fixture — it is about layering multiple light sources that each address a specific functional need or atmospheric quality at a specific location in the room. The 11 kitchen lamp ideas in this guide cover the full spectrum from the most functionally critical upgrades — under-cabinet LED strips, recessed dimmer systems — to the most atmospherically specific additions — toe-kick lighting, rechargeable table lamps — giving you a complete toolkit for building a kitchen lighting plan that works across every hour of the day.
Save this post so you can return to specific sections as you work through your kitchen lighting decisions one zone at a time. No kitchen requires all eleven solutions simultaneously — identify your specific lighting problem first and apply the idea that solves it most directly. If this guide was useful, explore more kitchen design and home lighting content for the same level of practical, problem-focused guidance.