Getting the lighting right in a living room is one of the most overlooked decisions homeowners make — and one of the most impactful. When you layer lighting for a cozy high end living room, you move beyond a single overhead fixture and create depth, warmth, and function that elevate every corner. This guide walks you through 18 specific, practical approaches used in professionally designed spaces across the USA — so you can apply them with confidence.
1. Combine Recessed Lighting With a Statement Chandelier for Depth and Drama
Pairing recessed can lights with a bold chandelier gives you the best of both worlds: general illumination and a strong focal point. The recessed lights handle ambient coverage across the ceiling plane, while the chandelier anchors the seating area and adds visual weight.
This combination works best in rooms with 9-foot or higher ceilings. If your ceiling is lower, opt for a flush-mount or semi-flush chandelier to avoid the space feeling compressed.
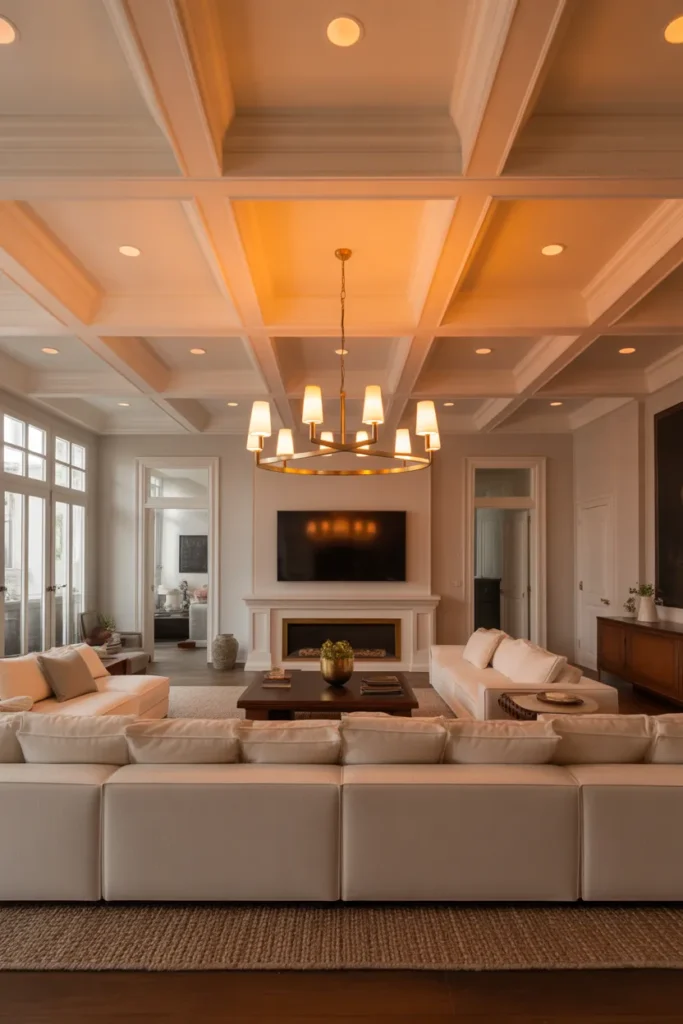

The most common mistake here is centering the chandelier over the room rather than over the conversation area. Always position your statement fixture above your primary seating arrangement, not over empty floor space.
Use warm white bulbs (2700K–3000K) in both layers for consistency. Mixing color temperatures between fixtures creates a disjointed look that reads as unfinished, not layered.
2. Use Floor Lamps Behind Sofas to Add Warmth Without Overhead Glare
A floor lamp placed behind or beside a sofa provides indirect uplight that bounces off the wall and ceiling, creating softness without the harshness of overhead fixtures. This is one of the fastest ways to make a living room feel warmer in the evening.
Arc floor lamps are especially effective in open-plan living spaces because they define the seating zone without requiring any wiring or permanent installation. This makes them ideal for renters or anyone who wants flexibility.
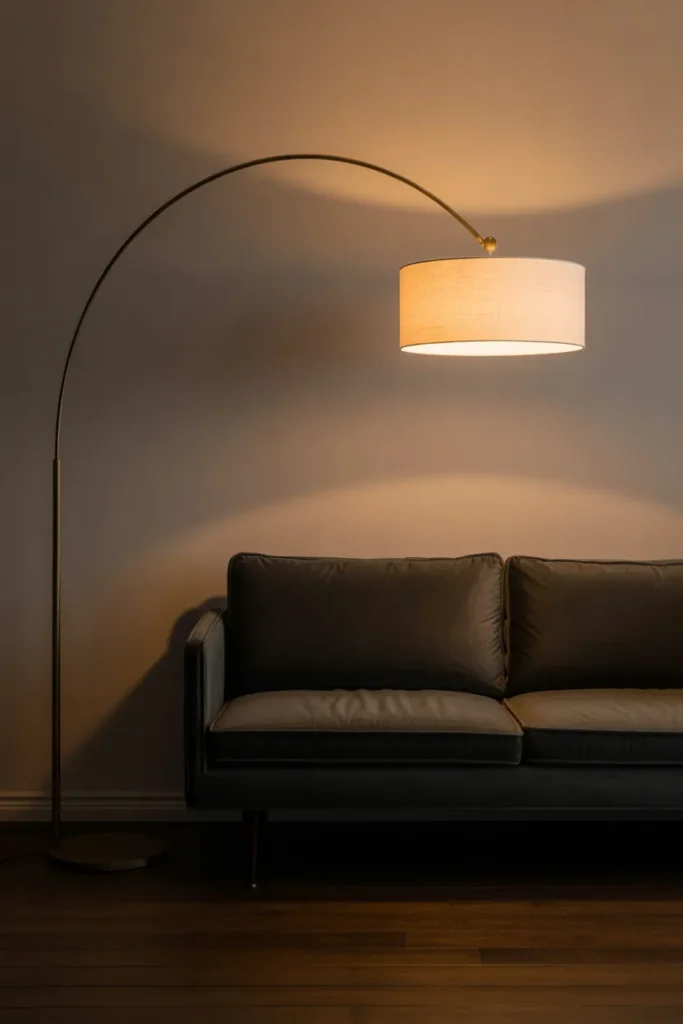
Position the lamp so the shade sits slightly above eye level when seated — roughly 58 to 65 inches from the floor. Too low and it creates glare; too high and it loses its warming effect on the immediate seating area.
Avoid lamps with exposed bulbs unless the fixture is specifically designed for that look. An unshielded bulb behind a sofa creates hotspots on the ceiling that distract rather than enhance.
3. Install Dimmable Wall Sconces to Control Mood at Every Hour
Wall sconces serve a function that neither ceiling lights nor floor lamps can fully replace — they deliver light at eye level, which is the most flattering and mood-enhancing position in any room. When paired with a dimmer, they give you full control over the atmosphere from midday brightness to evening intimacy.
Sconces flanking a fireplace, artwork, or mirror are the most common and effective placements. They frame the focal wall and create bilateral symmetry that reads as high-end and intentional.
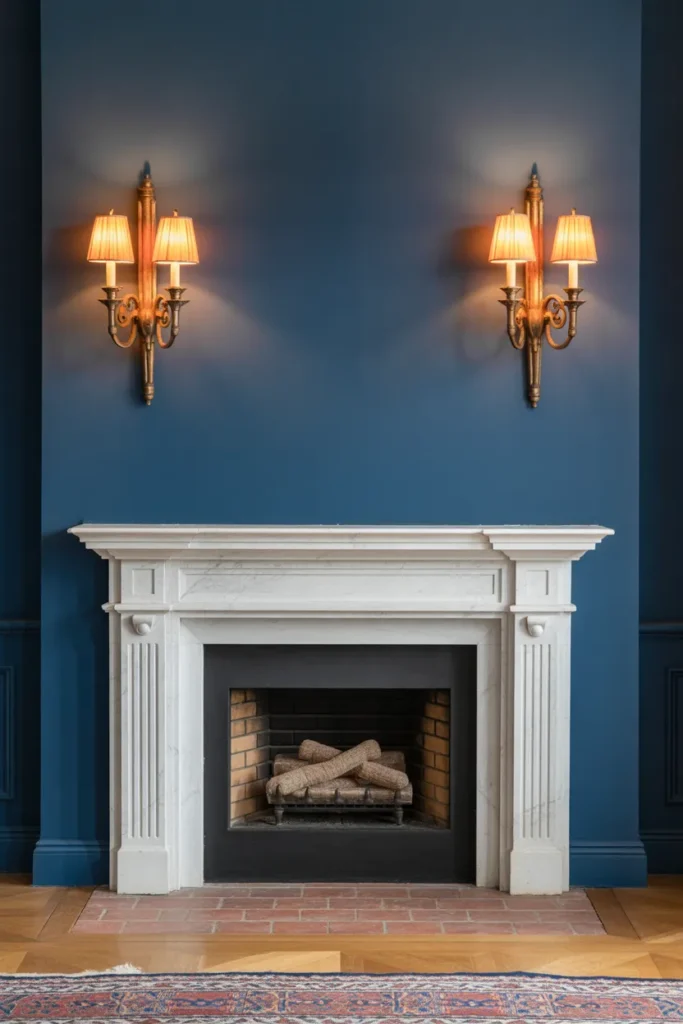
Install sconces at 60 to 66 inches from the finished floor — this places them at comfortable standing eye level without competing with artwork or mirrors hung above.
Always hardwire sconces when possible. Plug-in sconces with visible cords immediately lower the perceived quality of the room, even if the fixture itself is beautiful.
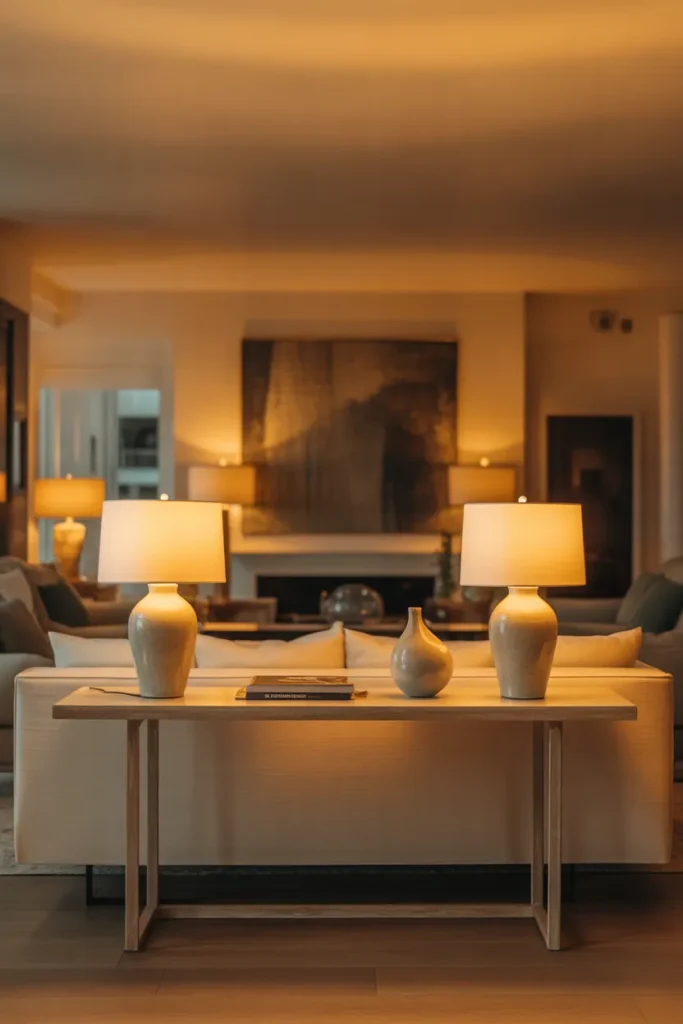
4. Layer Table Lamps on Side Tables for Intimate Pools of Light
Table lamps create intimate pools of light that draw the eye down into the seating area rather than up toward the ceiling. This grounding effect makes a room feel more human in scale, which is core to achieving that cozy high end living room quality.
Use table lamps in pairs where possible — matching lamps on either end of a sofa or console table create balance and a sense of deliberate design. Mismatched lamps can work, but they require a shared element such as the same shade shape or metal finish to feel cohesive.

The lampshade bottom should sit roughly at seated eye level, around 38 to 42 inches from the floor when measured from the table surface plus lamp height. Shades that sit too high throw light only at the ceiling; too low and they create uncomfortable downward glare.
Linen, cotton, and white drum shades diffuse light most evenly. Dark or opaque shades create dramatic focused pools, which are beautiful but reduce overall ambient contribution — factor this into your layering plan.
5. Add Recessed Lighting on Dimmers to Build a Flexible Ambient Base
Recessed lighting is the foundation of most well-lit living rooms in the USA — but only when it is dimmable. Fixed-output recessed lights are one of the biggest lighting mistakes in residential design because they force you into a single intensity level that is usually too bright for evening use and too flat for visual interest.
Use LED retrofit bulbs rated at 2700K for warmth, and ensure every recessed fixture is on a compatible dimmer switch. Many LED bulbs are not dimmer-compatible, so confirm the pairing before purchase.
Space recessed lights approximately 4 feet from walls and 4 to 6 feet apart from one another for even coverage without hotspots. A common error is placing too many fixtures, which results in a commercial, over-lit feel that works against the cozy atmosphere you are trying to build.
In rooms where you want a layered look, treat recessed lights as the background layer only — dial them down to 30 to 50 percent in the evening and let your accent and task layers do the work.
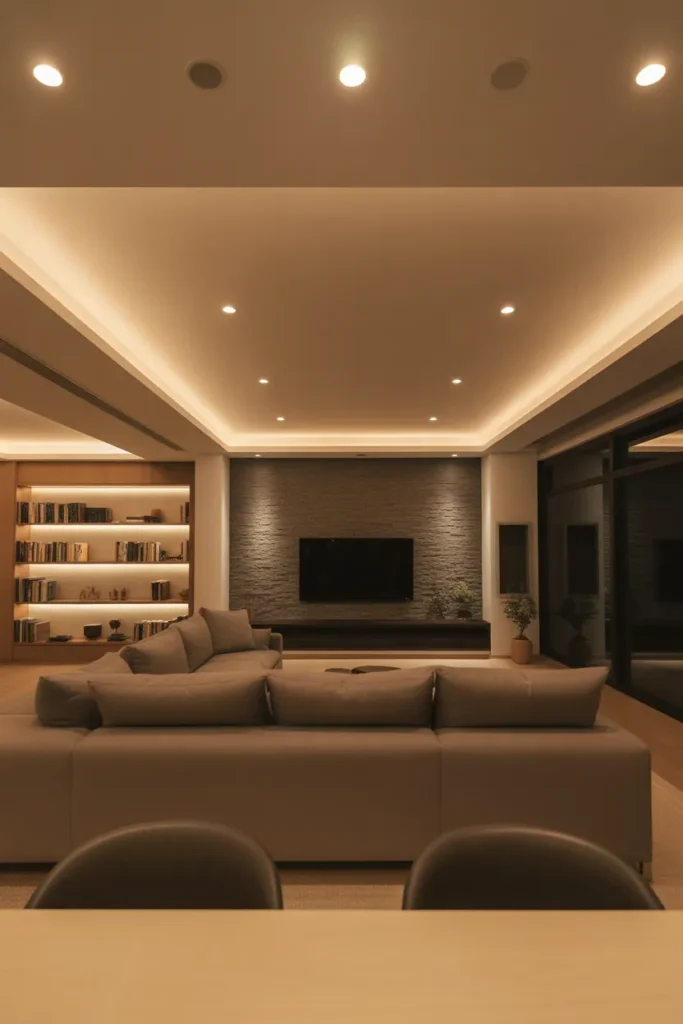
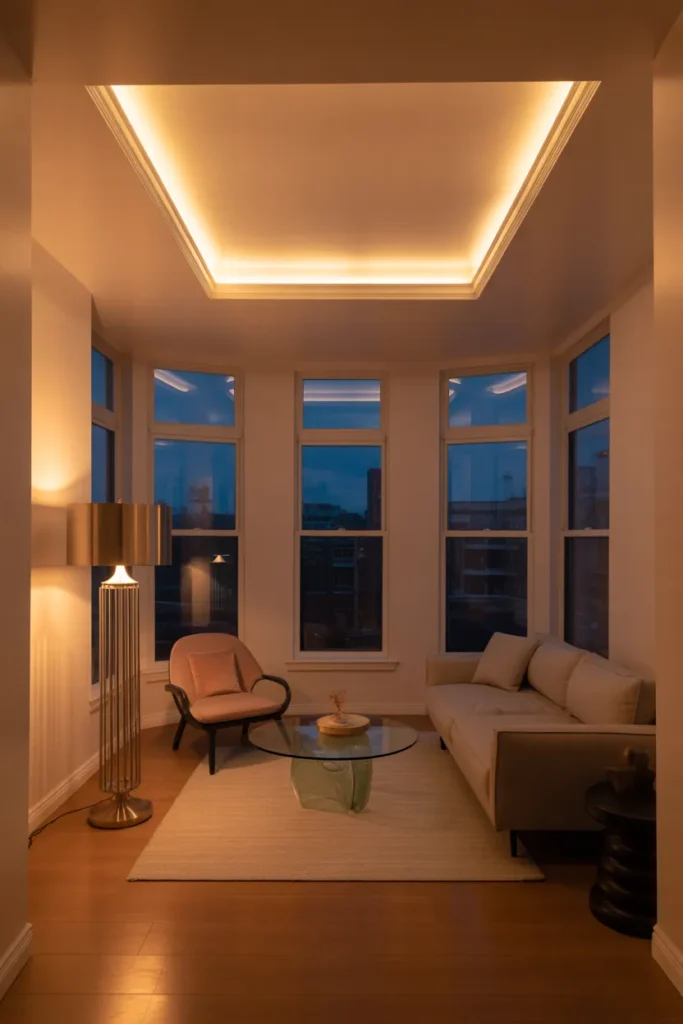
6. Use Cove Lighting Along Crown Molding for a Luxury Hotel Effect
Cove lighting — LED strip lights hidden inside a ledge or crown molding detail — produces indirect uplight that grazes the ceiling and creates a soft halo effect. It is one of the clearest signals of a high-end interior because it requires deliberate architectural planning to execute well.
This technique works especially well in rooms with tray ceilings, coffered ceilings, or custom crown molding. The recess hides the light source entirely, leaving only the glow, which is what gives it that polished, editorial quality.
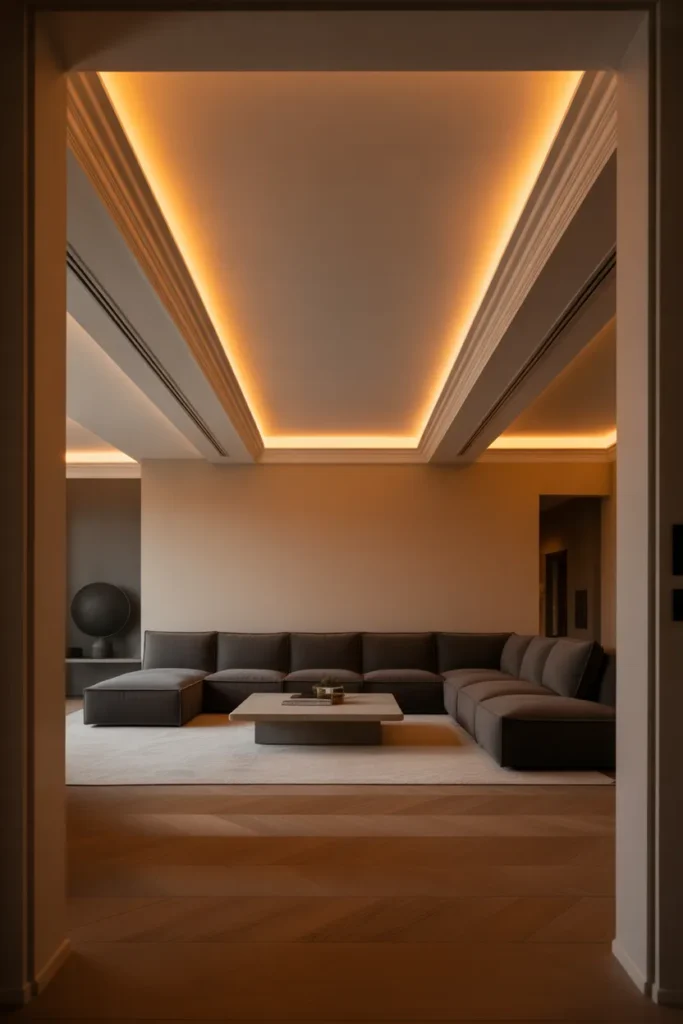
Use a continuous LED strip rated at 2700K to 3000K. Avoid gaps or visible hotspots by using a high-density strip (at least 60 LEDs per meter) and diffusing channels where the ceiling material meets the cove.
Cove lighting alone is not enough — it must work alongside other layers. Without task and accent lighting below, cove lighting creates a top-heavy room that feels theatrical rather than warm and livable.
7. Place Accent Lights Inside Built-In Shelves to Highlight Curated Displays
Built-in shelving with integrated lighting serves two purposes at once — it illuminates objects and books while also contributing a warm fill light to the room’s overall atmosphere. Done correctly, it reads as intentional and architecturally considered, not as an afterthought.
LED puck lights or slim LED strip lights mounted at the top interior of each shelf bay work best. Puck lights create focused circles of light that suit individual objects; strip lights provide even illumination across the full shelf depth and work better for books or grouped collections.
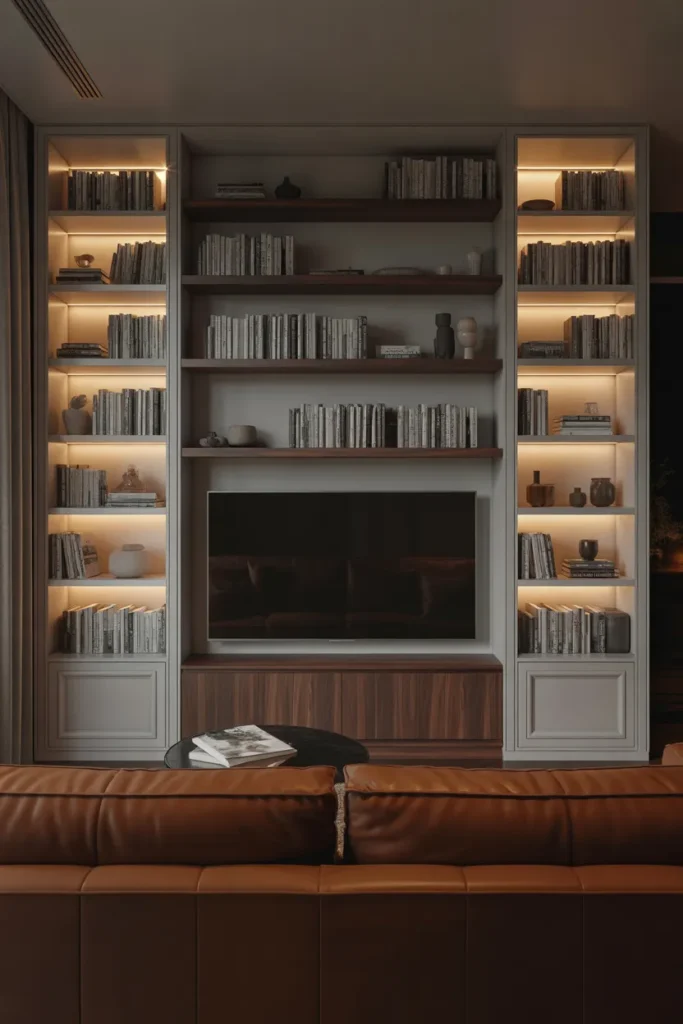
Use the same color temperature throughout the shelving to maintain visual consistency. Mixing warm and cool LEDs within a single built-in is a common mistake that makes the display look scattered.
Keep at least two shelf bays unlit as breathing room — lighting every single shelf creates visual clutter and removes the sense of intention that makes built-in lighting feel elevated.
8. Use a Low-Hung Pendant Over a Side Table to Define a Reading Corner
A single pendant hung low over a side table or reading chair creates a defined micro-zone within the living room. This technique borrows from restaurant and hospitality design, where lighting is used to create separate atmospheres within a single open space.
The pendant should hang so the bottom of the shade is approximately 48 to 54 inches from the floor when positioned over a side table with a chair beside it. Lower than 48 inches begins to interfere with sightlines; higher than 54 inches loses the intimate, defined quality.
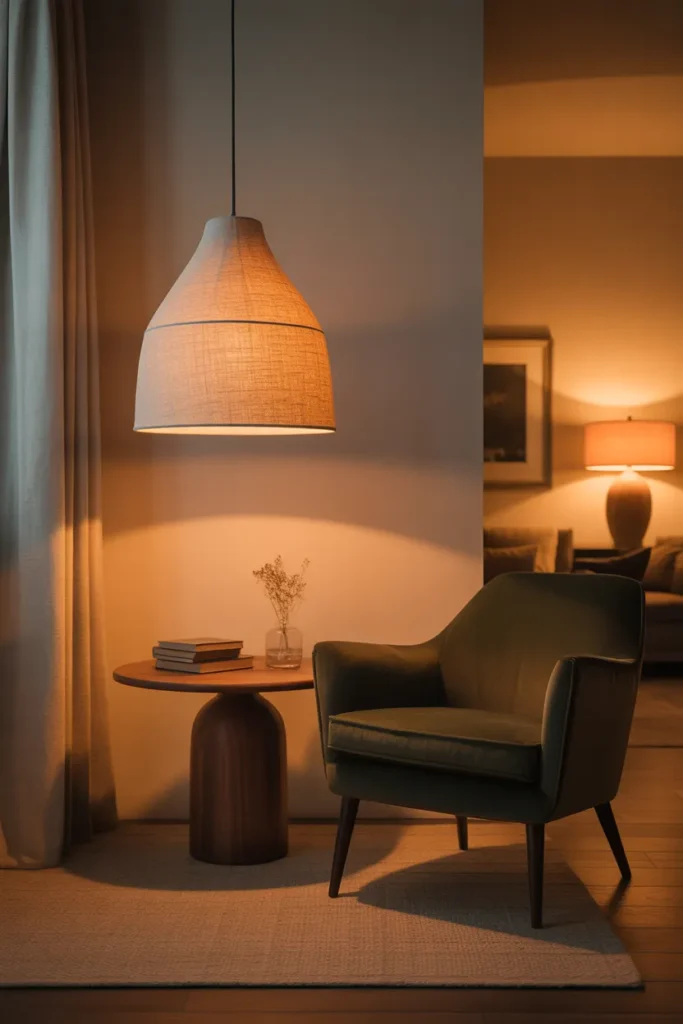
Choose a shade material that diffuses light softly — linen, frosted glass, or paper all work well. Exposed metal shades that direct light only downward are too focused for a reading corner and create uncomfortable shadows.
This approach is particularly effective in larger living rooms where the space benefits from broken-up zones. It signals to anyone entering the room that this corner has a distinct purpose, which adds both function and sophistication.
9. Install Fireplace-Adjacent Uplights to Amplify Texture and Warmth
Uplights placed at floor level beside a fireplace enhance the textural quality of stone, brick, or plaster surrounds by casting grazing light across the surface. This technique intensifies the visual warmth of the fireplace wall and reinforces the cozy atmosphere you are building through layered lighting.
Use compact LED uplights with a narrow beam angle — 15 to 25 degrees — to concentrate the grazing effect on the wall surface. Wide-beam uplights wash the wall too evenly and lose the texture-revealing quality.
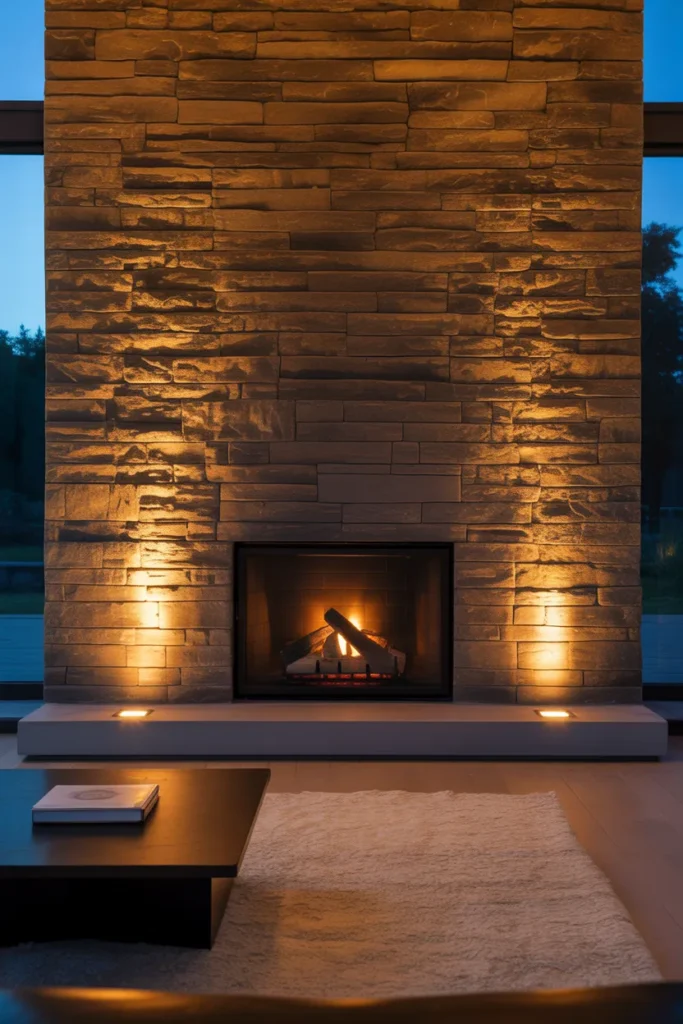
Position uplights 6 to 10 inches from the wall surface. Too close and you get an intense hotspot; too far and the grazing angle is lost. Always test placement before committing to any in-floor or baseboard installation.
This works best on stone, brick, limewash plaster, or shiplap — any material with surface relief. On smooth drywall, uplighting reveals paint roller marks and imperfections rather than enhancing texture, so it is best avoided on perfectly flat surfaces.
10. Use Warm Edison Bulbs in Exposed Fixtures to Add Character Without Going Rustic
Edison-style bulbs in amber glass add a distinctive warmth that standard bulbs cannot replicate. When used in exposed-bulb fixtures — like open cage pendants, globe chandeliers, or vintage-style wall sconces — they contribute both light and visual texture to a room.
This approach fits most naturally in transitional, industrial-modern, or eclectic interiors. In a very clean, minimal room, exposed Edison bulbs can read as stylistically inconsistent unless the other materials in the space carry some warmth or rawness.

Choose bulbs rated at 2200K to 2400K for the deepest amber warmth. Standard warm white LED bulbs at 2700K will not produce the same visual effect, even in an identical fixture.
The key limitation to plan around is light output — Edison-style bulbs are decorative first and functional second. Always supplement them with other layers in the room. Using them as your only light source results in a dim, yellowish space that feels more like a speakeasy than a high-end living room.
11. Place Buffet Lamps on a Console Table Behind the Sofa for a Layered Glow
Console tables placed directly behind a floating sofa offer a perfect platform for buffet lamps — tall, narrow lamps traditionally used in dining rooms but equally effective in living spaces. Positioned here, they add height, fill the visual gap between the sofa back and the ceiling, and contribute warm ambient light at a mid-wall level.
Buffet lamps typically range from 30 to 36 inches in total height, which positions the shade at roughly mid-wall level when on a standard 30-inch console table. This creates a distinct lighting layer that sits between floor lamp height and ceiling level.
Use them in pairs for symmetry, and choose shades that match or complement those used elsewhere in the room. A console lamp with a completely different shade style from your other lamps disrupts the cohesion of the layering scheme.
This placement also solves a common layout problem: rooms where the sofa floats in the middle of the space can feel unanchored. A console table with lamps behind the sofa both grounds the arrangement and adds the layered illumination that pulls the whole design together.
12. Use Torchiere Floor Lamps to Bounce Light Off Ceilings in Low-Ceilinged Rooms
Torchiere floor lamps — those that direct all light upward — are one of the most underused tools in living room lighting. By bouncing light off the ceiling, they create a broad, diffused ambient glow that feels natural and fills the room without the directness of recessed lights or table lamps.
This technique is especially valuable in rooms with 8-foot ceilings where cove lighting is not feasible. The ceiling becomes the reflective surface, and the quality of the bounce light depends heavily on ceiling color. White and very light ceilings reflect 80 to 90 percent of the light; dark painted ceilings will absorb most of it and make torchieres ineffective.
Place torchiere lamps in corners where they can bounce light across the full room rather than in the center of a wall where the bounce is limited. Corner placement also removes them visually from the primary sightlines of the room.
Choose models with a dimmer built into the pole — this is standard on quality versions and essential for controlling the contribution of this layer relative to others in the room.
13. Highlight Artwork With Adjustable Picture Lights or Track Lighting
Artwork lighting is one of the clearest markers of a truly designed living room. Most homeowners hang art and leave it in whatever ambient light exists — but this wastes both the art and the opportunity to add a purposeful accent layer.
Picture lights — small fixtures mounted directly to the frame or wall above a painting — provide focused illumination that draws the eye to the artwork and reinforces its importance in the room. Adjustable wall-mounted track heads serve the same purpose with greater flexibility to redirect light as collections change.
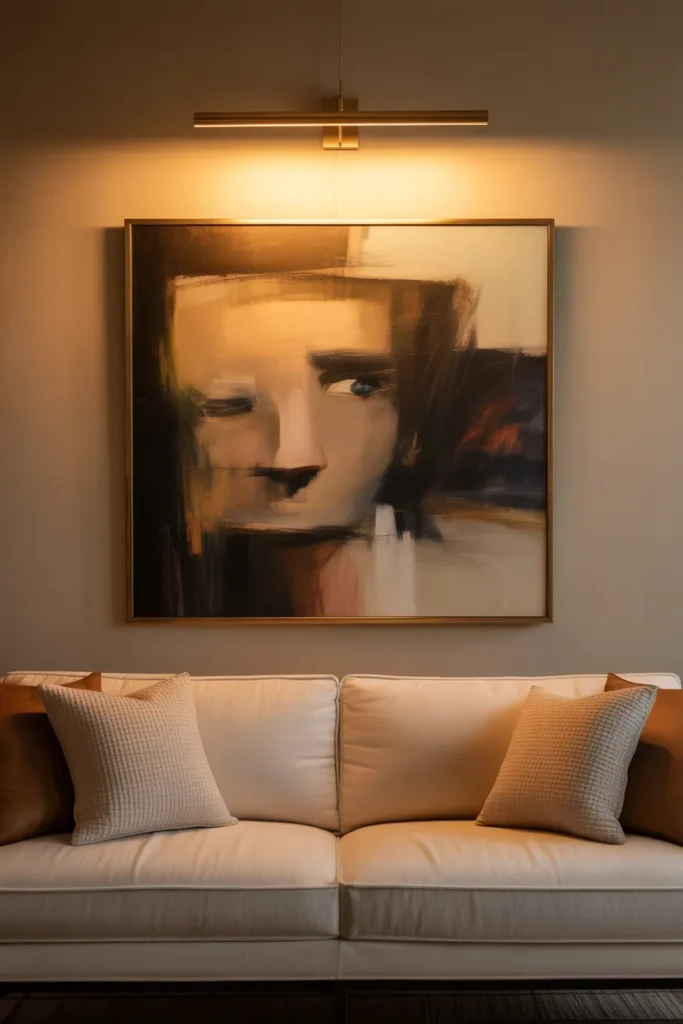
The beam should illuminate the full artwork without spilling significantly onto the surrounding wall. A 30-degree beam angle works for most standard paintings; wider pieces may need two fixtures or a longer picture light bar.
Use a CRI (Color Rendering Index) of 90 or above for artwork lighting. Lower CRI bulbs shift colors and distort the artwork — this matters especially for paintings with complex color ranges. Many standard LED bulbs fall below this threshold, so verify the specification before buying.
14. Use Candlelight and Flameless Alternatives to Add the Warmest Layer
No artificial light source fully replicates the quality of candlelight — it is the warmest, most dynamic, and most flattering light available in any residential setting. For a cozy high end living room, incorporating real or high-quality flameless candles as a final layer is not a decorative afterthought but a genuine lighting decision.
Group pillar candles on a tray on the coffee table, or use tall tapered candles in candlesticks on a console or mantel. The movement of real flame adds life to a room that static lighting cannot provide.
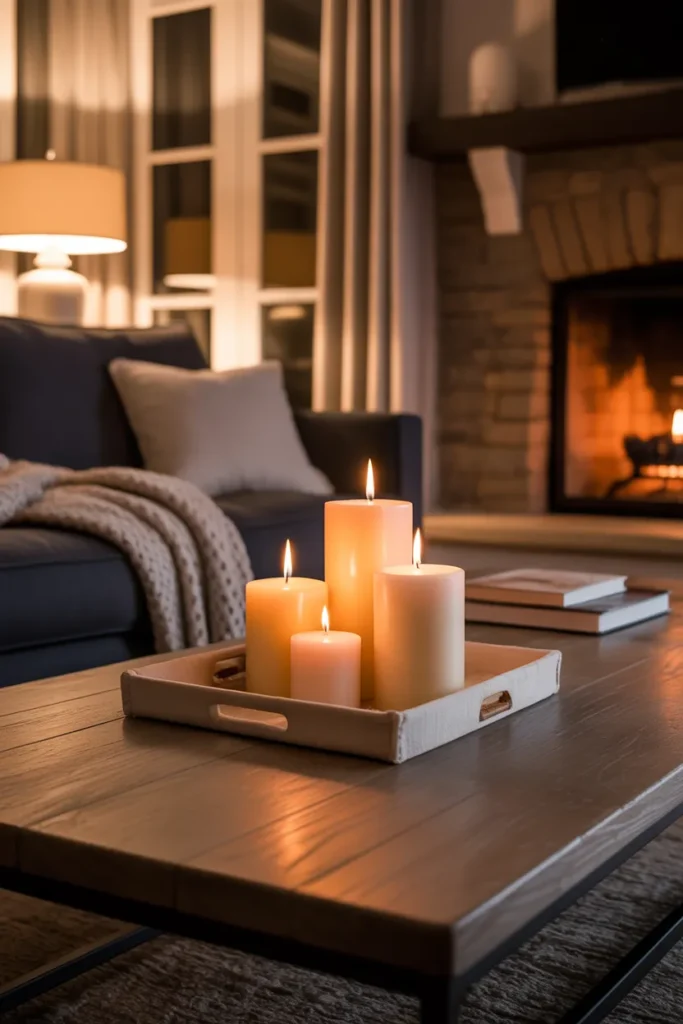
If real candles are not practical, invest in quality flameless wax candles with a real-wax exterior and a warm flicker mode. The distinction between cheap plastic flameless candles and real-wax versions is immediately visible, so material quality matters here.
Position candle groupings at coffee table height and console height to add lighting at the lowest layer in the room. This close-to-floor warmth contributes to the sense of depth that separates a truly layered room from one that simply has multiple fixtures on at once.
15. Install Under-Shelf LED Strips on Media Units for a Modern Ambient Layer
LED strips mounted beneath floating shelves or media console units create a gentle ambient glow at baseboard level that adds depth to the lower portion of the room. This technique is borrowed from hospitality and high-end retail design, where lighting the base of furniture or cabinetry creates a sense of the piece floating and adds dimensionality.
Use a warm white LED strip (2700K) and diffuse it through an aluminum channel with a frosted diffuser lens. Bare LED strips without a diffuser produce visible hotspots between individual diodes, which reads as cheap regardless of fixture quality elsewhere in the room.
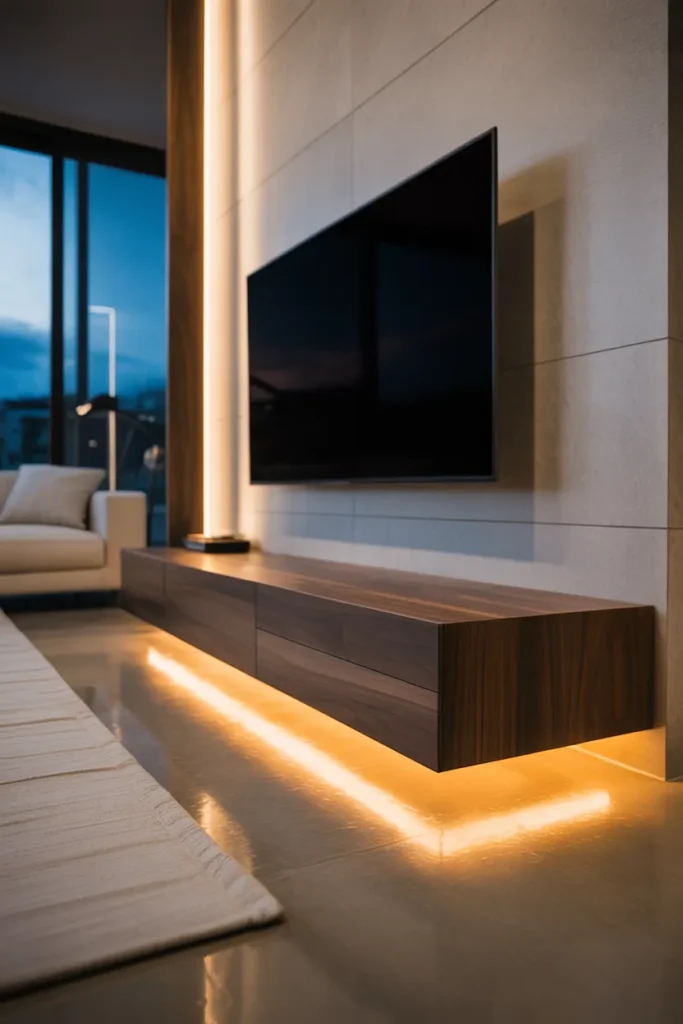
Route the LED strip along the underside of the media console, floating shelves, or even a low credenza. Keep the strip recessed far enough from the front edge that the light source itself is not visible from seated position.
This layer works particularly well in rooms where the media wall is a design feature. It visually separates the console from the floor, adds a premium quality to the wall, and contributes warm fill light that supplements the ambient and accent layers above.
16. Layer Pendant Lighting Over a Defined Conversation Zone in an Open Floor Plan
In open-plan homes — which represent a significant portion of USA residential design — defining the living room zone without walls requires lighting to do the work. A pendant or cluster of pendants hung directly over the primary seating arrangement gives the space a ceiling-level boundary that signals this is a separate, intentional zone.
The pendant cluster should hang at 7 to 8 feet from the floor to avoid interfering with sightlines while still clearly marking the territory below. In very high ceilings, you may need to extend the canopy drop to bring the fixtures down to an appropriate height.
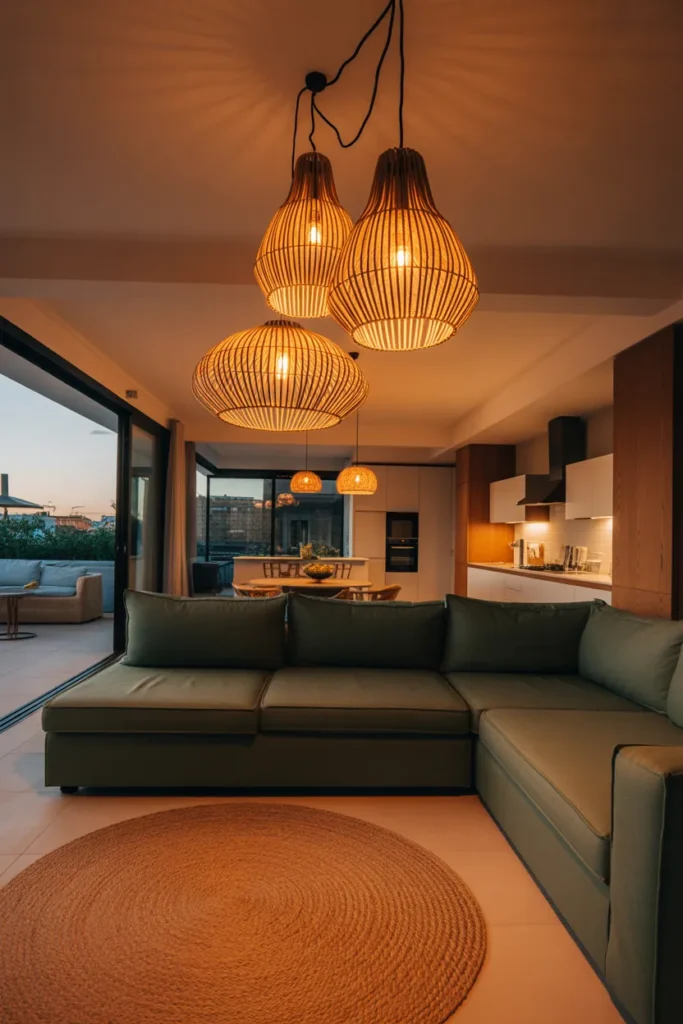
Choose pendants that are large enough to be visible and meaningful from other areas of the open plan — small or delicate pendants read as decorative objects rather than zone-defining fixtures at scale. A minimum of 16 inches in diameter for a single pendant, or a cluster spread across at least 30 inches, is appropriate for most open-plan living areas.
This is one of the most effective ways to add layered lighting for cozy high end living room design in open-plan spaces without construction. The fixture defines the zone above while the layers below — floor lamps, table lamps, and accent lights — build the warmth within it.
17. Use a Pair of Pharmacy or Swing-Arm Lamps to Add Task Lighting With Style
Pharmacy lamps and swing-arm wall lights add adjustable, directional task lighting without requiring floor space or table surface area. They solve a practical problem — delivering focused light exactly where you need it for reading — while also contributing to the layered look of a well-designed room.
Wall-mounted swing-arm lamps beside a sofa or armchair work particularly well in rooms where side tables are narrow or absent. The arm extends to position the light precisely where needed and retracts when not in use, which makes them space-efficient for apartments and smaller living rooms.
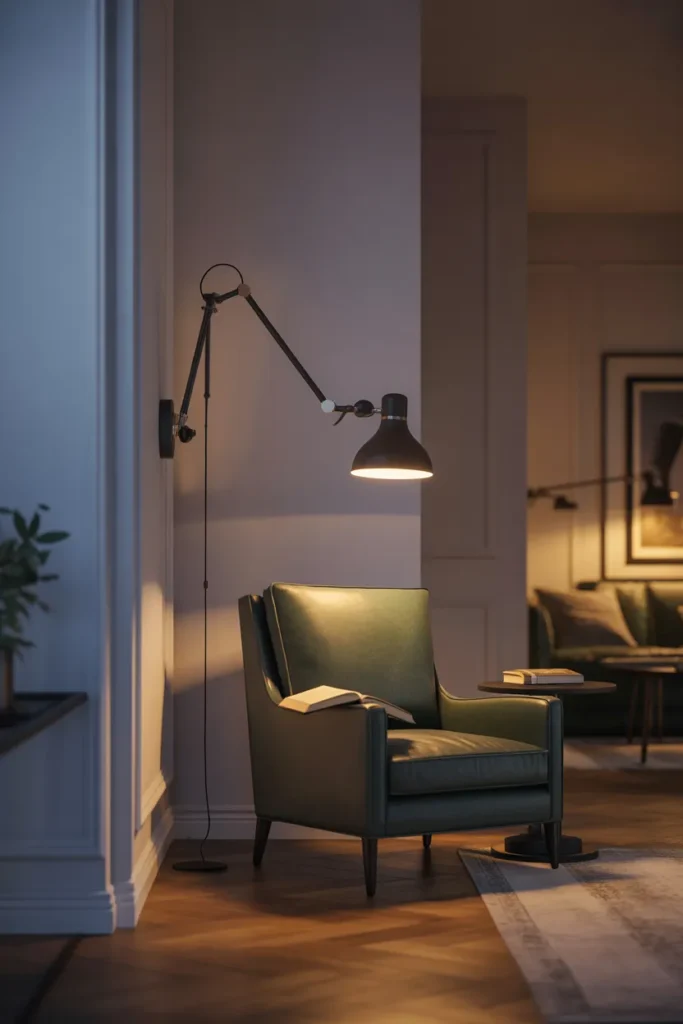
Mount swing-arm lamps at 48 to 54 inches from the floor to the center of the shade. This positions the light source at approximately seated shoulder height, which is optimal for directing light onto reading material without creating glare.
Choose a finish that connects to at least one other metal in the room — whether that is a coffee table leg, decorative hardware, or the chandelier finish. Isolated metal finishes are one of the most common ways a room looks assembled rather than designed.
18. Design a Master Lighting Scene Using a Smart Dimmer System for Full Control
All eighteen layers described in this guide reach their full potential only when you can control them collectively. A smart dimmer system — whether a simple multi-zone dimmer panel or a fully integrated smart home lighting controller — allows you to set scenes for different times of day and activities without adjusting every fixture individually.
Program at minimum three scenes: a daytime scene at full or near-full brightness for cleaning, working from home, or high-activity use; an evening scene that dims recessed and overhead fixtures while activating floor lamps, table lamps, and accent lights at medium intensity; and a late-evening or movie scene that reduces everything to 10 to 20 percent with only the warmest accent layers active.
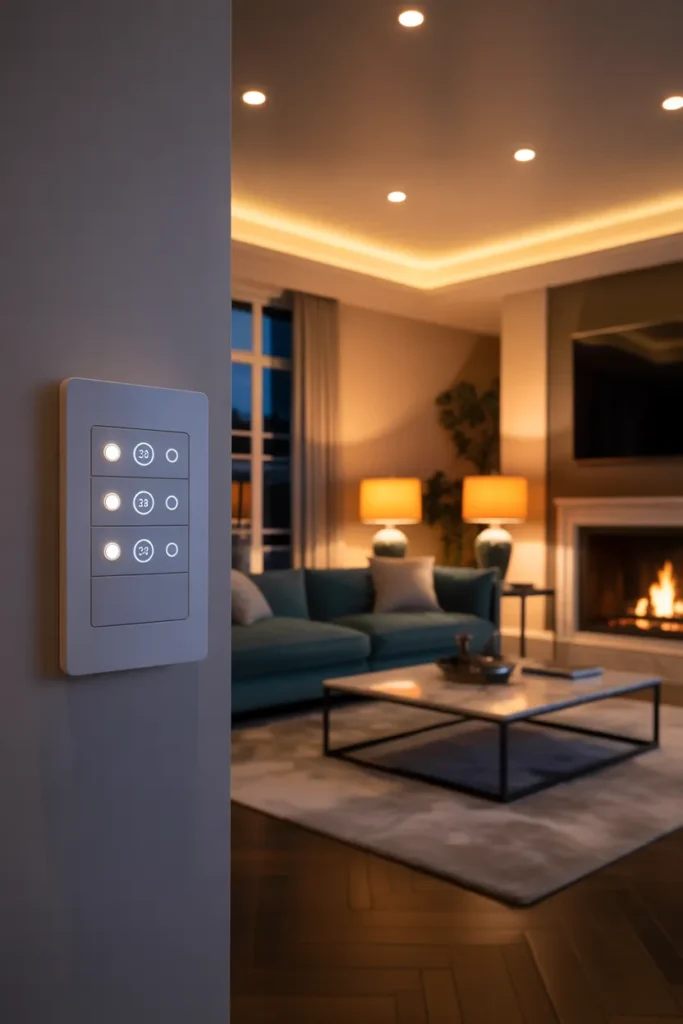
The investment in smart dimming pays for itself in daily livability. Homes with controllable lighting layers adapt to the household’s rhythm in a way that fixed-output spaces cannot, which is a major quality-of-life distinction in high-end residential design.
When selecting a system, confirm compatibility between your smart dimmer brand and your specific LED bulbs before installation. Incompatible pairings produce flickering and buzzing that degrades both the experience and the bulb lifespan.
Final Thoughts
Layering lighting for a cozy high end living room is not about spending more — it is about thinking in layers. Start with a dimmable ambient base, add warmth through floor and table lamps, define zones with pendants and sconces, and finish with accent lights that highlight the details that matter. Each layer builds on the last, and together they create a room that feels both polished and genuinely livable at every hour of the day.
Save this post to your Pinterest boards so you can reference each idea as you work through your own living room — and revisit it when your lighting needs change with the seasons or a new layout. The right lighting plan is always worth returning to.